
vue2使用face-api.js实现,人脸识别
由于开发需求要实现人脸识别,顺便在此记录一下,希望给各位前端爱好者带来帮助。
1、安装依赖
首先,确保你已经安装了Vue.js,并且创建了一个Vue项目。然后,安装face-api.js及其相关依赖。由于face-api.js依赖于TensorFlow.js,你可能还需要安装这个库。可以通过npm或yarn来安装:
npm install face-api.js
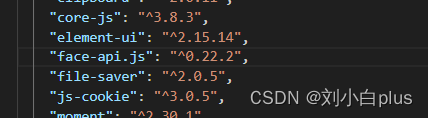
这是我安装的版本
2、下载模型文件
face-api.js需要一些预先训练好的模型文件来执行人脸检测和识别。你需要从GitHub仓库中下载这些文件,并放置在项目的public目录下,或者配置一个正确的路径指向这些文件。可以从face-api.js的GitHub页面下载模型。
-
在这个页面上,你会看到多个模型文件,例如 ssd_mobilenetv1_model-weights_manifest.json、face_landmark_68_model-weights_manifest.json 等。为了使用 face-api.js 的不同功能,如人脸检测、特征点定位、表情识别等,你需要下载相应的模型文件。
-
你可以手动下载,也可以直接克隆,你也可以私聊我一下我给你发。
git clone https://github.com/justadudewhohacks/face-api.js.git
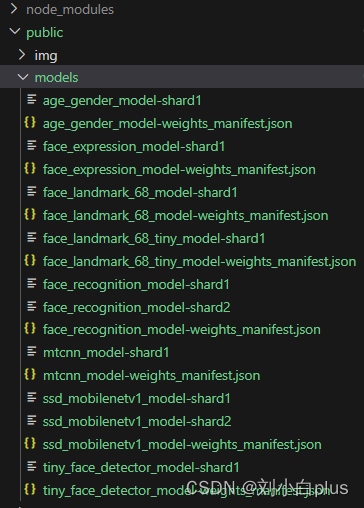
3.克隆完之后你需要把模型文件放到 public下的models没有models自己创建,你也可以自己规定路径,只要路径正确就行。
到此准备工作就做完了,当然你需要配置好vue框架。
3、封装组件
为了更好地组织代码并使其可复用,我们可以将人脸识别的功能封装成一个Vue组件。下面是一个更完善的示例,展示了如何创建一个名为FaceRecognition.vue的自定义组件,该组件负责处理视频流、人脸检测、以及展示检测结果。完整代码块在这
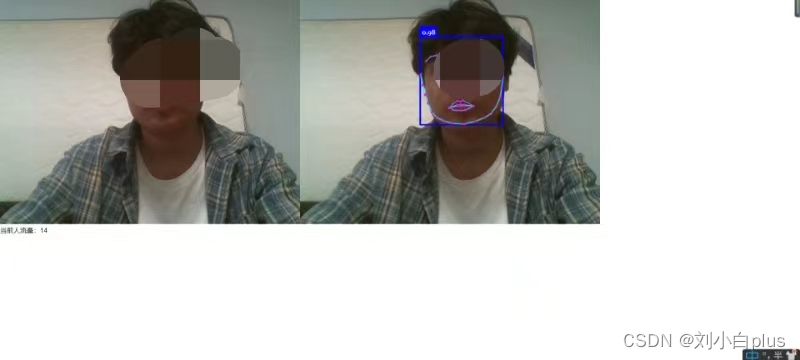
    当前人流量:{{ peopleCount }}


import * as faceapi from 'face-api.js';
export default {
  name: 'FaceRecognition',
  data() {
    return {
      isLoaded: false,
      lastDetections: [], // 上一帧检测到的人脸
      peopleCount: 0, // 当前人流量计数
    };
  },
  mounted() {
    this.loadModels();
  },
  methods: {
    async loadModels() {
      try {
        await Promise.all([
          faceapi.nets.faceRecognitionNet.loadFromUri('/models'),
          faceapi.nets.faceLandmark68Net.loadFromUri('/models'),
          faceapi.nets.ssdMobilenetv1.loadFromUri('/models'),
        ]);
        this.isLoaded = true;
        this.startVideo();
      } catch (error) {
        console.error('Failed to load models:', error);
      }
    },
    startVideo() {
      if (navigator.mediaDevices && this.isLoaded) {
        navigator.mediaDevices.getUserMedia({ video: true })
          .then(stream => {
            this.$refs.video.srcObject = stream;
            this.$refs.video.onloadedmetadata = () => {
              this.detectFaces();
            };
          })
          .catch(error => console.error('getUserMedia error:', error));
      }
    },
    async detectFaces() {
      const video = this.$refs.video;
      const canvas = this.$refs.canvas;
      const ctx = canvas.getContext('2d');
      const detectionOptions = new faceapi.SsdMobilenetv1Options({ minConfidence: 0.9 });
      let recentDetections = [];
      const detectionHistoryLength = 5;
      setInterval(async () => {
        if (video.readyState === video.HAVE_ENOUGH_DATA) {
          ctx.drawImage(video, 0, 0, canvas.width, canvas.height);
          const detections = await faceapi.detectAllFaces(video, detectionOptions).withFaceLandmarks();
          // console.log('查看获取帧',validDescriptors)
          // 确保只收集有效的面部描述符
          const validDescriptors = detections
          console.log('查看获取帧',validDescriptors)
          recentDetections.push(...validDescriptors.map(face => face.descriptor));
          // 限制历史长度并去重
          recentDetections = recentDetections.slice(-detectionHistoryLength);
          // console.log('查看获取帧',recentDetections)
          const uniqueDescriptors = Array.from(new Set(recentDetections));
          this.peopleCount = uniqueDescriptors.length; // 直接使用去重后的数组长度,因已排除undefined,无需JSON.stringify和parse
          faceapi.draw.drawDetections(canvas, detections);
          faceapi.draw.drawFaceLandmarks(canvas, detections);
        }
      }, 100);
    }
  },
  beforeDestroy() {
    // 清理视频流
    if (this.$refs.video.srcObject) {
      this.$refs.video.srcObject.getTracks().forEach(track => track.stop());
    }
  },
};


.face-recognition {
  position: relative;
}
4、使用组件
创建文件直接引入组件然后注册使用即可
  import FaceDetection from '@/components/FaceDetection/FaceDetection.vue';

  export default {
    name: 'App',
    components: {
      FaceDetection,
    },
  };
5、实现逻辑
- 在mounted()生命周期钩子中,首先加载模型,然后启动视频流。
- 创建一个方法如detectFaces()来周期性地从视频流中捕获帧,使用faceapi.detectAllFaces()来检测人脸,并绘制检测结果到上。
- 根据需要,你可以扩展此逻辑来实现更复杂的人脸识别功能,比如与已知人脸匹配等。
6、注意事项
- 确保你的应用有访问用户媒体设备的权限。
- 处理好异步加载模型和获取视频流的错误情况。
- 由于浏览器的安全策略,你可能需要在HTTPS环境下运行此应用,或者在localhost上进行开发。
- 考虑性能优化,避免频繁的重绘导致的性能问题。
7、实现效果
免责声明:我们致力于保护作者版权,注重分享,被刊用文章因无法核实真实出处,未能及时与作者取得联系,或有版权异议的,请联系管理员,我们会立即处理! 部分文章是来自自研大数据AI进行生成,内容摘自(百度百科,百度知道,头条百科,中国民法典,刑法,牛津词典,新华词典,汉语词典,国家院校,科普平台)等数据,内容仅供学习参考,不准确地方联系删除处理! 图片声明:本站部分配图来自人工智能系统AI生成,觅知网授权图片,PxHere摄影无版权图库和百度,360,搜狗等多加搜索引擎自动关键词搜索配图,如有侵权的图片,请第一时间联系我们,邮箱:ciyunidc@ciyunshuju.com。本站只作为美观性配图使用,无任何非法侵犯第三方意图,一切解释权归图片著作权方,本站不承担任何责任。如有恶意碰瓷者,必当奉陪到底严惩不贷!


