
Freecad Assembly4装配模型设计入门
温馨提示:这篇文章已超过393天没有更新,请注意相关的内容是否还可用!
一、基本信息
本文内容:学习Assembly4装配模型设计功能。
2024年3月7日
最新版Freecad 0.21.2
最新版 Assembly4 0.50.8 下载地址:stoneold/FreeCAD_Assembly4
最新版 Assembly4 示例教程 下载地址:FreeCAD_Examples: Freecad Assmbly4 的示例模型
This assembly workbench allows to assemble into a single assembly container other FreeCAD objects, and place them relative to the assembly and to each-other. The parts in the assembly can be in the same document as the assembly or in an external document. When parts are modified in their original document, they are instantly updated in the assembly.
Parts are placed relative to each-other by matching features inside them. Specifically, in Assembly4, these features are virtual objects called LCS (for Local Coordinate System, also called datum coordinate system) and are attached using FreeCAD's built-in Part::Attacher and ExpressionEngine. No geometry is used to place and constrain parts relative to each other, thus avoiding a lot of the topological naming problems.
An Assembly4 Assembly is a standard FreeCAD App::Part container, therefore it is compatible and can be manipulated with any FreeCAD tool handling App::Part objects. In particular, it can be inserted into another Assembly to create nested assemblies to any level. It can also contain solids, datum objects and sketches. A document can contain only 1 Assembly.
安装很简单:
下载后Assembly4,在freecad的Mod目录下,解压,重启Freecad即可。
Assembly4模块可实现多个几何体对象的装配功能。Assembly4装配功能的实现并不是借助于几何约束求解器,而是通过三维局部坐标系变换(也称作基准坐标系,Local Coordinate System, Datum Coordinate System)。
具体来说,Assembly4模块中使用一个App:Part类型的Model表示装配体,可以将多个几何体(App::Part、PartDesign::Body)以App::Link对象的形式添加到装配体Model中。在这过程中,可以通过Expression指定几何体与几何体、几何体与Model的局部坐标系变换关系。然后,Assembly4便可借助于Expresion Engine来完成这种局部坐标系变换,进而实现多个几何体的装配。
二、装配建模学习
参考资料:Assembly4 示例教程, Asm4_Tutorial2 (Freecad 0.19)
In this tutorial we'll assemble 3 parts inside a single FreeCAD document, and animate the movement using a master sketch:
-
the base is fixed and holds 2 axes
-
the disk rotates around one of the axes
-
the arm can wiggle around the base's other axis
-
the disk has a nipple that is prisoner in a slot in the arm
-
all 3 parts and the full assembly are in 1 single FreeCAD file
注意:由于Freecad和Assembly4插件已经升级,已经与教程有所差异。
效果如下:
需要此装配模型参考学习的,请加微信:23245175,备注:几何内核
As usual in Assembly4, the assembly holds (App::Link) links to the (App::Part) parts, not the parts themselves, even though the parts are in the same document here. Thus, making assemblies with parts in the same document is identical to making assemblies with parts from external documents. Actually, it is possible to mix both methods at will.
The only difference is that, since a FreeCAD document can only contain one Assembly4 Model, only one level assemblies are possible if everything is in the same document. For large assemblies this is a severe limitation, therefore in order to make nested assemblies — assemblies of sub-assemblies and sub-sub-assemblies — it is mandatory to have several documents. See tutorial 1 for how to make assemblies from external parts.
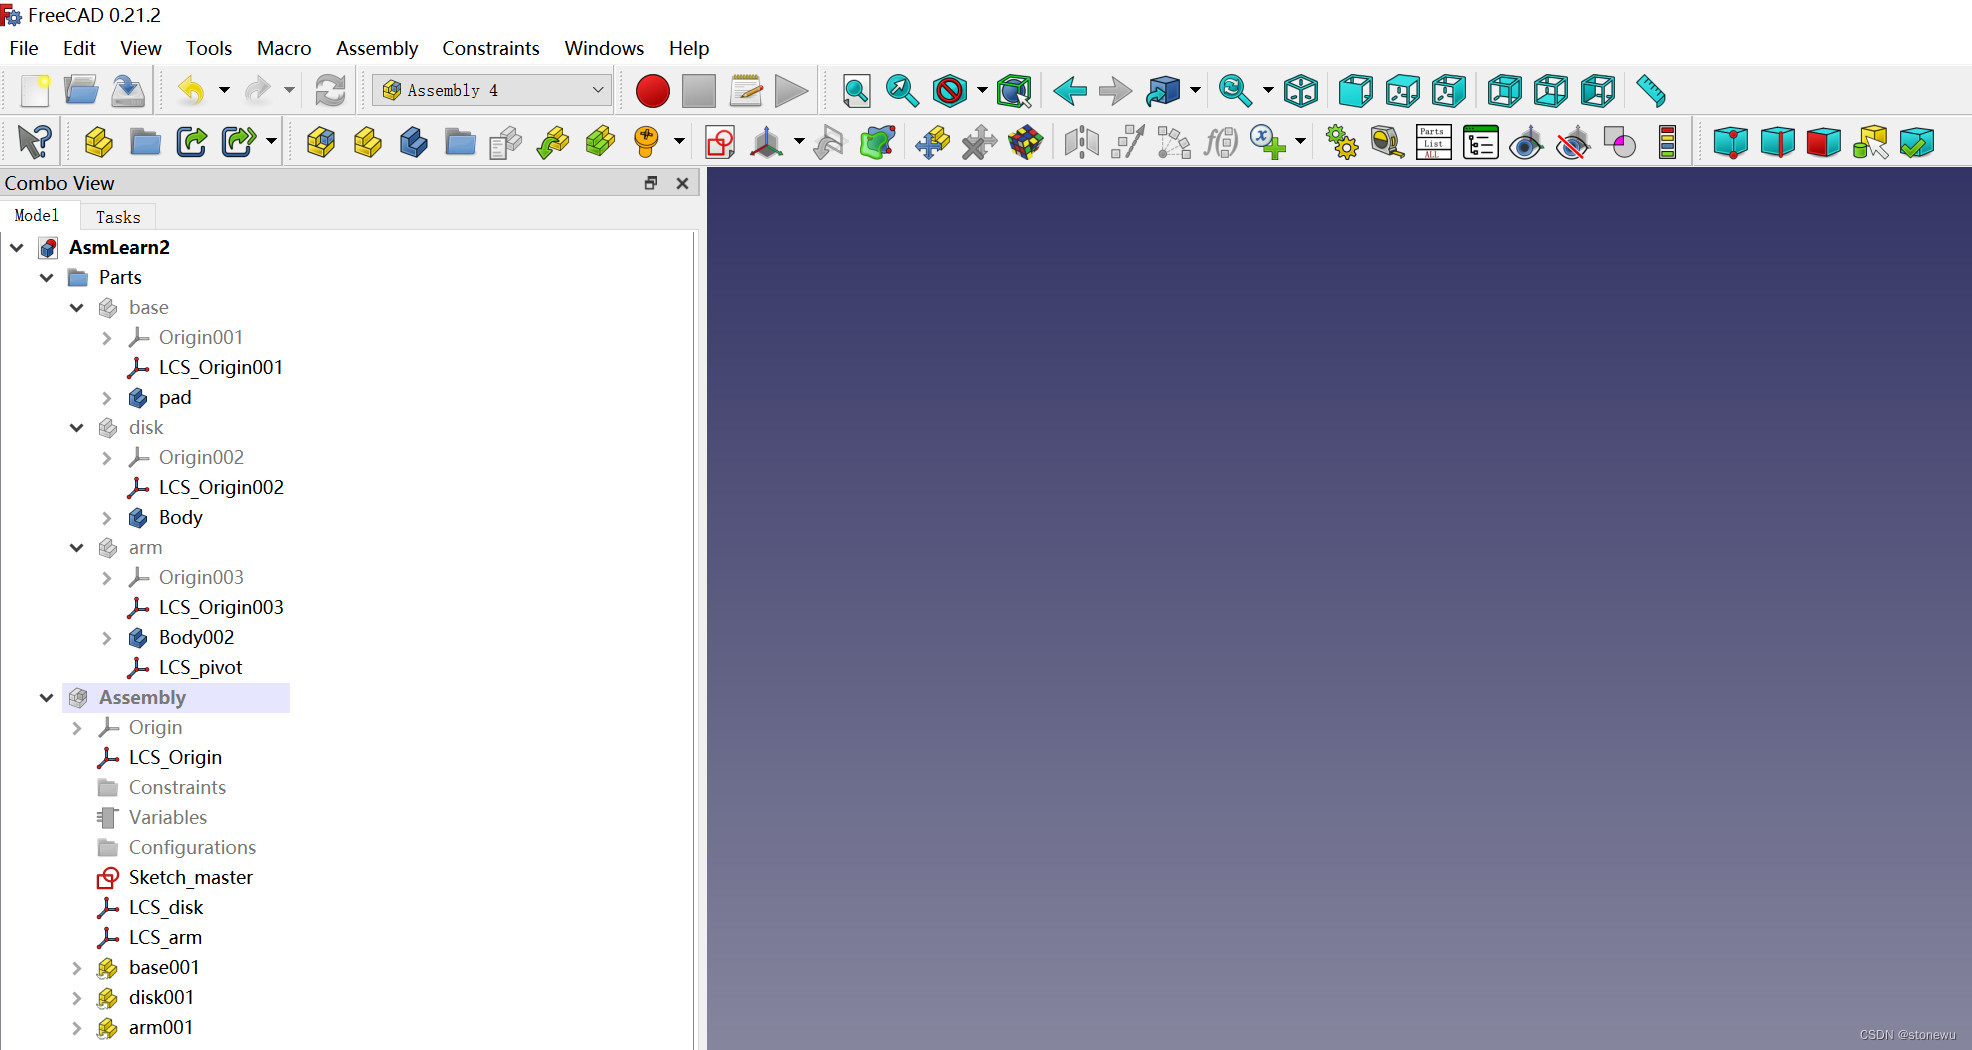
三、装配框架
在Freecad选择Assembly4插件,创建一个Assembly。会生成Parts和Assembly两个目录。
创建三个Variable,后面零件设计和装配都要用到。

四、零件设计
Assembly4 示例教程, Asm4_Tutorial2 有详细的各个零件的尺寸标注,请用freecad打开asm_tuto2.FCStd文件,自行查找。
在Parts目录下,创建三个Part:base、disk、arm。
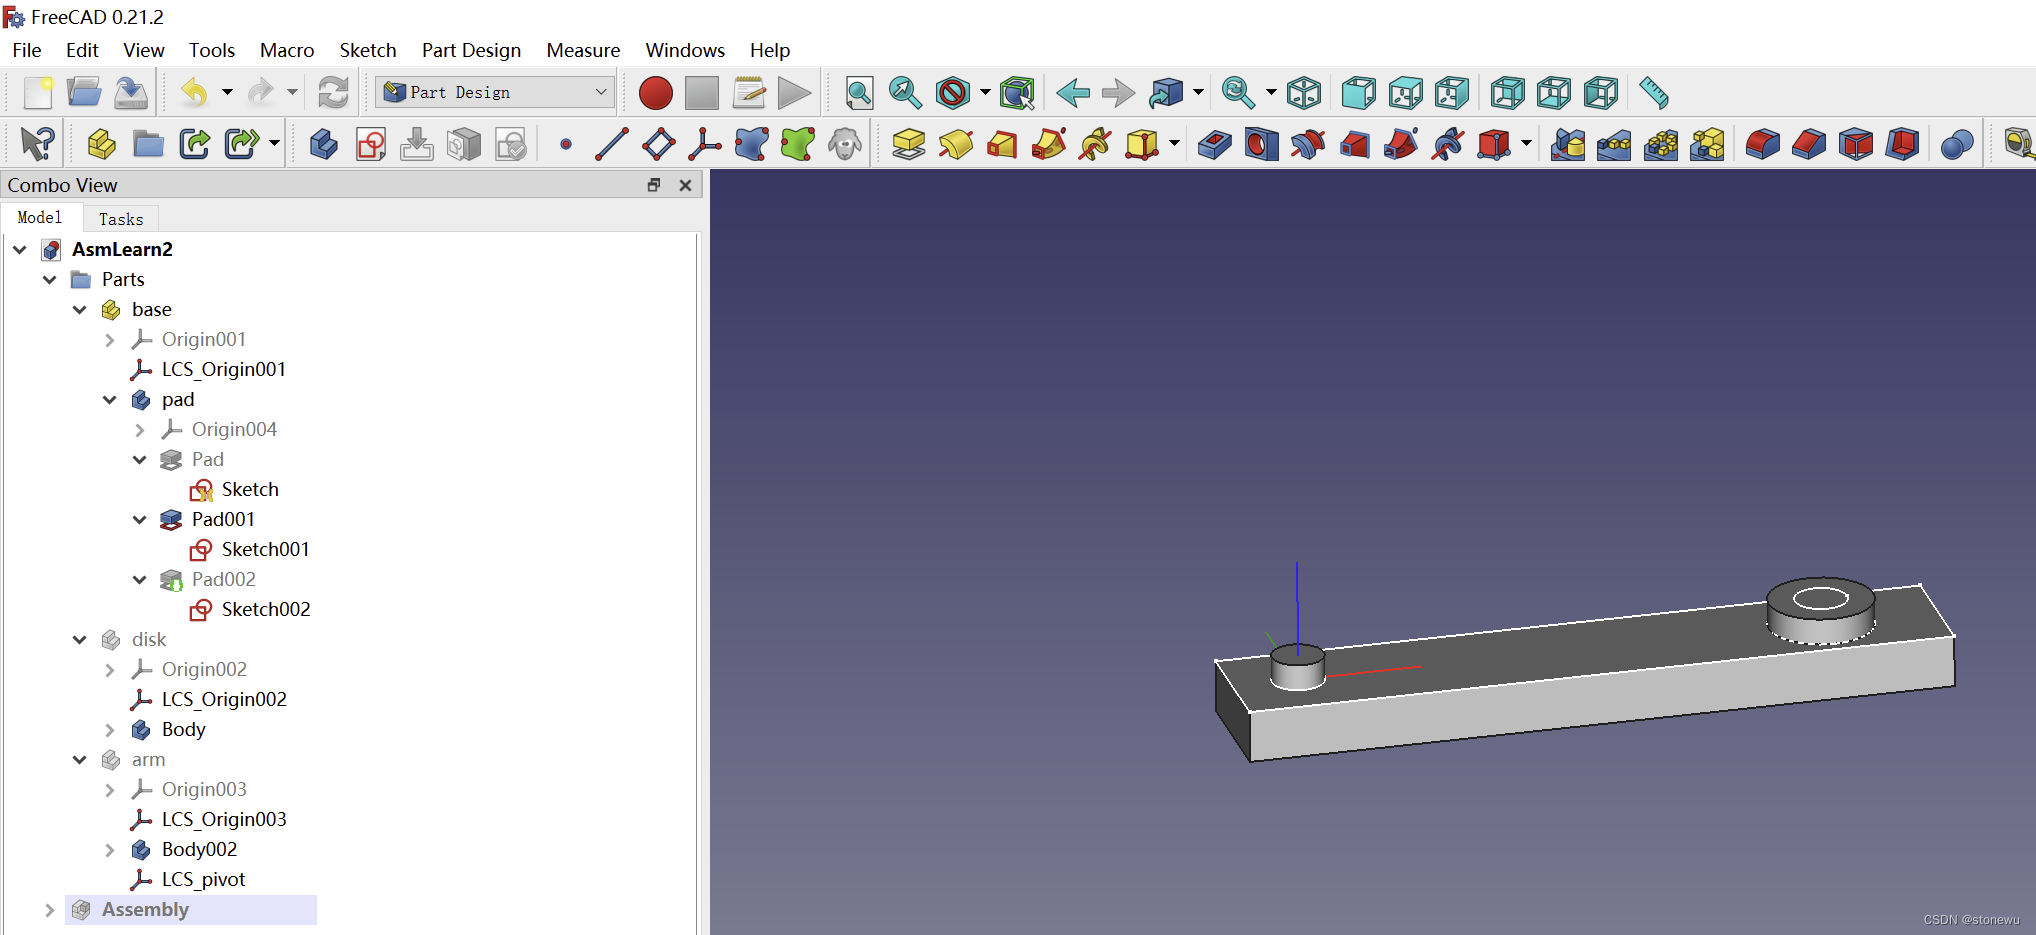
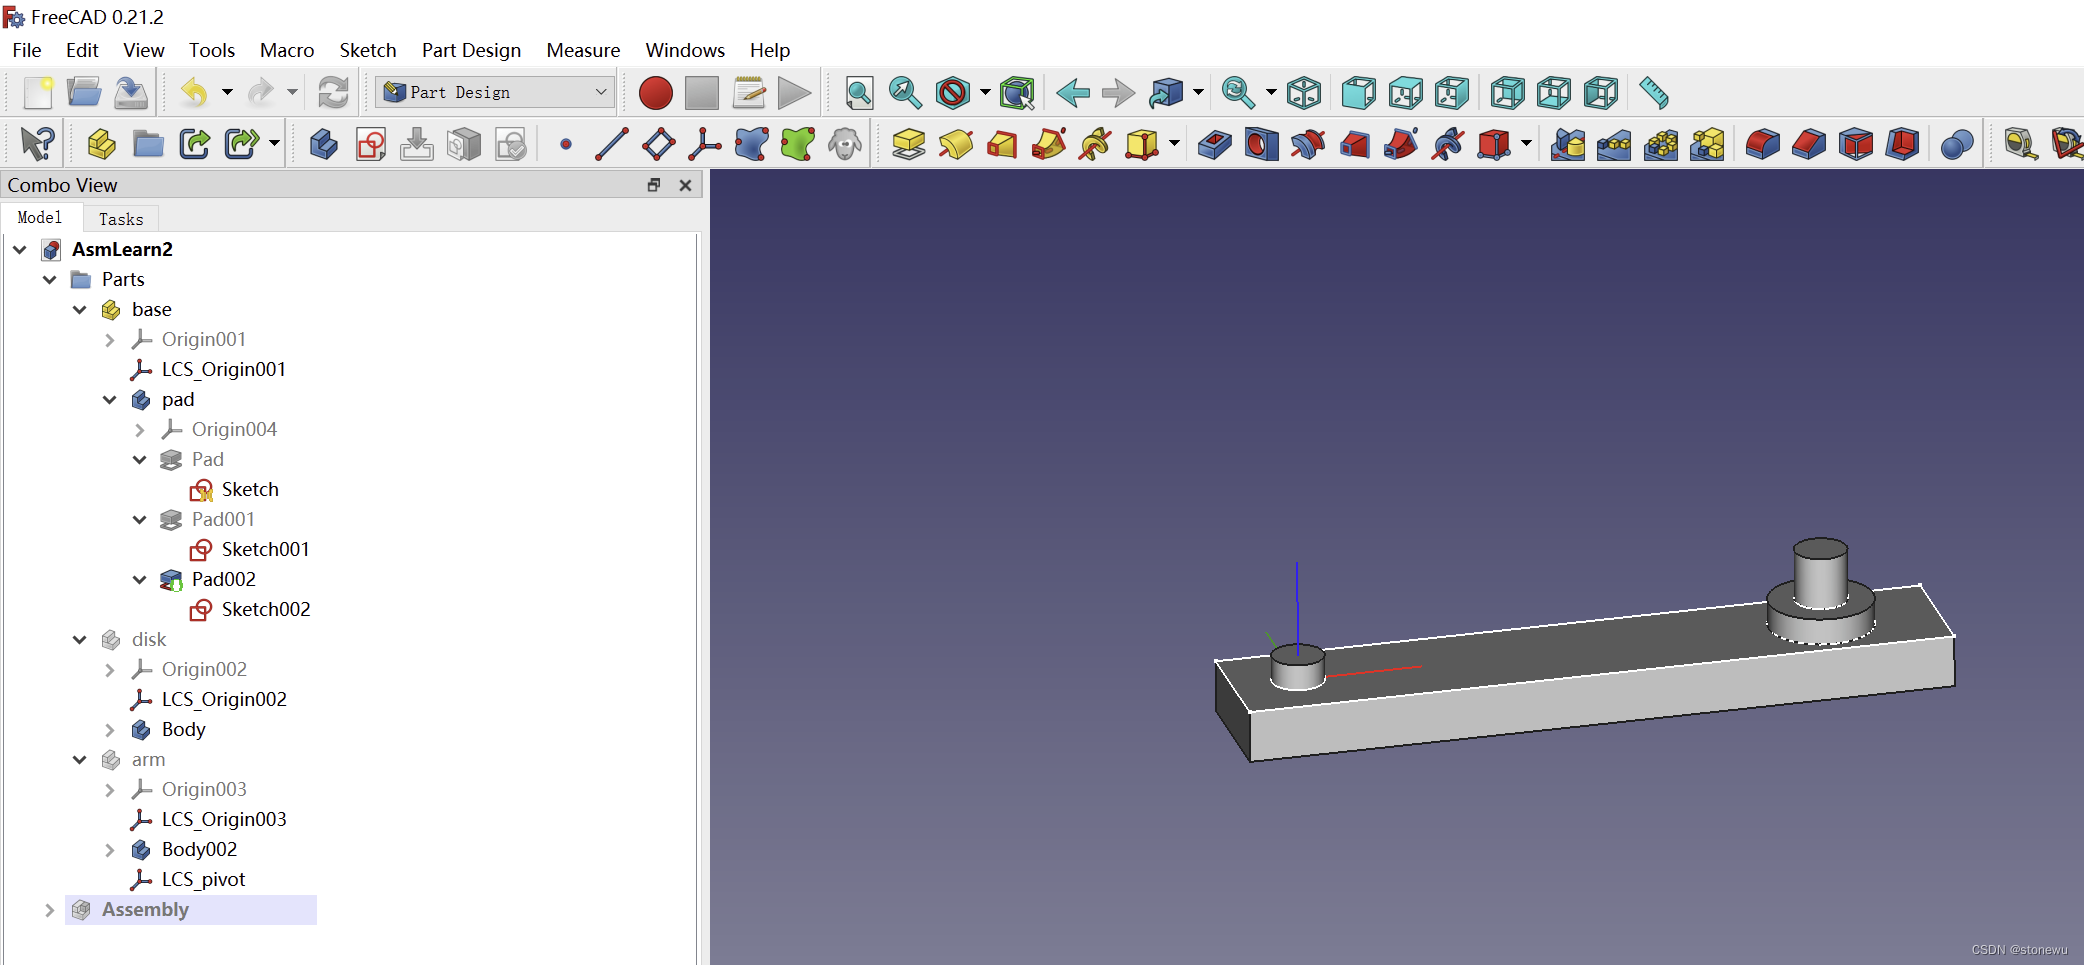
1、base零件
在base下创建三个body,分别创建Sketch。
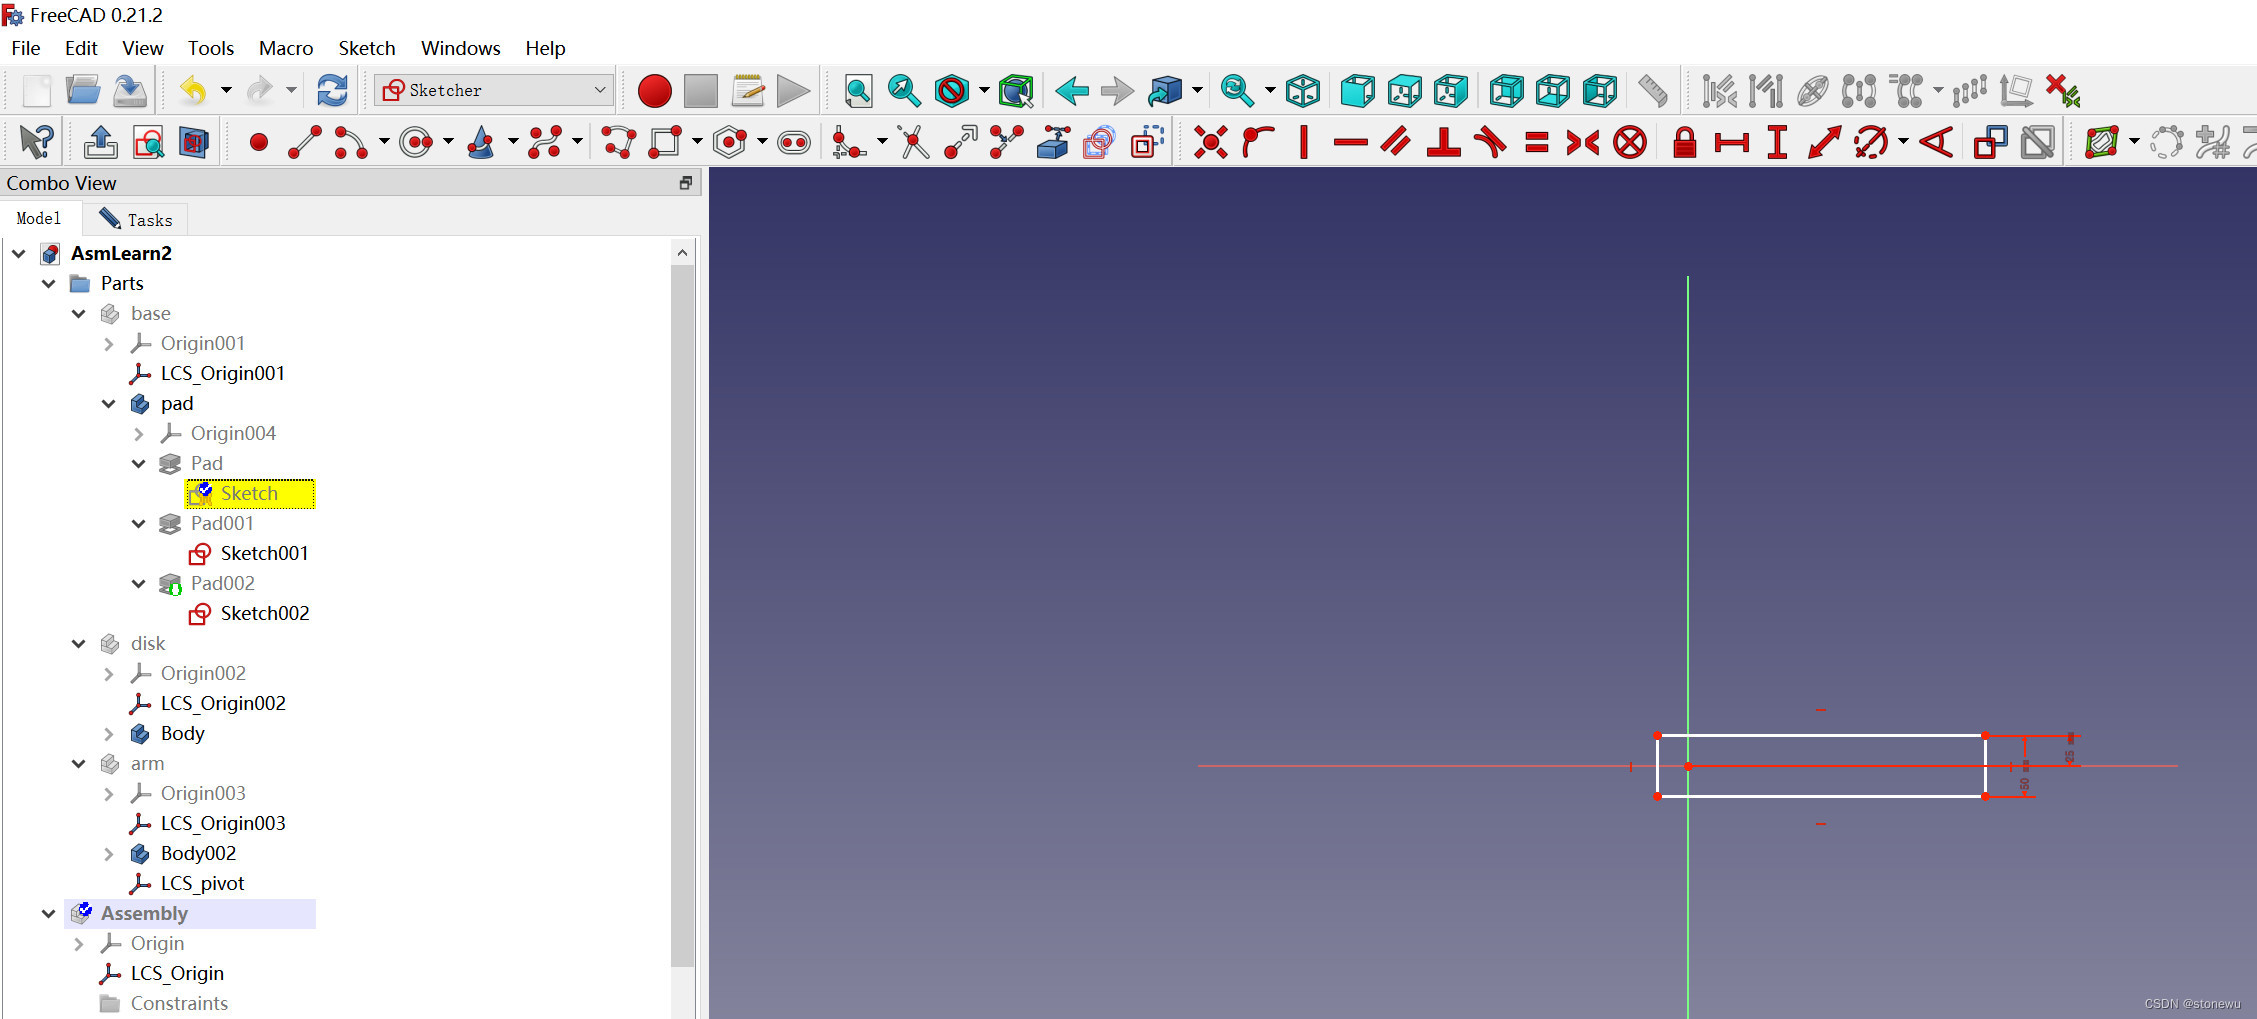

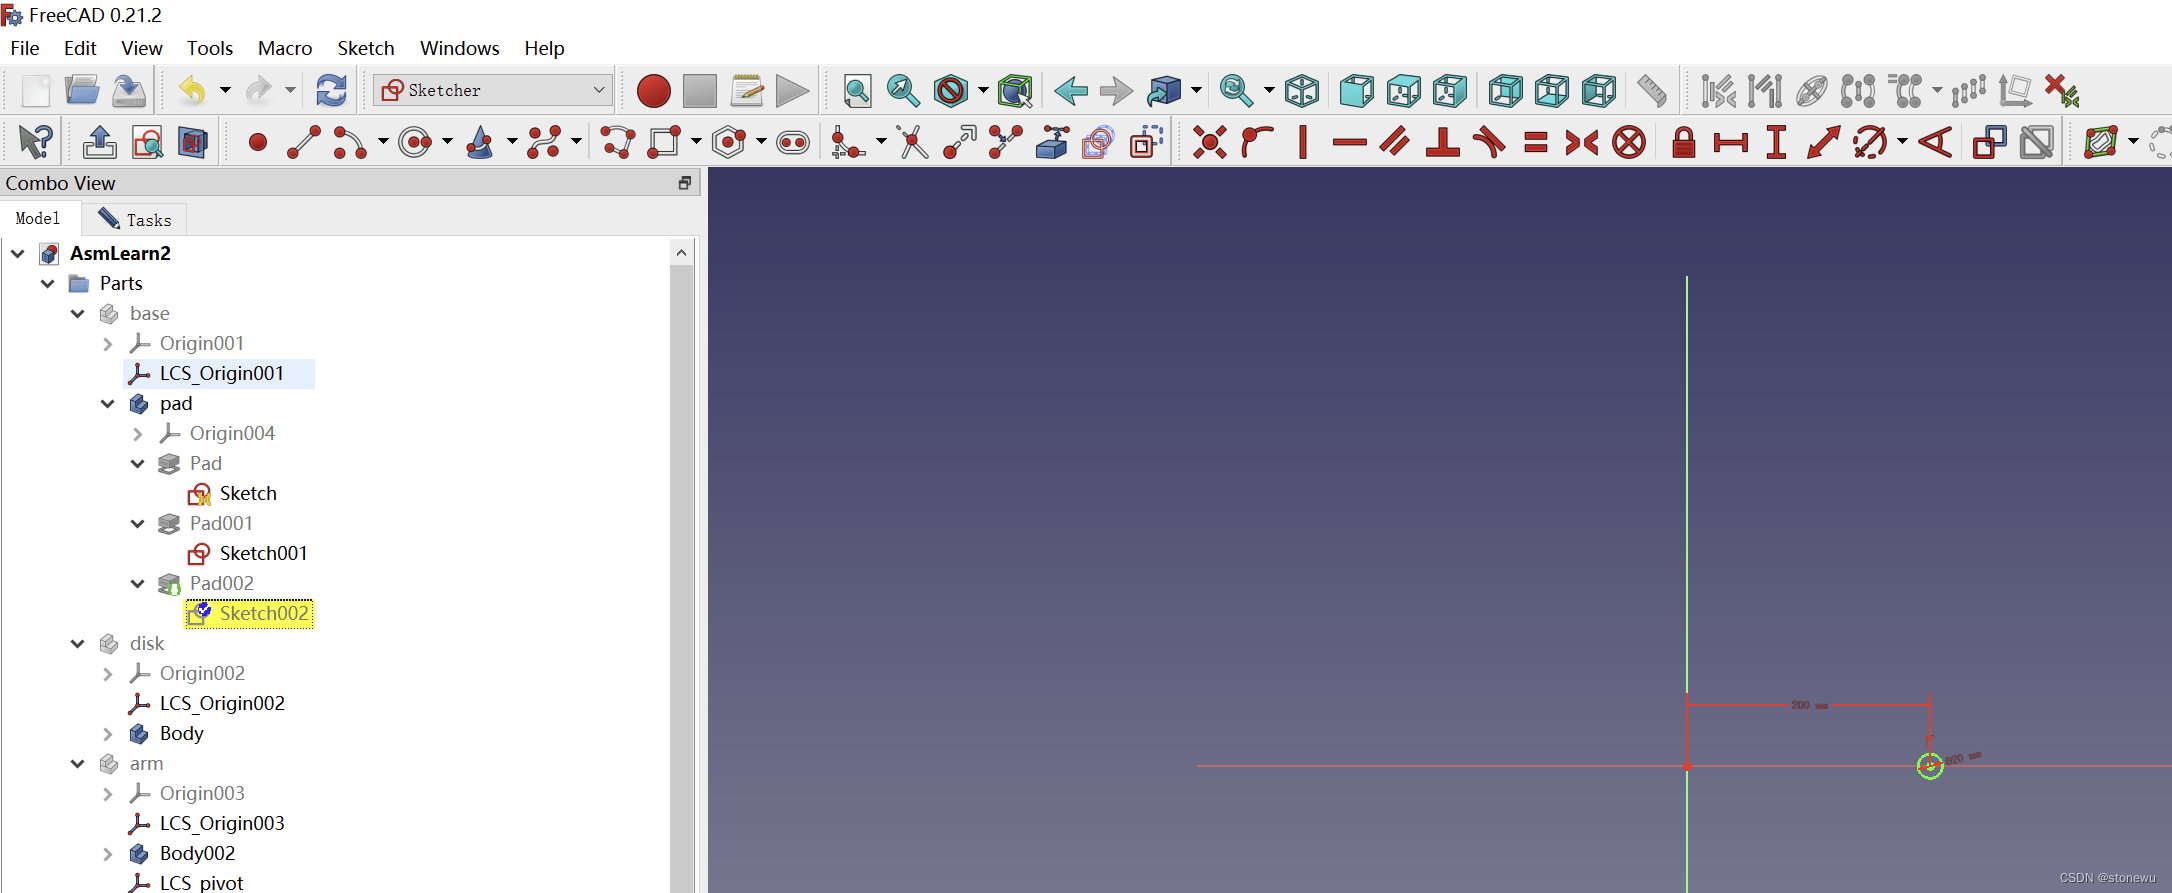
选择Part Design插件,依次选定Sketch后,执行Pad操作。

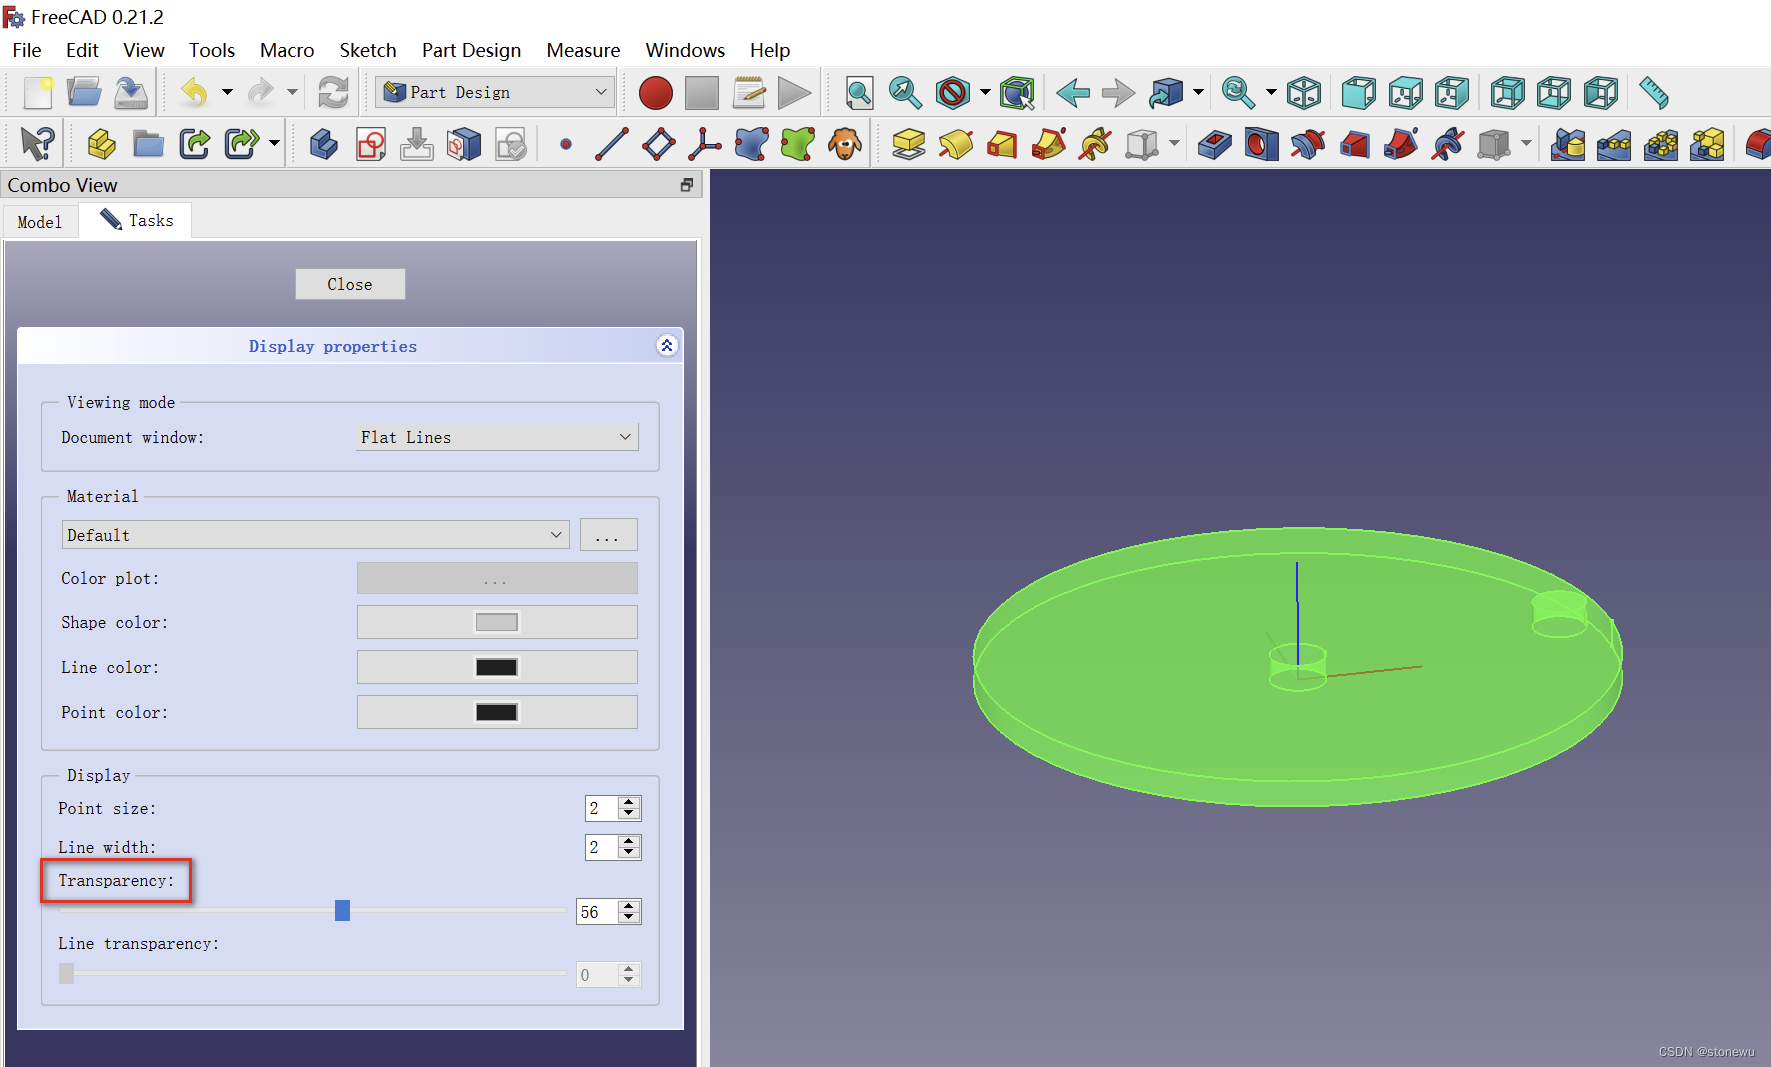
2、disk零件
一个body,两个Sketch。

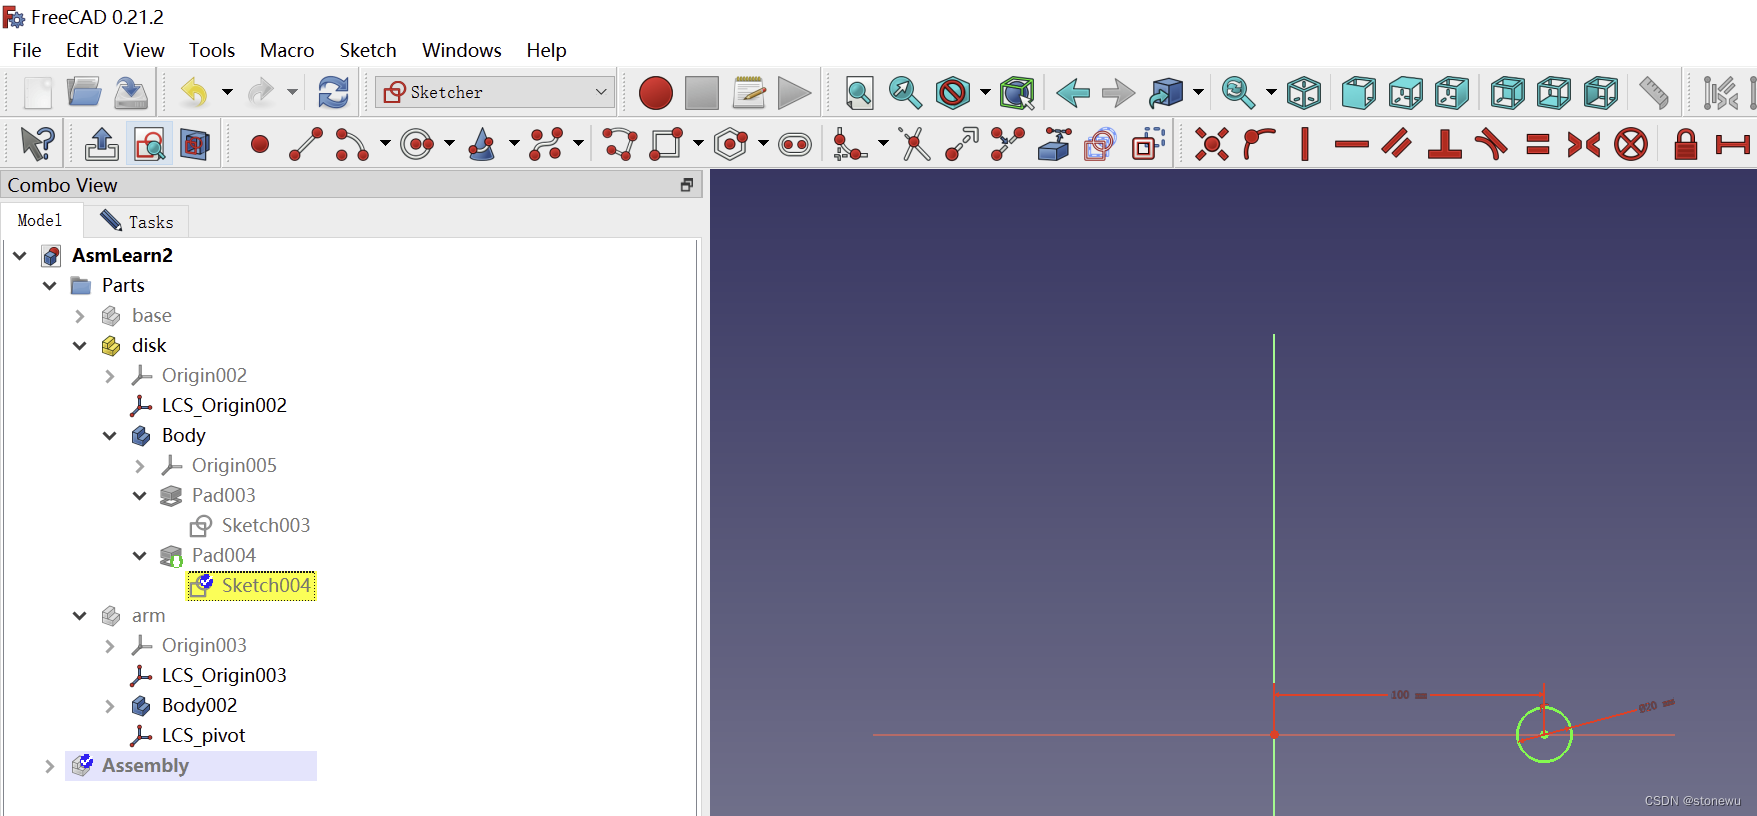
Pad操作

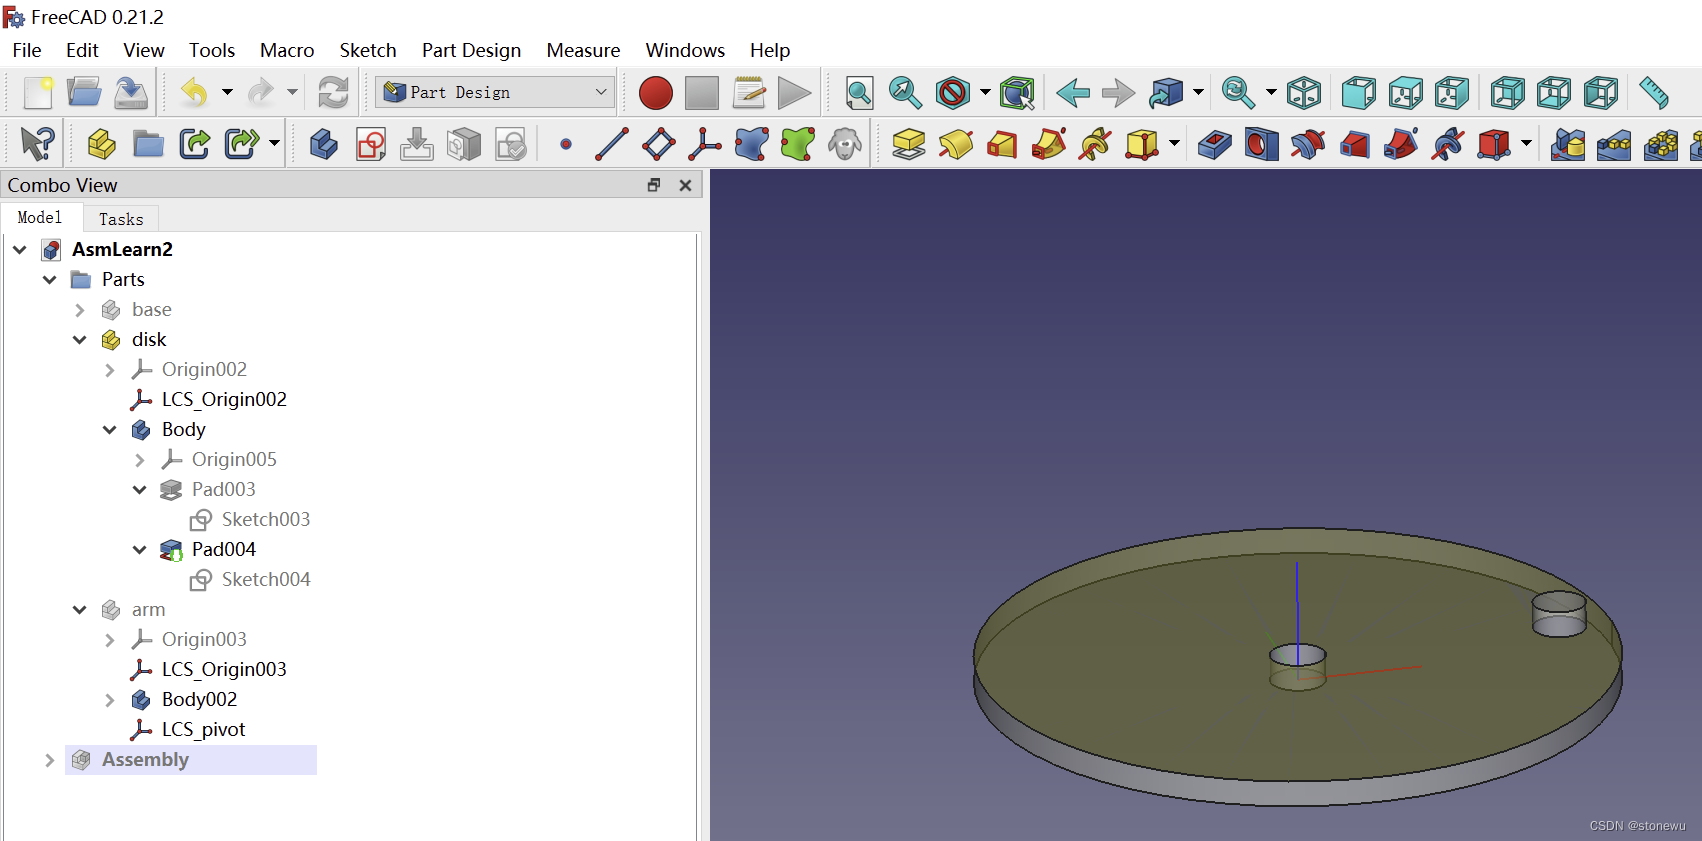
透明度设置

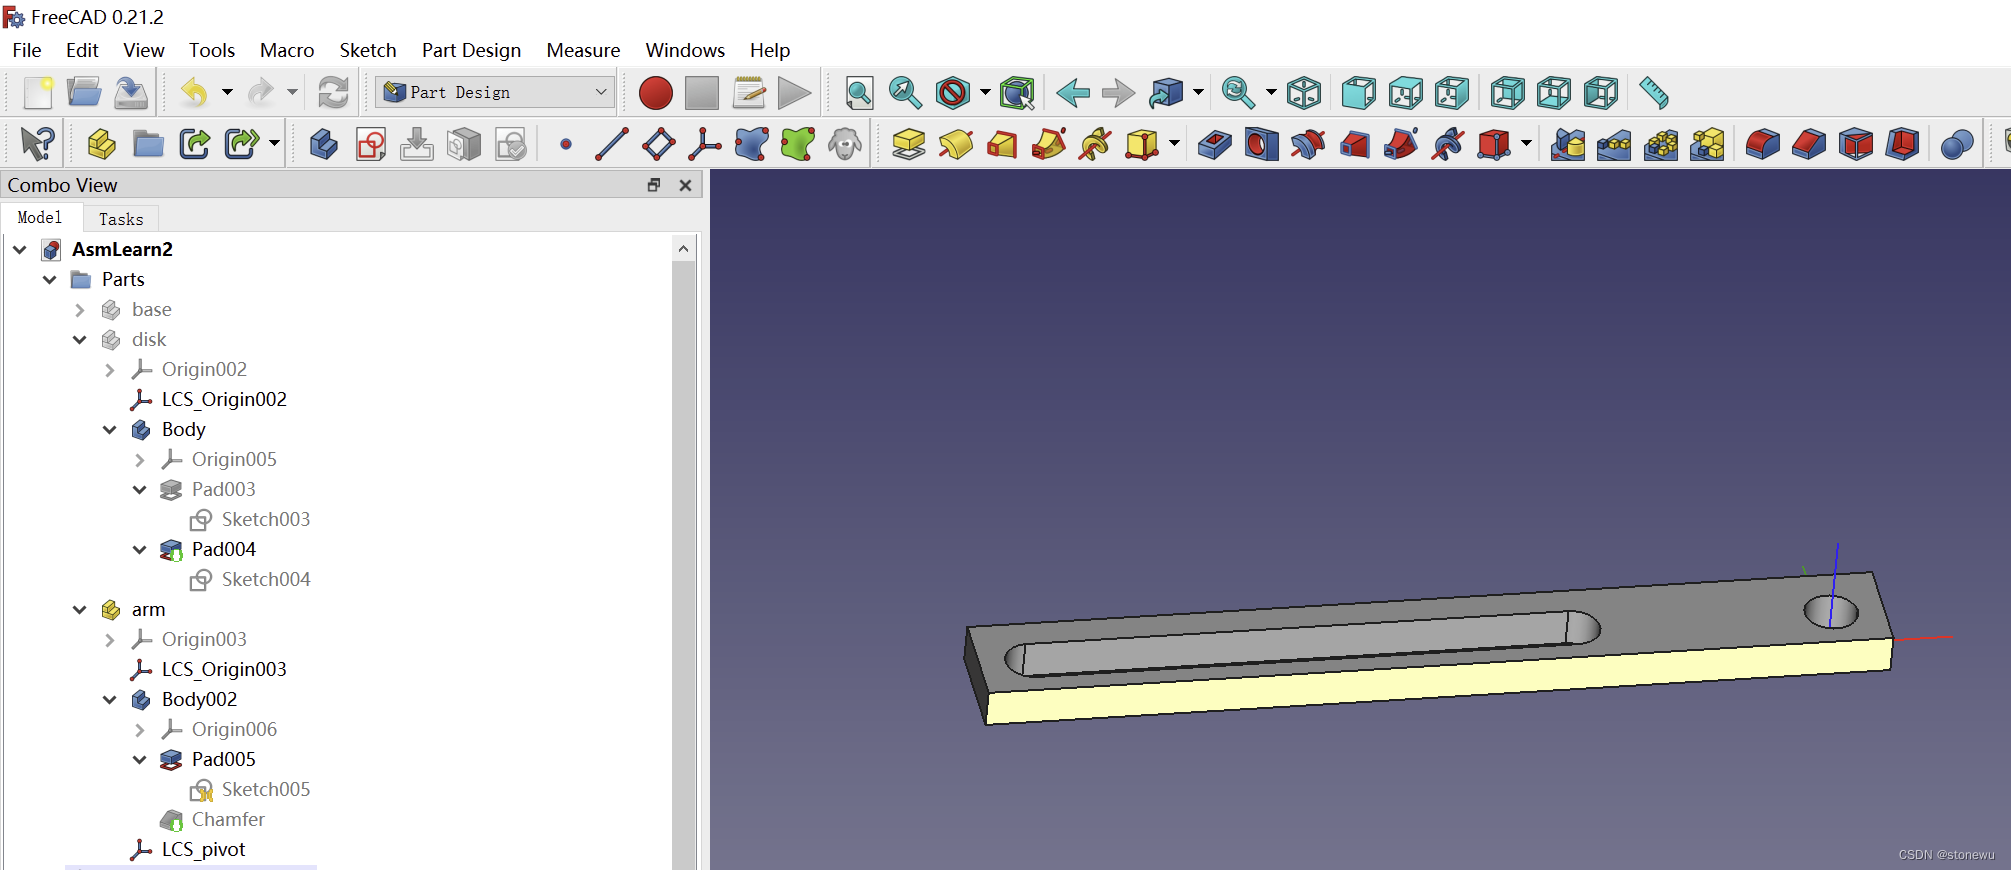
3、arm零件
草图设计

Pad操作
Chamfer
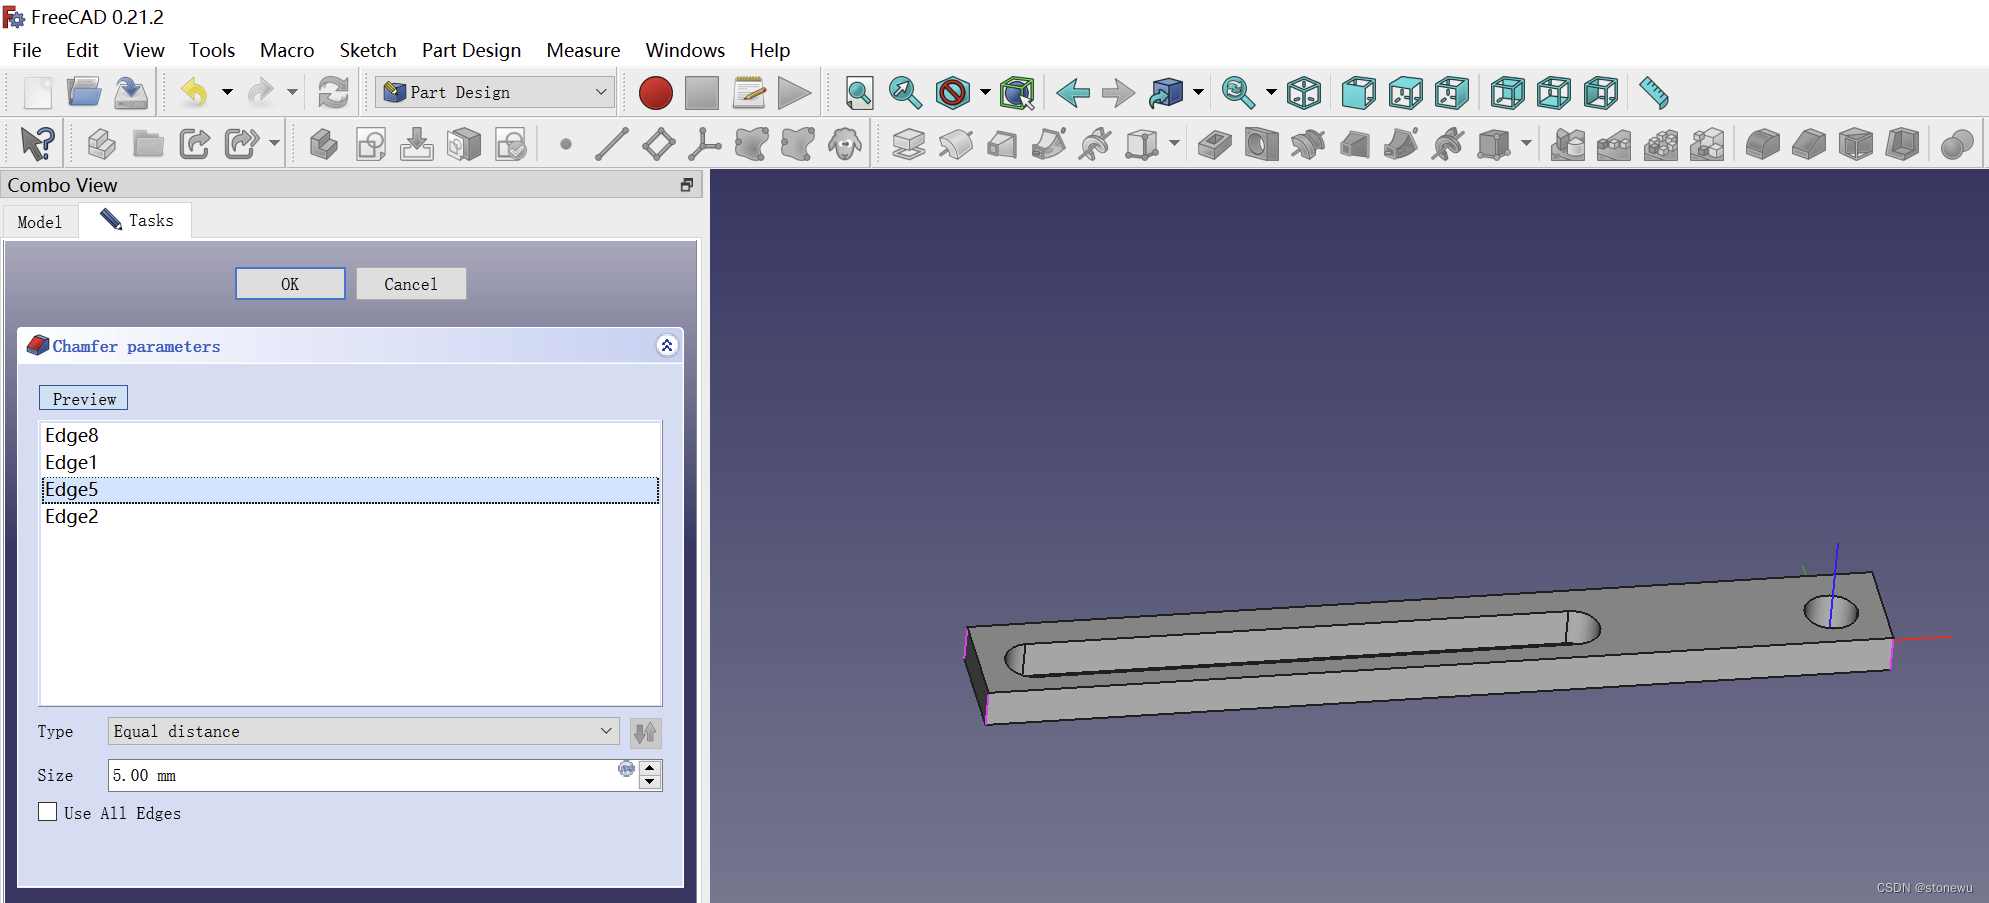
把所有edge都删除,然后选四个角上的竖边。
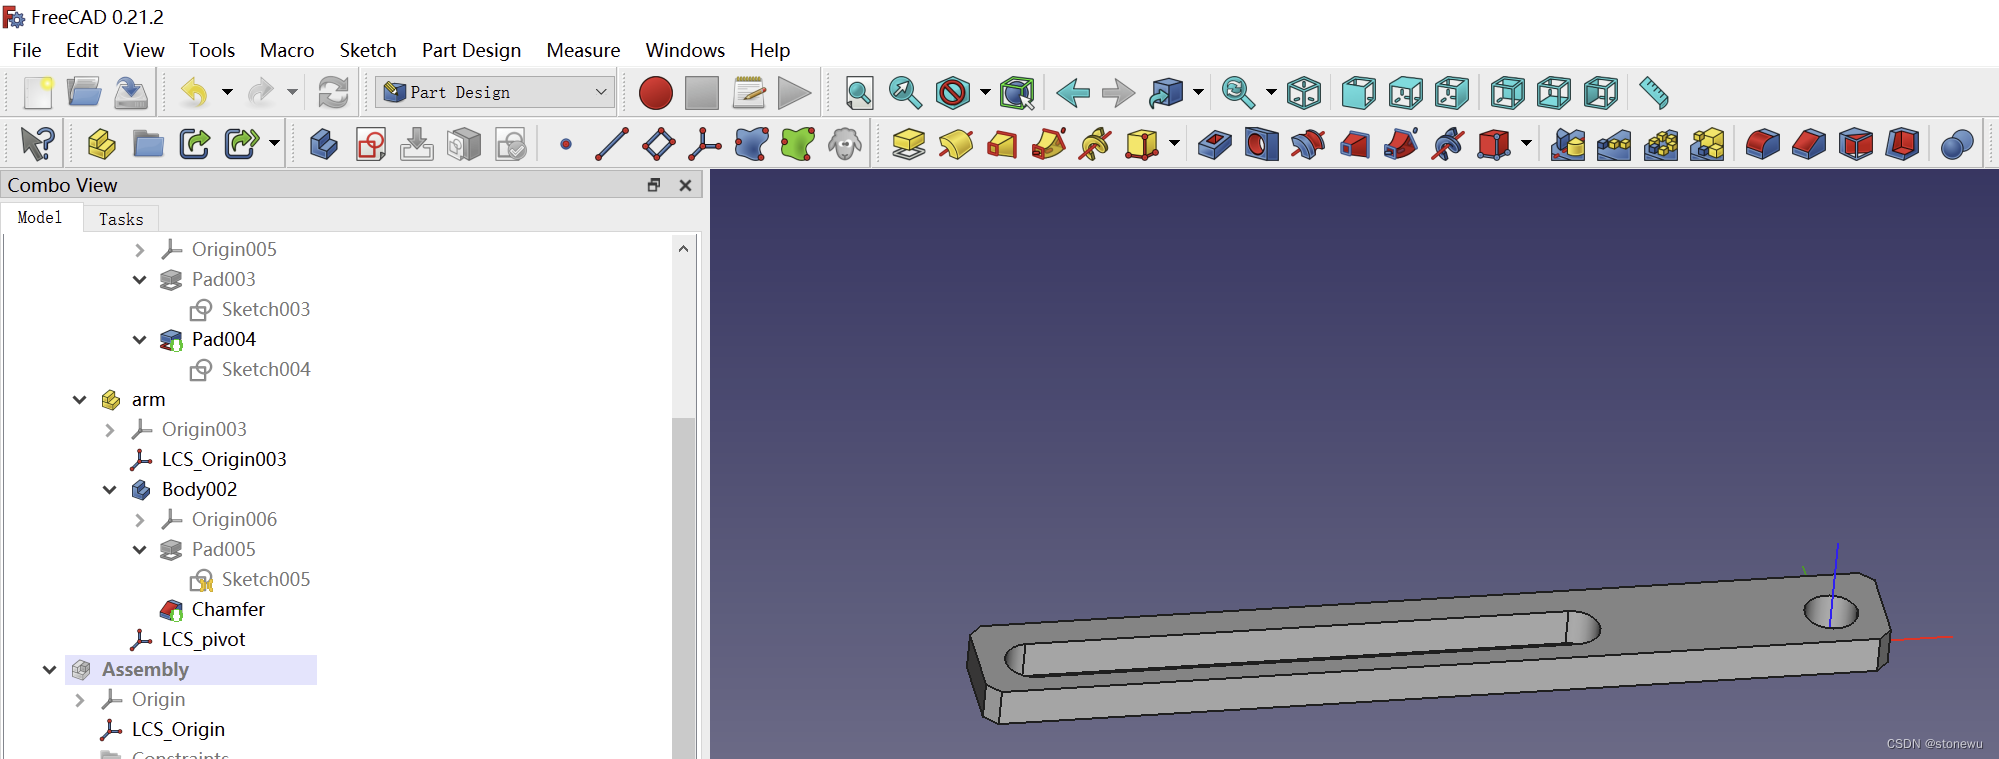
创建LCS_pivot

五、装配
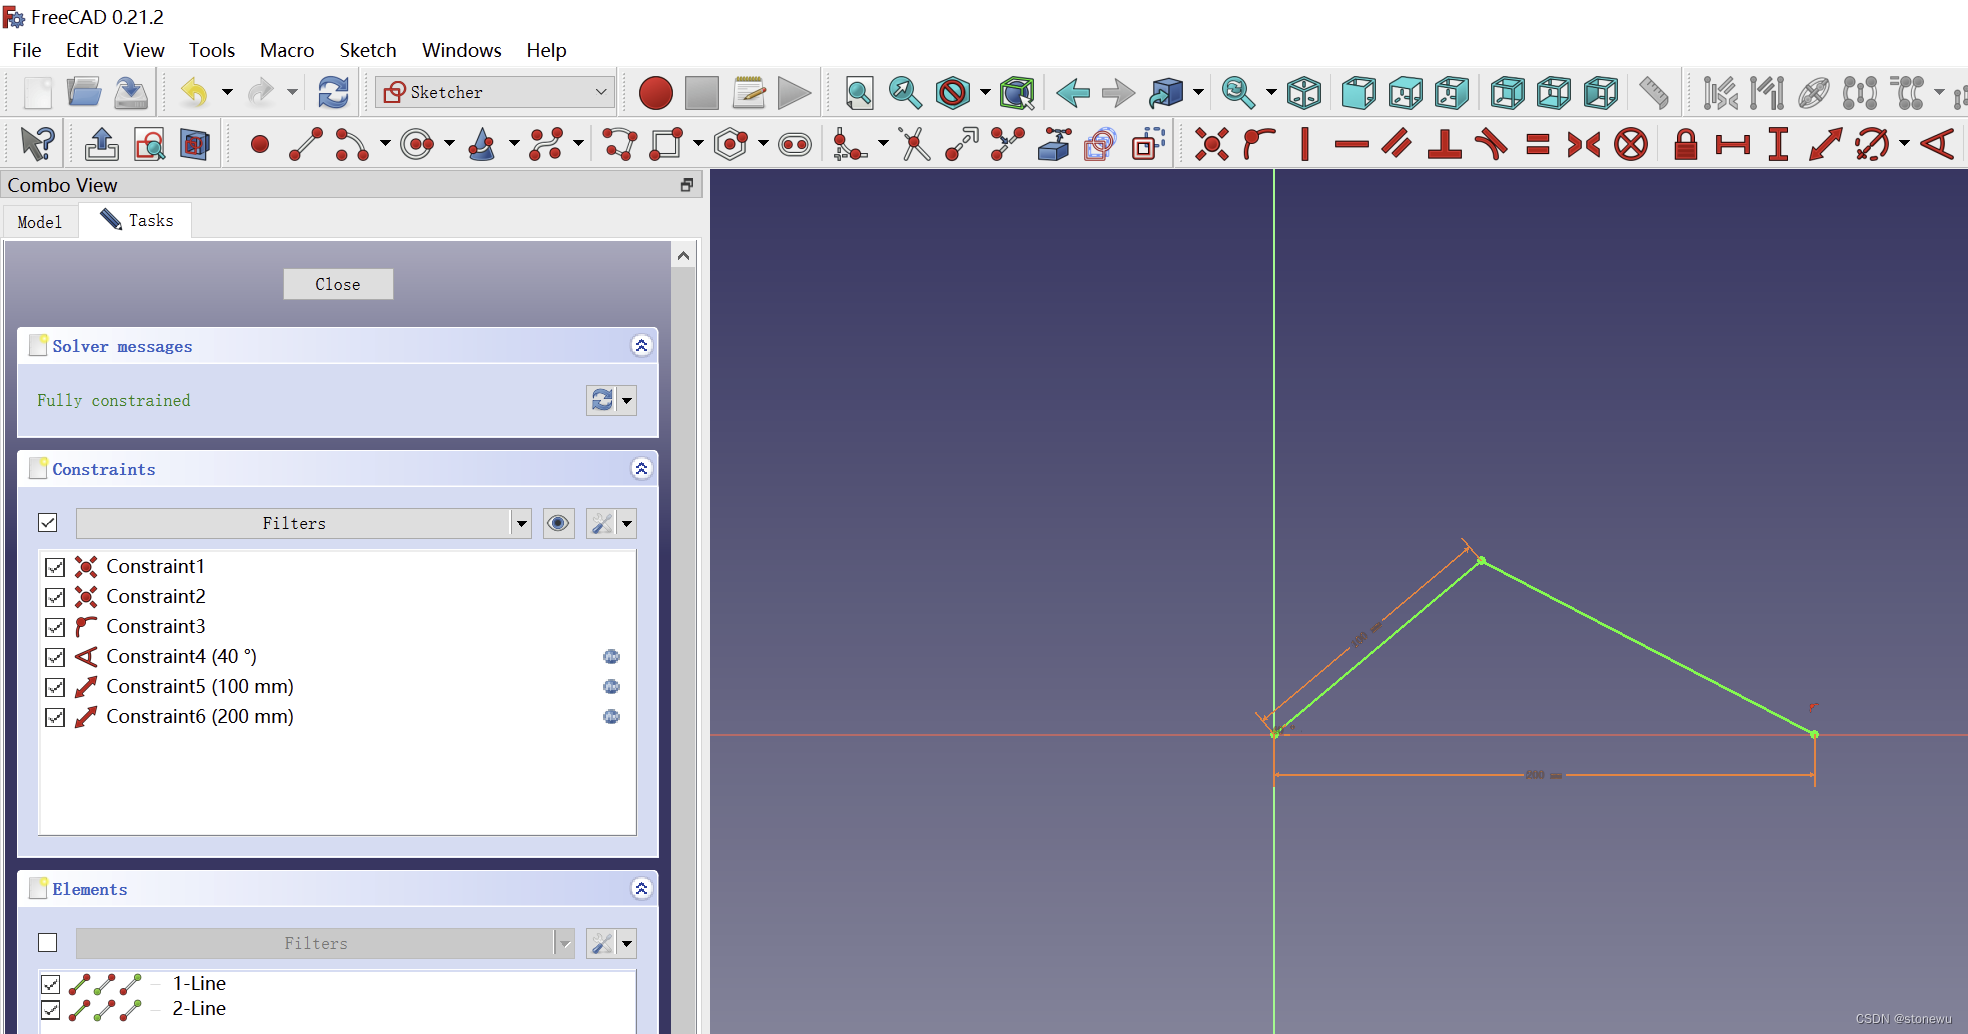
1、创建Sketch_Master
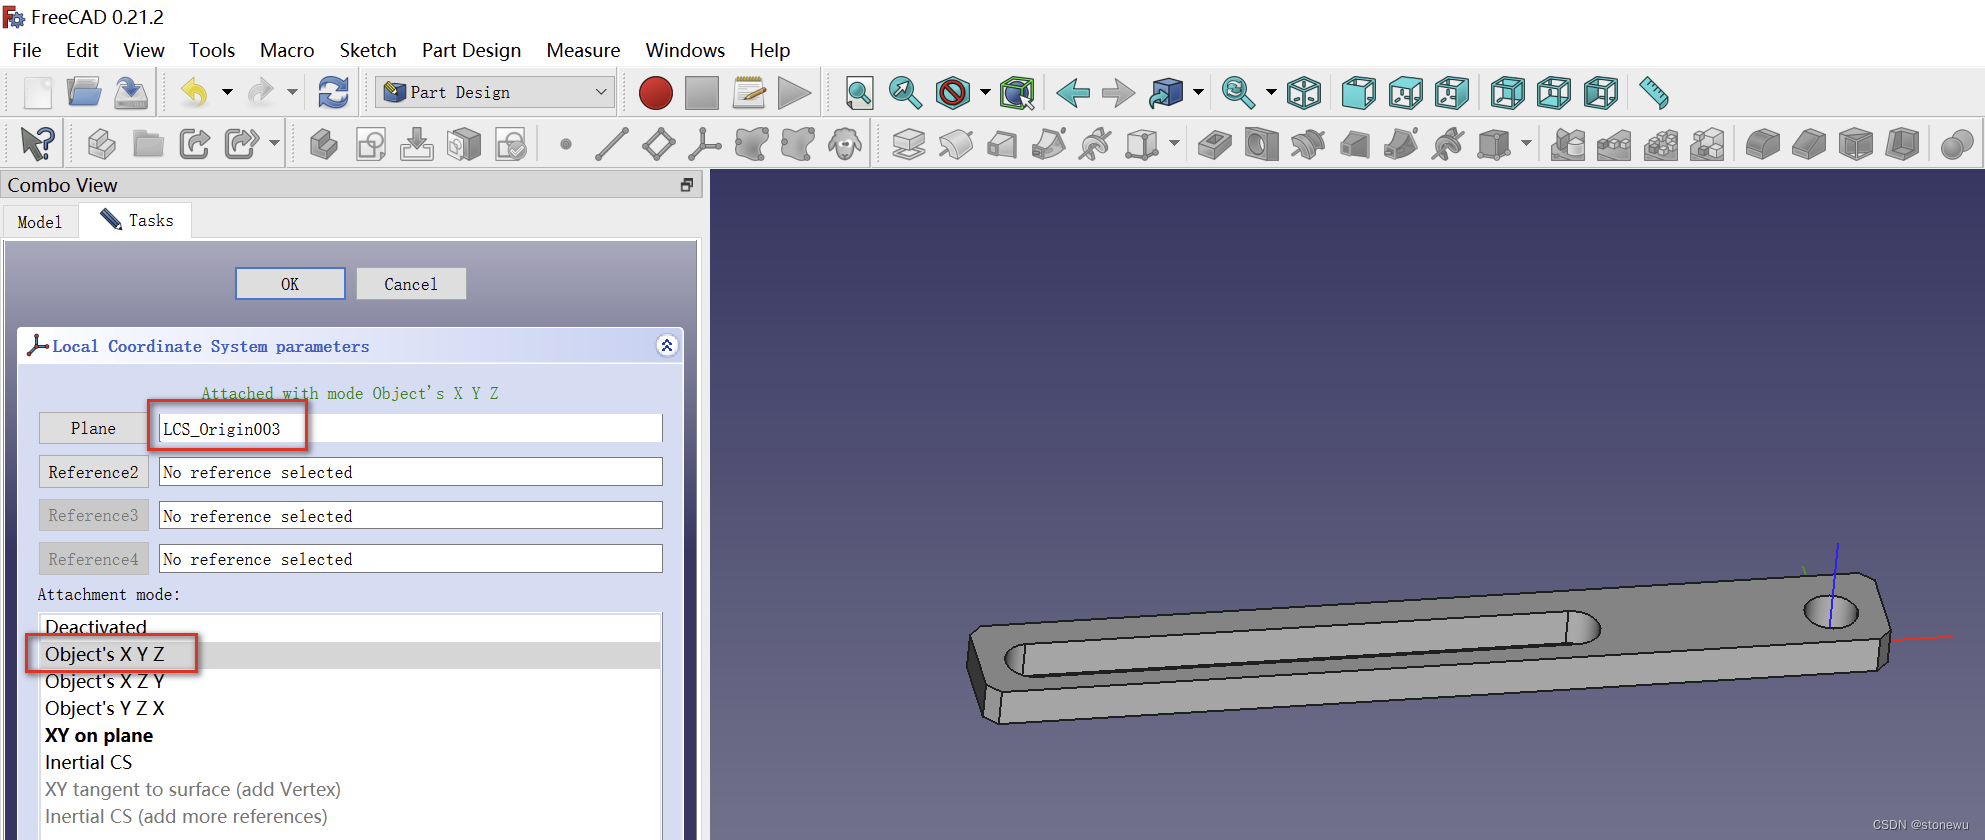
2、创建LCS_disk、LCS_arm

注意:选点不好操作,可以手工输入:Sketch_master:Vertex1
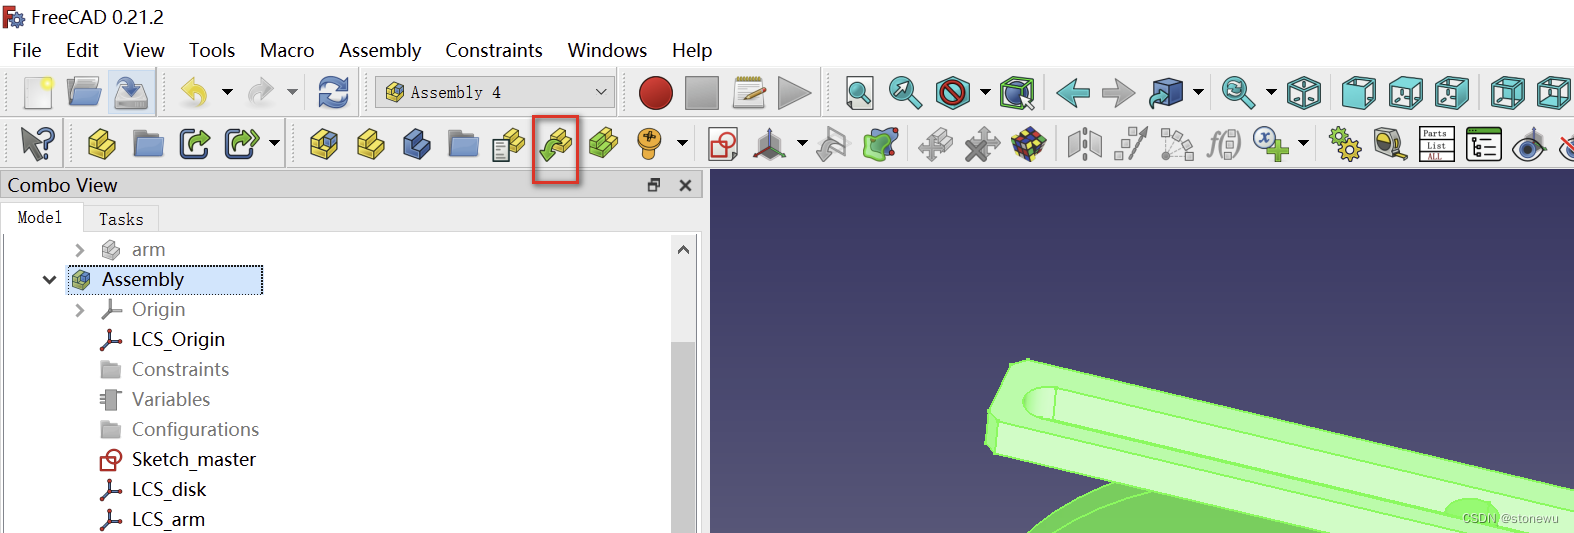
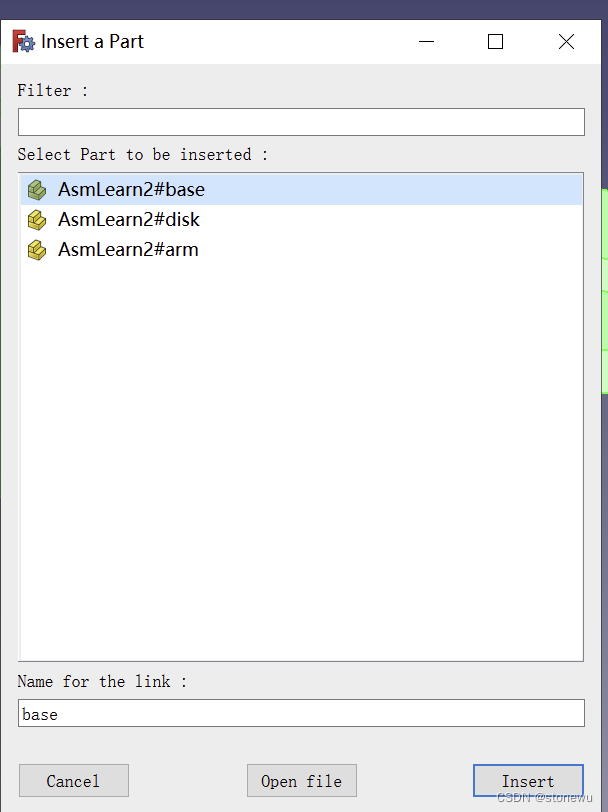
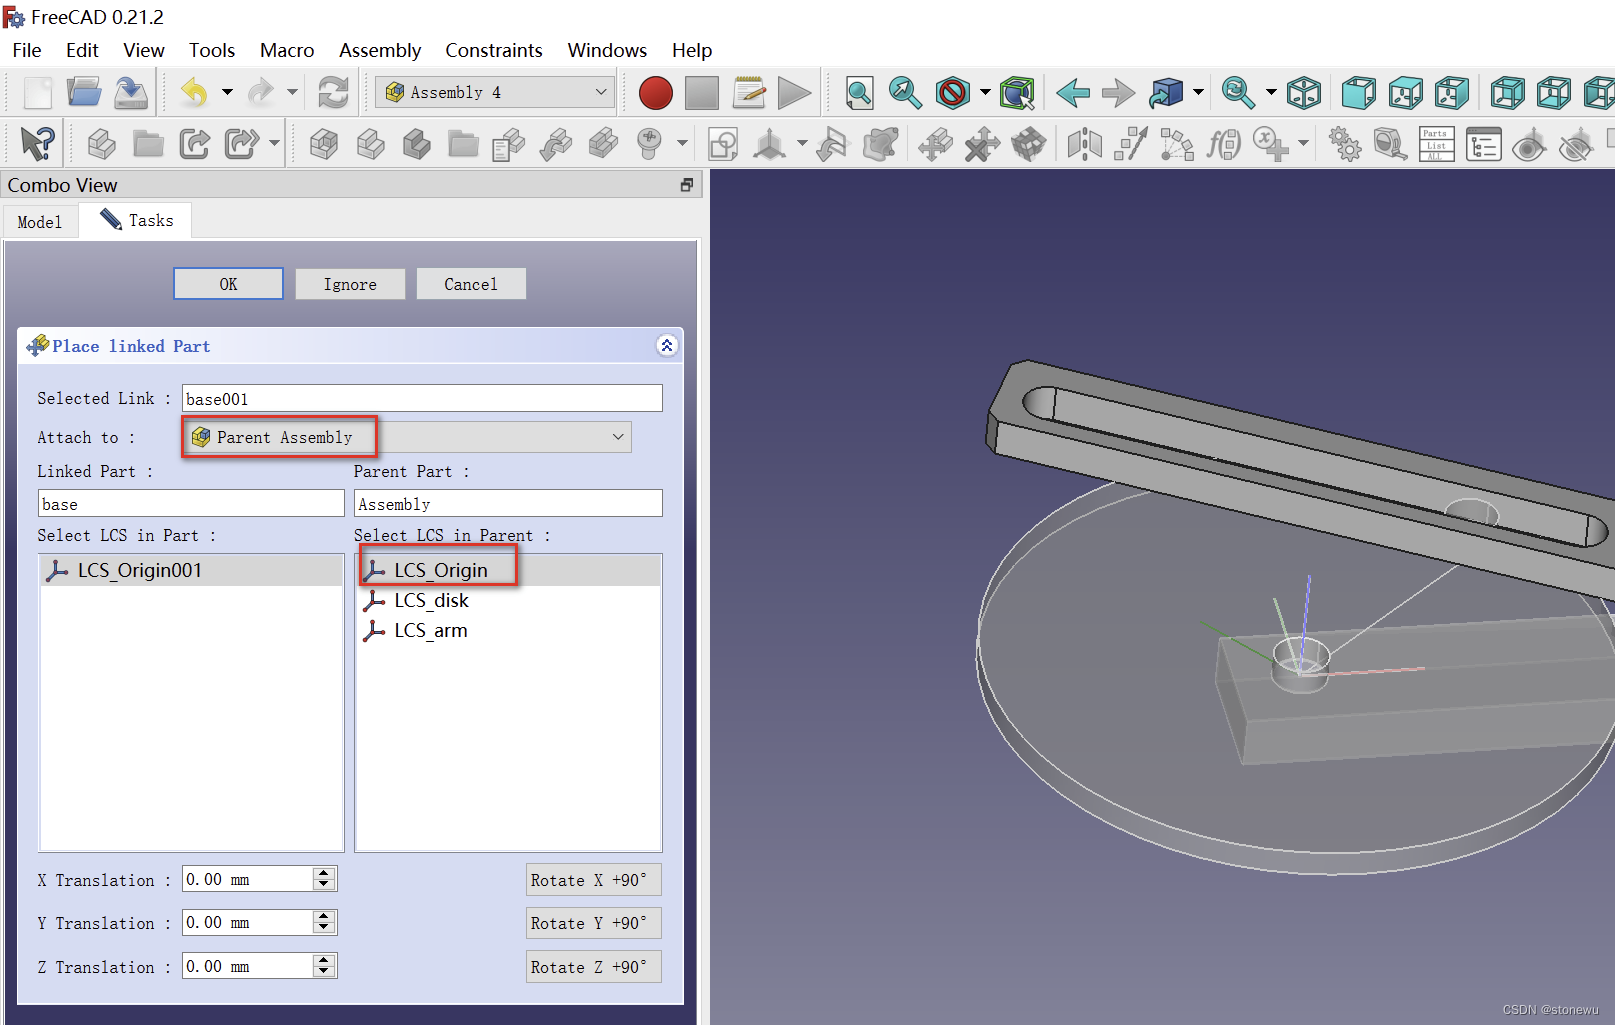
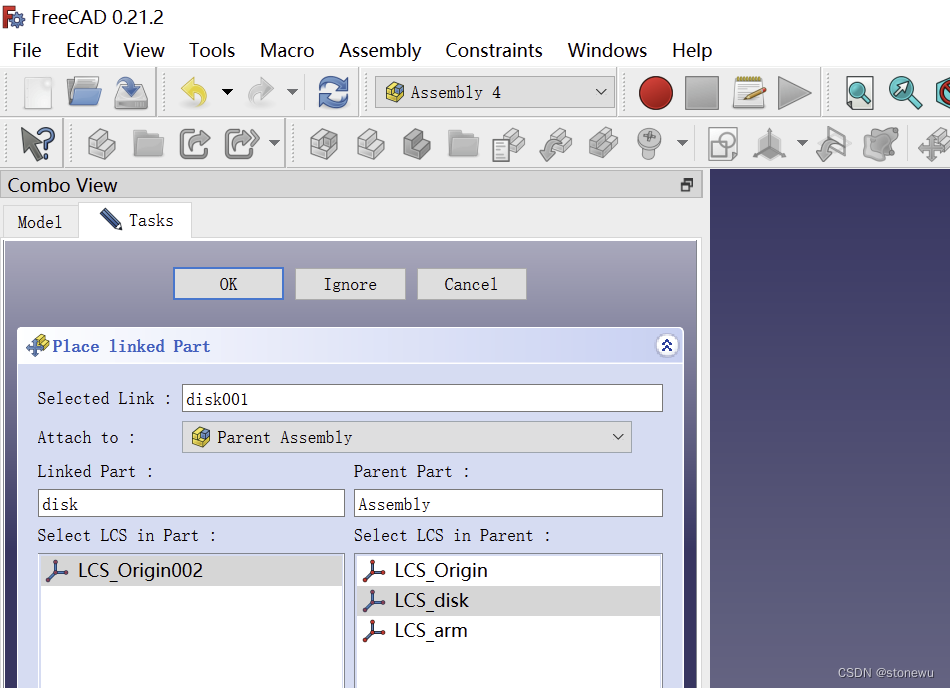
3、Insert Part:base、disdk、arm
Inset Part操作
注意选择合适的LCS
base
disk
arm

六、装配动画
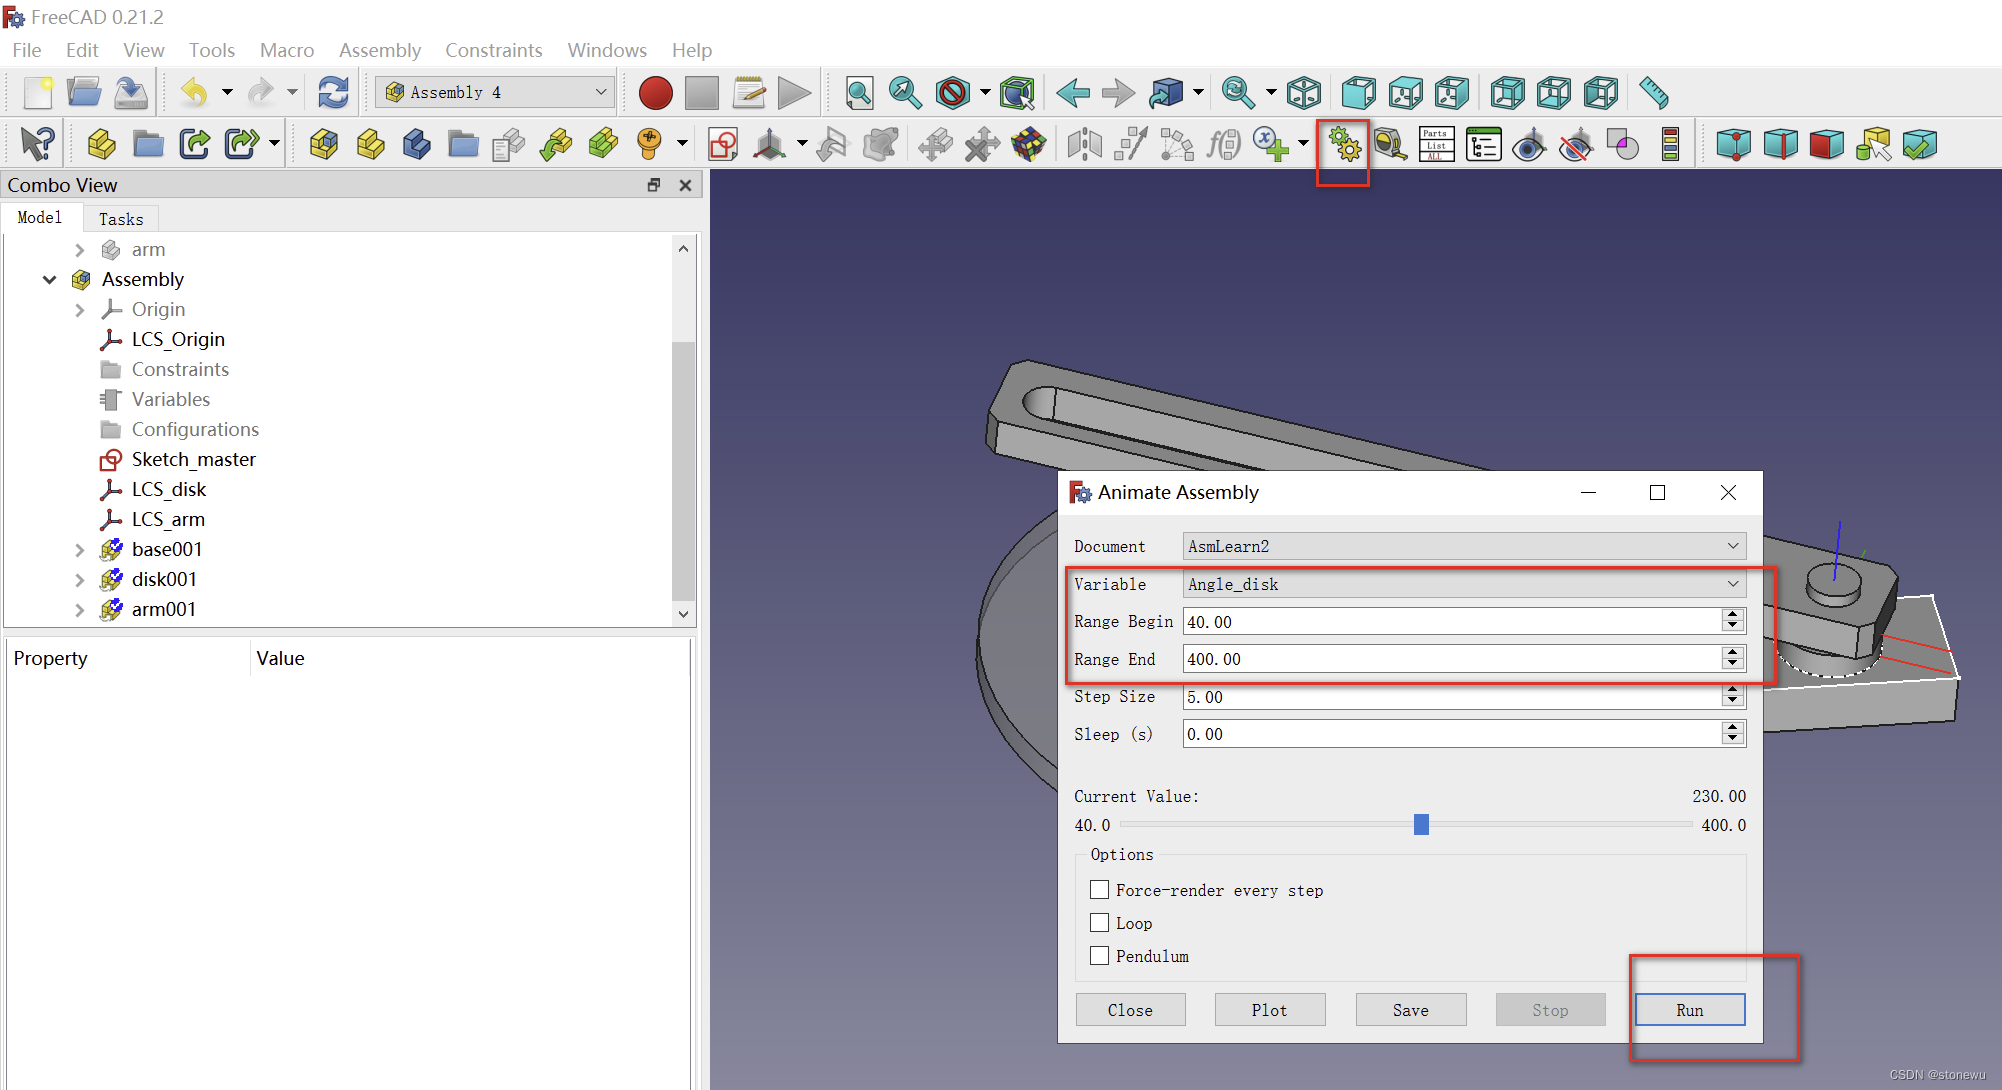
就能看到装配动画了。


