
WebView2教程(基于C++)【一】环境初始化


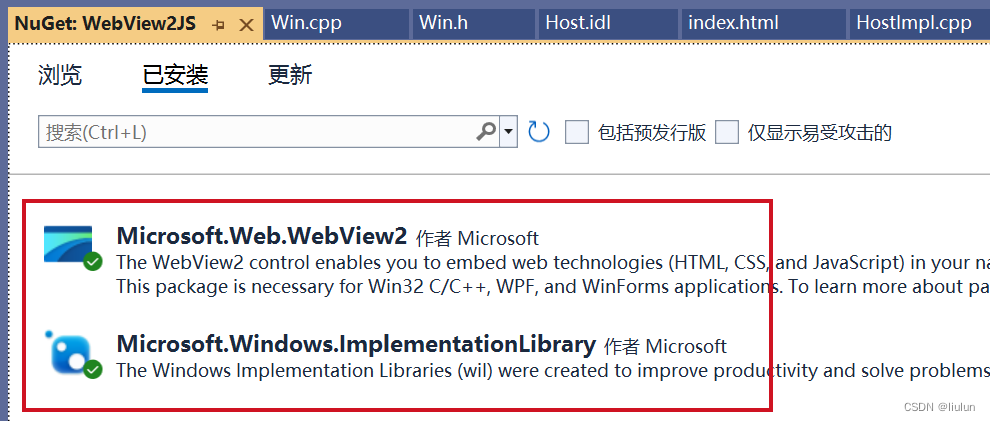
创建一个VisualStudio C++项目,通过NuGet包管理器安装两个包:
注意,在项目属性页设置项目使用:C++ 20,子系统设置成窗口(相应的预处理器也要改变),DPI识别设置成每个监视器高DPI识别。
附加依赖项设置以下几项:
dwmapi.lib
shell32.lib
comctl32.lib
usp10.lib
kernel32.lib
user32.lib
新建一个main.cpp代码如下:
#include
#include "App.h"
int APIENTRY wWinMain(_In_ HINSTANCE hInstance, _In_opt_ HINSTANCE hPrevInstance,
 _In_ LPTSTR lpCmdLine, _In_ int nCmdShow)
{
    auto result = CoInitializeEx(nullptr, COINIT_APARTMENTTHREADED);
    if (result != S_OK) {
        return 0;
    }
    App::init();
    MSG msg;
    while (GetMessage(&msg, NULL, 0, 0))
    {
        TranslateMessage(&msg);
        DispatchMessage(&msg);
    }
    CoUninitialize();
    return 0;
}
这是入口方法,我们在入口方法里初始化了App类
下面是App类的头文件代码如下:
#pragma once
#include
#include
#include
#include
#include
#include
#include
#include
class App
{
public:
	~App();
	static void init();
	static void dispose();
	static App* get();
	static ICoreWebView2Environment* getWebViewEnv();
	static std::wstring getAppPath();
private:
	App();
	void initConfig();
	void regScheme();
	bool checkRuntime();
	bool checkRegKey(const HKEY& key, const std::wstring& subKey);
	bool ensureAppFolder();
	HRESULT envCallBack(HRESULT result, ICoreWebView2Environment* env);
};
先看来看看这个类的一部分代码(不是全部):
#include "App.h"
#include
#include
#include
#include
#include
#include
#include "Util.h"
#include
#include
#include
#include "Win.h"
using namespace Microsoft::WRL;
namespace {
static App* app;
static rapidjson::Document d;
static std::vector wins;
static std::filesystem::path appPath;
static ICoreWebView2Environment* webViewEnv;
}
App::App()
{
initConfig();
if (!checkRuntime()) {
return;
}
if (!ensureAppFolder()) {
return;
}
regScheme();
auto envCBInstance = Callback(this, &App::envCallBack);
HRESULT result = CreateCoreWebView2EnvironmentWithOptions(nullptr, appPath.c_str(), nullptr/*options.Get()*/, envCBInstance.Get());
if (FAILED(result)) {
return;
}
}
App::~App()
{
for (size_t i = 0; i
App::init();执行之后,就创建了一个App对象,这个对象被保存在静态变量app中,在App的构造函数中,先初始化了应用程序的配置信息。代码如下:
void App::initConfig()
{
std::ifstream file("config.json");
std::string content((std::istreambuf_iterator(file)), std::istreambuf_iterator());
d.Parse(content.c_str());
}
这段代码读取应用程序(exe文件)所在目录下的config.json文件,并把这个json文件存储在静态变量:static rapidjson::Document d;中,以后我们会从这个d中获取配置信息。
这个config.json文件的代码如下:
{
"appName": "WebView2JS",
"windows": [
{
"id": "FirstWindow",
"w": 1200,
"h": 800,
"miniWidth": 1200,
"miniHeight": 800,
"resizable": true,
"title": "WebView2JS窗口",
"frame": false,
"shadow": true,
"position": {
"x": 100,
"y": 100,
"centerOfScreen": true
},
"webviews": [
{
"id": "FirstWebView",
"url": "https://wv2js/index.html",
"disableWindowOpen": null,
"area": {
"left": 0,
"right": 0,
"top": 0,
"bottom": 0,
"width": -1,
"height": -1
}
}
]
}
]
}
这里配置了窗口和webview的一些基本信息。
需要注意的是,我们读取JSON用到了RapidJSON,至于怎么用这个库,我们这里就不多做介绍了。甚至你可以完全不用json配置文件。
initConfig之后,就会执行checkRuntime方法,代码如下:
bool App::checkRuntime()
{
std::wstring regSubKey = L"\\Microsoft\\EdgeUpdate\\Clients\\{F3017226-FE2A-4295-8BDF-00C3A9A7E4C5}";
bool hasRuntime = checkRegKey(HKEY_LOCAL_MACHINE, L"SOFTWARE\\WOW6432Node" + regSubKey);
if (hasRuntime) return true;
hasRuntime = checkRegKey(HKEY_CURRENT_USER, L"Software" + regSubKey);
if (!hasRuntime) {
auto result = MessageBox(nullptr, L"error", L"error", MB_OKCANCEL | MB_ICONINFORMATION | MB_DEFBUTTON1);
if (result == IDOK) {
ShellExecute(0, 0, L"https://go.microsoft.com/fwlink/p/?LinkId=2124703", 0, 0, SW_SHOW);
}
return false;
}
return true;
}
这个方法会判断当前的用户环境,是否安装了WebView2的运行时,如果没有,则打开一个网页,让用户去下载WebView2的运行时。
接下去执行ensureAppFolder方法,代码如下:
bool App::ensureAppFolder() {
PWSTR pathTmp;
auto ret = SHGetKnownFolderPath(FOLDERID_RoamingAppData, 0, nullptr, &pathTmp);
if (ret != S_OK) {
CoTaskMemFree(pathTmp);
auto result = MessageBox(nullptr, L"error", L"error", MB_OK | MB_ICONINFORMATION | MB_DEFBUTTON1);
exit(1);
return false;
}
appPath = pathTmp;
CoTaskMemFree(pathTmp);
appPath /= convertToWideChar(d["appName"].GetString());
if (!std::filesystem::exists(appPath)) {
auto flag = std::filesystem::create_directory(appPath);
if (!flag) {
MessageBox(nullptr, L"error", L"error", MB_OK | MB_ICONINFORMATION | MB_DEFBUTTON1);
exit(1);
return false;
}
}
return true;
}
这个方法会初始化一个应用程序缓存目录,:C:\Users\[user name]\AppData\Roaming\WebView2JS,其中WebView2JS是从配置文件中读取的。
目录中的文件如下图所示,这与Electron应用差不多
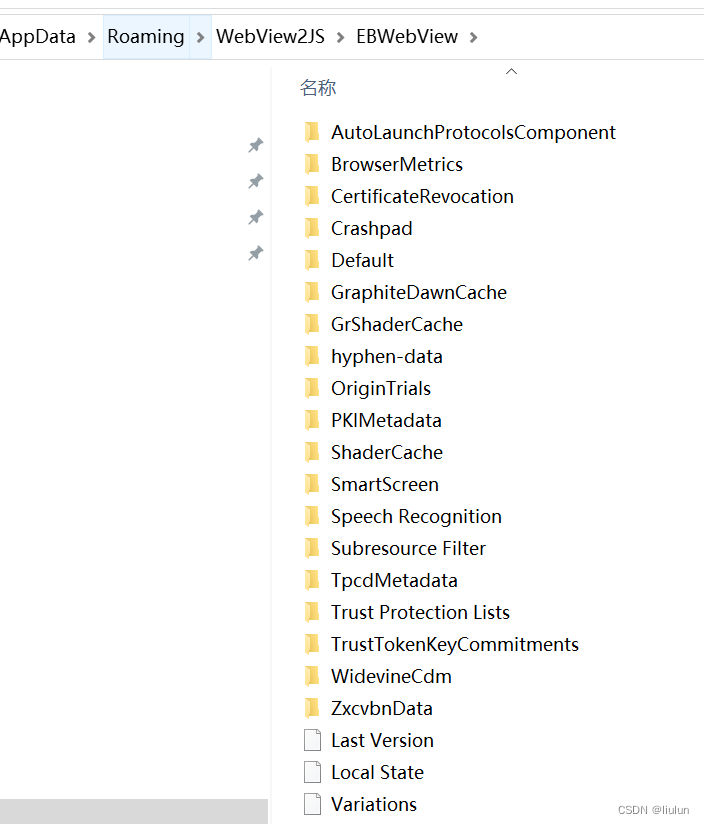
这个路径被保存到appPath静态变量中了。
接下去会执行regScheme方法:
void App::regScheme()
{
auto options = Microsoft::WRL::Make();
options->put_AdditionalBrowserArguments(L"--allow-file-access-from-files");
Microsoft::WRL::ComPtr options4;
HRESULT oeResult = options.As(&options4);
const WCHAR* allowed_origins[1] = { L"*" };
auto defaultRegistration = Microsoft::WRL::Make(L"wv2js");
defaultRegistration->put_HasAuthorityComponent(TRUE);
defaultRegistration->put_TreatAsSecure(TRUE);
defaultRegistration->SetAllowedOrigins(1, allowed_origins);
ICoreWebView2CustomSchemeRegistration* registrations[1] = { defaultRegistration.Get() };
options4->SetCustomSchemeRegistrations(1, static_cast(registrations));
}
这个方法会为WebView注册一个自定义协议,这样我们就可以用:https://wv2js这个域名加载我们的自定义页面了。
App类构造函数中最后几行代码以异步的方式创建WebView2的环境变量对象,异步回调方法为:envCallBack,这个方法的代码如下:
HRESULT App::envCallBack(HRESULT result, ICoreWebView2Environment* env)
{
webViewEnv = env;
rapidjson::Value& winConfigs = d["windows"].GetArray();
for (size_t i = 0; i
在这个方法中,webview2的环境对象被保存到静态变量webViewEnv中了,接着创建了窗口对象,并保存到一个容器wins中(静态变量)。
如你所见,依据我们的配置文件,我们是可以在应用程序启动时,直接创建多个窗口的。
App类还有几个简单的方法,如下所示:
ICoreWebView2Environment* App::getWebViewEnv()
{
return webViewEnv;
}
std::wstring App::getAppPath()
{
return appPath.wstring();
}
这两个方法用于给其他类提供全局信息。


