
pytest框架介绍


一、概述
一)、单元测试框架
1.单元测试框架定义
单元测试框架是在自动化测试或白盒测试中对软件的最小单元(函数,方法)进行测试的框架。
2.单元测试框架分类
python:unittest,pytest(主流)
Java:Testng(主流),Junit
3.单元测试框架主要做什么
发现测试用例:从多个文件里面去找到我们的测试用例
执行测试用例:按照一定的顺序和规则去执行,并生成结果
判断测试结果:通过断言判断预期结果和实际结果的差异
生成测试报告:统计测试进度,耗时,通过率,生成测试报告
二)、单元测试框架和自动化测试框架有什么关系
1.什么是自动化测试框架
为了去完成一个指定的系统的自动化测试而封装的一整套的完善的代码的框架。
主要封装的内容:自动化的基础模块,自动化的管理模块,包括统计模块
2.作用
1).提高测试效率,降低维护成本
2).减少人工干预,提高测试的准确性,增加代码的重用性
3).核心思想是让不懂代码的人也能够通过这个框架去实现自动化测试
3.Pytest单元测试框架和自动化测试框架的关系
单元测试框架 是 自动化测试框架的组成部分之一。
pytest 框架是一个 Python 的单元测试框架,支持 Python 函数、方法和类的测试。
二、Pytest简介以及常用插件
一).pytest简介
pytest是一个基于Python的单元测试框架,它支持参数化、fixture、插件、mock等功能,并且易于使用和扩展。灵活和简单。
pytest还提供了一个简单的方式来运行测试用例,并且能够自动生成测试报告。
可以结合selinium,requests,appium完成各种不通的自动化。
可以生成自动生成allure报告以及和jenkins持续集成。
二).常用插件
下面是pytest的一些常用插件:
- pytest-xdist:用于多进程或分布式测试。多CPU分发。
- pytest-cov:用于测试覆盖率分析
- pytest-html:生成HTML测试报告
- pytest-rerunfailures:用于重试测试失败的用例
- pytest-mock:用于mock测试
- pytest-selenium:用于Selenium浏览器自动化测试
- pytest-ordering :指定测试用例的执行顺序
- allure-pytest:生成美观自定义的HTML报告
pytest-xdist
pytest-xdist插件用于多进程或分布式测试。它可以将测试用例分发到多个进程或机器上运行,从而加快测试速度。
安装方法如下:
pip install pytest-xdist
使用方法:
pytest -n # num为进程数
pytest-cov
pytest-cov插件用于测试覆盖率分析。它可以帮助我们了解测试用例覆盖了代码的哪些部分,从而帮助我们优化测试用例。
安装方法如下:
pip install pytest-cov
使用方法:
pytest --cov= # path为代码路径
pytest-html
pytest-html插件可以生成HTML测试报告,使测试结果更加直观。安装方法如下:
pip install pytest-html
使用方法:
pytest --html= # path为报告路径
pytest-rerunfailures
pytest-rerunfailures插件用于重试测试失败的用例。它可以帮助我们排除测试环境的干扰,使测试结果更加准确。安装方法如下:
pip install pytest-rerunfailures
使用方法:
pytest --reruns= # num为重试次数
pytest-mock
pytest-mock插件用于mock测试。它可以帮助我们模拟测试环境中的外部依赖,从而使测试结果更加稳定。安装方法如下:
pip install pytest-mock
使用方法:
# 在测试用例中使用
def test_example(mocker):
    mock_func = mocker.Mock(return_value=42)
    assert mock_func() == 42
pytest-selenium
pytest-selenium插件用于Selenium浏览器自动化测试。它可以帮助我们在测试用例中模拟用户操作,从而测试网页应用程序。安装方法如下:
pip install pytest-selenium
使用方法:
plaintext
# 在测试用例中使用
def test_example(selenium):
    selenium.get('http://www.baidu.com')
    assert '百度' in selenium.title
pytest-ordering
pytest-ordering插件是一个用于pytest的插件,它可以让我们指定测试用例的执行顺序。默认情况下,pytest会按照测试用例名称的字典序进行排序。但是,在某些情况下,测试用例的执行顺序可能会对测试结果产生影响,这时我们可以使用pytest-ordering插件来指定测试用例的执行顺序。安装方法如下:
pip install pytest-ordering
使用方法:
import pytest
@pytest.mark.run(order=1)
def test_foo():
    assert True
@pytest.mark.run(order=2)
def test_bar():
    assert True
allure-pytest
allure-pytest插件是一个用于pytest的插件,它可以将pytest的测试结果转换为美观的HTML报告,并且支持截图、日志、环境变量等功能。allure-pytest插件可以帮助我们更直观地了解测试结果,并且方便我们与其他人分享测试报告。安装方法如下:
pip install allure-pytest
使用方法:
plaintext
pytest --alluredir=allure-report # 生成测试报告
allure serve allure-report # 启动测试报告服务器
三).插件安装
在当前工程根目录下新建requirements.txt文件,输入需要安装的插件,保存
pytest==7.3.1
pytest-html
pytest-xdist
pytest-ordering
pytest-rerunfailures
pytest-cov
pytest-mock
pytest-selenium
allure-pytest
pyyaml
requests
在当前的工程中安装,每个工程都有虚拟环境,在虚拟环境的终端中执行命令
pip install -r requirements.txt
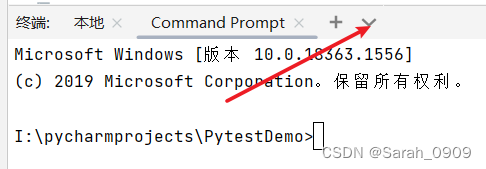
终端Terminal 选择command Prompt,确保在虚拟环境下运行
(venv) F:\projects\study\python\codes>(工程代码目录)
 安装后检查:打开设置查看,Settings->Projet:项目名称->Python Interpreter需要升级的这里可以直接选中,升级
三、测试用例规则
使用默认规则:
- 模块名必须以test开头或者_test结尾。
- 测试类必须以Test开头,并且不能带有init方法。
- 测试用例必须以test_开头。
四、断言
-assert:断言一个表达式为True。
- assert equal:断言两个值相等。
- assert not equal:断言两个值不相等。
- assert greater:断言第一个值大于第二个值。
- assert less:断言第一个值小于第二个值。
- assert in:断言一个值在一个序列中。
- assert not in:断言一个值不在一个序列中。
五、用例执行
一)用例执行方式
1.通过命令行执行
终端执行pytest,输入pytest即可
pytest -vs   # 执行所有
pytest -vs test_login.py  # 指定模块,注意切换目录 cd testcase
pytest -vs ./insterface_testcase  # 指定文件夹
pytest -vs ./insterface_testcase/test_interface.py::TestLogin::test03  # 指定测试用例
执行的参数 作用 前提:安装插件 举例 -vs -v 输出详细信息,包括模块名类名。 pytest -vs -s输出调试信息,包括print打印的信息 -n 多线程运行 pytest-xdist pytest -vs -n=2 –reruns num 失败重跑 pytest-rerunfailres pytest -vs --reruns=2 raise Exception() 抛出异常 try except 解决异常 -x 出现一个用例失败停止测试 pytest -vs -x –maxfail 出现几个失败才终止 pytest -vs --maxfail=2 –html 生成html的测试报告 pytest-html pytest -vs --html ./reports/result.html -k 运行测试用例名称中包含某个字符串的测试用例 pytest -vs -k “aa“ 2.通过主函数main方式执行
1)运行所有用例
if __name__ == '__main__':
    pytest.main(["-vs"])   # 参数是列表的类型
2)指定模块运行
if __name__ == '__main__':
    pytest.main(["-vs", 'test_login.py'])
3)指定文件夹
if __name__ == '__main__': pytest.main(["-vs", './interface_testcase'])- 通过nodeid制定用例运行:nodeid由模块名,分隔符,类名,方法名,函数名组成
if __name__ == '__main__':
    pytest.main(["-vs", './interface_testcase/test_interface.py::TestLogin::test03'])
3.通过读取pytest.ini配置文件执行
pytest.ini是pytest单元测试框架的核心配置文件(全局配置文件)。
1.位置:文件放在项目的根目录下,名称必须是pytest.ini
2.编码:文件编码格式ANSI(utf-8),pycharm中可以设置加载文件的默认编码格式,使用notpad++修改编码格式
3.作用:改变pytest默认的行为/规则
4.运行的规则:命令运行或主函数运行都会加载/读取这个配置文件
[pytest]
# 命令行参数,用空格分隔
addopts = -vs -m "smoke or model1"  # 执行冒烟用例和model1模块的用例
# 测试文件夹,可以自行配置,../pytestproject 上一层的pytestproject文件夹
testpaths = ./testcases
# 测试模块文件名,搜索所有匹配的文件
python_files = test_*.py
# 测试模块类名,搜索所有匹配的类
python_classes = Test*
# 测试模块函数名,搜索所有匹配的函数
python_functions = test_*
#标记
markers =
    smoke:冒烟测试
    model1:model1
    model2:model2
4.通过ini文件与主函数结合
# pytest.ini
[pytest]
addopts = -vs
testpaths = ./testcases
python_files = test_*.py
python_classes = Test*
python_functions = test_*
markers =
    smoke:冒烟测试
    login:登录模块
    h1:用例级别1
    h2:用例级别2
    h2:用例级别3
# testrun.py import os import pytest from utils.timer import sleep def run(): pytest.main(['-m h1']) # 每次运行通过-m选择需要执行的模块 if __name__ == '__main__': run()二)用例执行顺序
默认:从上到下顺序执行
改变默认的执行顺序:使用mark标记
@pytest.mark.run(order=1) # 先执行带装饰器的,后执行不带装饰器的
三)分组执行用例
1.ini文件定义标记
2.测试用例使用装饰器标记
冒烟, 模块, 接口, web
@pytest.mark.smoke
@pytest.mark.login
@pytest.mark.h1
3.执行命令添加 -m “标记”, 命令行执行必须是双引号
参考第五章。
四)Pytest跳过测试用例
(1) 无条件跳过
@pytest.mark.skip(reason='无理由跳过')
# 用例不执行
(2) 有条件跳过
@pytest.mark.skipif(key == 0, reason='key为0,跳过')
# 如果key为0,则用例不执行,key不为0,则执行标记的用例
六、测试用例前后置
一)公共库实现前后置
实现全局的前后置
定义公共库,在单独的文件夹common下新建common_util.py文件,定义公共库class
class Common:
    # 公共工具库
    def setup_class(self):
        print('每个类之前执行一次')
    def teardown_class(self):
        print('每个类之后执行一次')
    def setup(self):
        print('每个用例之前执行一次')
    def teardown_method(self):
        print('每个用例之后执行一次')
在测试模块中继承此类:
class TestModel1(Common):
    # 继承工具类
    def test_case1(self):
        print('测试用例1')
    def test_case2(self):
        print('测试用例2')
    def test_case3(self):
        print('测试用例3')
缺点:不能指定部分用例的前后置
二)fixtrue实现部分前后置
@pytest.fixture(scope=None, autouse=False, params=None, ids=None, name=None)
参数说明:
1.scope:作用域
- function:在函数之前和之后执行,默认
1.自动调用方式:在所有测试用例的前后自动调用
@pytest.fixture(scope='function', autouse=True)
def exe_database_sql():
    print("执行sql查询")
    yield  # 之后的都是后置
    print('关闭数据库连接')
2.手动调用方式:在测试用例的参数里面加入fixture的名称,默认是手动调用autouse=False
@pytest.fixture(scope='function')  # 需要在用例里传参
def exe_database_sql():
    print("执行sql查询")
    yield  # 之后的都是后置
    print('关闭数据库连接')

class TestModel1():
    def test_case4(self, exe_database_sql):  # 加入fixture名称
        print('测试用例4')
3.如果fixtrue通过return或yield返回值,返回值可以通过固件的名字传递到测试用例当中,数据驱动
@pytest.fixture(scope='function') def exe_database_sql(): print("执行sql查询") return 'success' class TestModel1(): def test_case4(self, exe_database_sql): print('测试用例4') print(exe_database_sql) # 打印success- class:在类之前和之后执行
1.手动调用的方式:在类的上面加上@pytest.mark.usefixtures(“exe_database_sql”)装饰器调用
@pytest.fixture(scope='class', autouse=False) def exe_database_sql(): print("执行sql查询") yield # 之后的都是后置 print('关闭数据库连接') @pytest.mark.usefixtures("exe_database_sql") # 在类之前和之后调用 class TestModel1(CommonUtil): def test_case1(self): print('测试用例1') def test_case3(self): print('测试用例3') class TestModelA: def test_case_a1(self): print('测试a1')- module:模块之前和之后执行
- package/session:在整个项目会话之前和之后执行**
1.一般会结合contest.py文件实现
2.autouse:自动执行
自动执行,默认是False。
如果希望在另一个py文件中调用需要结合contest.py文件使用。
@pytest.fixture(scope='session', autouse=True)
def exe_database_sql():
    print("执行sql查询")
    yield  # 之后的都是后置
    print('关闭数据库连接')
3.params:实现参数化
参数支持:列表[], 元祖(),字典列表[{},{},{}],字典元祖({},{},{})
参数传递到fixture方法:装饰器使用 params参数传参,fixture函数参数使用request参数接收,reques.param取值。通过fixture函数返回return 参数。测试用例调用fixture函数,使用fixture函数return的参数。
# 第一步:读取数据方法
def read_yaml():
    return ['chenglong', 'zenzidan', 'cai10']
@pytest.fixture(scope='function', autouse=False, params=read_yaml())  # 第二步 参数params传递参数
def exe_database_sql(request):
    print("执行sql查询")
    yield request.param  # 第三步:固件返回参数
    print('关闭数据库连接')
class TestModel1:
    def test_case1(self):
        print('测试模块1用例1')
    def test_case2(self, exe_database_sql):  # 第四步:调用fixture  list有几个值,用例执行几次
        print('测试模块1用例2: '+ exe_database_sql)
4.ids:参数别名
不能单独使用,必须和params一起使用,作用是对参数起别名
# 读取数据方法
def read_yaml():
    return ['chenglong', 'zenzidan', 'cai10']
@pytest.fixture(scope='function', autouse=False, params=read_yaml(), ids=['c', 'z', 'cai'])
def exe_database_sql(request):
    print("执行sql查询")
    yield request.param
    print('关闭数据库连接')
class TestModel1:
    def test_case1(self):
        print('测试模块1用例1')
    def test_case2(self, exe_database_sql):
        print('测试模块1用例2: '+ exe_database_sql)
5.name: 给fixture起别名
多个fixture的情况下,方便记忆。
特别注意:使用别名后,fixture的名称就不能再使用,只能使用name。
# 读取数据方法
def read_yaml():
    return ['chenglong', 'zenzidan', 'cai10']
@pytest.fixture(scope='function', autouse=False, params=read_yaml(), name='db')
def exe_database_sql(request):
    print("执行sql查询")
    yield request.param
    print('关闭数据库连接')
class TestModel1:
    def test_case1(self):
        print('测试模块1用例1')
    def test_case2(self, db):
        print('测试模块1用例2: '+ db)  # 调用时只能使用db
三)fixture结合conftest.py文件使用
-更多用于前后置-
1.conftest.py是专门用于存放fixture的配置文件。名称是固定的,不能变;
2.在conftest.py文件里面所有的方法在调用时都不需要导包;
3.conftest.py文件可以有多个,分层级,并且多个conftest.py文件里面的多个fixture可以被一个用例调用
如果fixture是function级别,自动调用,则调用方式如下:
- 每个文件夹自动调用本文件夹下的conftest.py;
- 先调用父文件夹,再调用子文件夹。

如果是session级别,自动调用,则在所有用例执行之前和之后执行。
四)固件优先级
优先级从高到低:
fixture session
fixture class
setup_class
fixture function
setup
七、parametrize()实现数据驱动-参数化
方法:
@pytest.mark.parametrize(args_name, args_value)
args_name: 参数名称,用于将参数值传递给函数。
args_value:参数值:(列表,字典列表,元祖列表; 元祖,字典元祖),有n个值那么用例执行n次。
第一种用法: 使用一个参数
@pytest.mark.parametrize('caseinfo',['no1','no2','no3'])  # 列表
def test_case21(self,caseinfo):
    print('测试模块2用例1 '+caseinfo)
# 执行三个用例
# test_index.py::TestLogin::test_case21[no1]
# test_index.py::TestLogin::test_case21[no2]
# test_index.py::TestLogin::test_case21[no3]
# 输出
# 测试模块2用例1 no1
# 测试模块2用例1 no2
# 测试模块2用例1 no3
@pytest.mark.parametrize('caseinfo', [{'name': '小美', 'age': '18'}, {'name': '小青', 'age': '180'}]) # 字典列表 def test_case22(self, caseinfo): name = caseinfo['name'] age = caseinfo['age'] print(name, age) # 执行2个用例 # test_index.py::TestLogin::test_case22[caseinfo0] # test_index.py::TestLogin::test_case22[caseinfo1] # 输出 # 小美 18 # 小青 180第二种用法:使用多个参数
@pytest.mark.parametrize('arg1, arg2', [('小美', '18'), ('小青', '180')])  # 元祖列表 使用列表嵌套也可以 [['小美', '18'], ['小青', '180']]  看着不好看
def test_case23(self, arg1, arg2):
    print(arg1, arg2)
# 执行2个用例
# test_index.py::TestLogin::test_case23[小美-18]
# test_index.py::TestLogin::test_case23[小青-180]
# 输出
# 小美 18
# 小青 180
一) json格式数据驱动
1. json数据格式
1.新建json文件,在文件中编写一个{}
2.有几个模块,写几个key,值为列表
3.列表中参数化数据有几组,就写几个{}
4.每个{}中组成->说明+参数数据+预期结果
{
  "login": [
    {
      "desc": "登录成功",
      "username": "700001",
      "password": "700001",
      "epxpect": "登录成功"
    },
    {
      "desc": "登录失败",
      "username": "700002",
      "password": "",
      "epxpect": "登录失败"
    },
    {
      "desc": "登录成功",
      "username": "700003",
      "password": "123456",
      "epxpect": "登录失败"
    }
  ]
}
注意json文件的格式,gbk 还是utf-8
2. read_json封装
# read_json.py
import json
class ReadJson:
    def __init__(self, json_file):
        self.json_file = json_file
    def read_json(self, key):
        arr = []  # 测试数据列表
        with open(self.json_file, "r", encoding="utf-8") as f:
            for data in json.load(f).get(key):
                arr.append(tuple(data.values())[1:])  # 不读描述
            return arr
json_para = ReadJson("test_data.json")
login_para = json_para.read_json("login")

# login_para 得到元祖列表
# [('700001', '700001', '登录成功'), ('700002', '', '登录失败'), ('700003', '123456', '登录失败')]
3. 测试用例
import pytest
from read_json import login_para
class TestLogin():
    """登录测试 """
    @pytest.mark.parametrize("username, password, expect_text", login_para)   # 前后参数的顺序、数量必须一致,名字可以不一样 拆包方法
    def test_login(self, username, password, expect_text):
        print(f"username:{username}")
        print(f"password: {password}")
        print(f"expect text: {expect_text}")
        """测试步骤"""
        error_info = """获取提示信息"""
        assert expect_text in error_info
二)YAML格式数据驱动
1. yaml数据格式
1.新建yaml文件,扩展名可以是yaml或yml
2.支持#注释
3.通过缩进表示层级,缩进不管空格数量,对齐就行
4.区分大小写
5.支持裸字符,字符串可以用“”也可以不用
6.数据组成:
map对象 key: value(中间有空格)
数组(list) 使用 “-” 表示列表 /数组
举例:
login:   # key 如果是接口用例只有一个key,看封装的方式,也可以不写key(模块名称)
  - case1: 登录成功   # 用例描述  一个 - 就是一个用例
    username: 70001
    password: 7001@123
    expect: 成功
  - case2: 登录失败1
    username: 70002
    password:
    expect: 失败
  - case3: 登录失败2
    username: 70003
    password: 70003
    expect: 失败
用途:
做配置文件。环境变量,数据库信息,用户名密码,日志格式。
编写自动化测试用例,接口测试中常用。
一行的写法,基本上属于json格式
msxy: {username: 70001, password: 7001@123}
msxy:[{username: 70001, password: 7001@123},{username: 70002, password: None}]
2. read_yaml封装方法1: 获取字典列表
# read_yaml.py
import yaml
class ReadYaml:
    """yaml测试数据文件"""
    def __init__(self, yaml_file):
        self.yaml_file = yaml_file
    def read_yaml(self, key):
        with open(self.yaml_file, 'r', encoding='utf-8') as f:
            data = yaml.load(f, Loader=yaml.FullLoader)
            value = data[key]  # 如果是接口测试,没有模块的区分,没有key,直接返回value
            return value
    def write_yaml(self, data):
        with open(self.yaml_file, encoding='utf-8', mode='a') as f:
            yaml.dump(data, stream=f, allow_unicode=True)
yaml_para = ReadYaml("test_data.yaml")
login_para = yaml_para.read_yaml('login')
# login_para 为: [{'case1': '登录成功', 'username': 70001, 'password': '7001@123', 'expect': '成功'}, {'case2': '登录失败1', 'username': 70002, 'password': None, 'expect': '失败'}, {'case3': '登录失败2', 'username': 70003, 'password': 70003, 'expect': '失败'}]
3. 对应测试用例1:单参数
class TestLogin(Common):
    """登录测试 """

    @pytest.mark.parametrize("login_case", login_para)
    def test_login(self, login_case):
        username = login_case['username']
        password = login_case['password']
        expect_text = login_case['expect']
        print(f"username:{username}")
        print(f"password: {password}")
        print(f"expect text: {expect_text}")
        """测试步骤"""
        error_info = """获取提示信息"""
        assert expect_text in error_info
使用这种封装,log中的测试用例名称为函数名+参数名+编号,编号从0开始
case:test_index.py_TestLogin_test_login[login_case0]
case:test_index.py_TestLogin_test_login[login_case1]
json也可以使用单参数的方法,修改read_json封装方法,返回字典列表。
4. read_yaml封装2:获取元祖列表
import yaml
class ReadYaml:
    """yaml测试数据文件"""
    def __init__(self, yaml_file):
        self.yaml_file = yaml_file
    def read_yaml(self, key):
        with open(self.yaml_file, 'r', encoding='utf-8') as f:
            data = yaml.load(f, Loader=yaml.FullLoader)
            value = data.[key]
            arr = []
            for data in value:
                arr.append(tuple(data.values())[1:])
            return arr
    def write_yaml(self, data):
        with open(self.yaml_file, encoding='utf-8', mode='a') as f:
            yaml.dump(data, stream=f, allow_unicode=True)
yaml_para = ReadYaml("test_data.yaml")
login_para = yaml_para.read_yaml('login')
# login_para 为: [(70001, '7001@123', '成功'), (70002, None, '失败'), (70003, 70003, '失败')]
5. 对应测试用例2:多参数
class TestLogin(Common):
    """登录测试 """
    @pytest.mark.parametrize("username, password, expect_text", login_para)
    def test_login(self, drivers, username, password, expect_text):
        print(f"username:{username}")
        print(f"password: {password}")
        print(f"expect text: {expect_text}")
        """测试步骤"""
        error_info = """获取提示信息"""
        assert expect_text in error_info
使用这种参数化方法用例名称显示为函数名+参数值:
case:test_index.py_TestLogin_test_login[70001-7001@mcx-失败]
三)parametrize中ids 导致编码乱码解决
@pytest.mark.parametrize 运行用例导致显示会形成乱码,比如
=========================== short test summary info ===========================
FAILED testcases/test_index.py::TestLogin::test_login[70001-70001-\u767b\u5f55\u6210\u529f]
FAILED testcases/test_index.py::TestLogin::test_login[70002-70002-\u767b\u5f55\u6210\u529f]
FAILED testcases/test_index.py::TestLogin::test_login[70003-70003-\u767b\u5f55\u6210\u529f]
有俩种方法解决:
1.第一种:创建个pytest.ini 文件,输入
[pytest]
disable_test_id_escaping_and_forfeit_all_rights_to_community_support = True
运行就会自动转化为 utf-8的形式。
运行后显示为:
=========================== short test summary info ===========================
FAILED testcases/test_index.py::TestLogin::test_login[70001-70001-登录成功]
FAILED testcases/test_index.py::TestLogin::test_login[70002-70002-登录成功]
FAILED testcases/test_index.py::TestLogin::test_login[70003-70003-登录成功]
2.第二种:在用例目录创建 config.py 文件,写入 (未验证)
def pytest_collection_modifyitems(items):
	 for item in items:
        item.name = item.name.encode("utf-8").decode("unicode_escape")
        item._nodeid = item.nodeid.encode("utf-8").decode("unicode_escape")
会收集每一个用例name和nodeid的中文显示在控制台上,转化为utf-8形式。
八、pytest执行过程
- 查询当前目录(./)下的conftest.py文件
- 查询当前目录下pytest.ini文件,找到测试用例的位置
- 查询用例目录下的conftest.py文件
- 查询测试用例的py文件中是否有setup_class, teardown_class, setup, teardown
- 根据pytest.ini文件的测试用例的规则去查找用例并执行。
整体过程:
- 执行pytest命令:在命令行中输入pytest命令,pytest会自动搜寻当前目录及其子目录下的测试文件或测试目录。
- 收集测试文件和测试函数:pytest会根据配置文件或命令行参数来收集测试文件和测试函数,收集到的测试函数被称为测试用例。
- 执行测试用例:pytest会执行收集到的所有测试用例,包括测试函数、测试类中的测试方法等。
- 生成测试报告:pytest会根据配置文件或命令行参数来生成测试报告,可以生成多种格式的测试报告,如HTML、XML、JSON等。
- 输出结果:pytest会将测试报告输出到指定的目录或文件中,也可以在命令行中直接输出测试结果,包括测试用例的执行情况、测试覆盖率等信息。
- 清理测试环境:pytest会在测试用例执行完毕后清理测试环境,包括清理测试数据、清理测试用例的状态等。
九、pytest识别用例失败
测试报告展示过程中对失败用例可能有特殊的要求,比如失败用例打印,失败用例截图等。在pytest框架中可以使用pytest钩子函数,在测试用例被执行后获取用例的测试结果,识别每一条用例失败的情况。
一)pytest钩子函数
钩子函数是在测试执行期间特定事件发生时被调用的函数。任何函数都可以作为钩子函数,只需要符合一定的规则。
钩子函数可以具有不同的功能和作用,具体取决于所注册的钩子函数。钩子函数可以用于修改测试报告、收集额外的测试数据、执行额外的操作等。钩子函数的作用是允许用户通过自定义函数来对测试执行过程进行干预和扩展,以满足特定的需求。
在 pytest 中,可以使用装饰器 @pytest.hookimpl 来将函数注册为钩子函数。注册就是将函数与特定的测试执行事件关联起来,以便在事件发生时自动调用该函数。
在 pytest 执行测试过程中,可以通过注册 pytest_runtest_makereport 钩子函数来输出测试结果和生成测试报告。
pytest_runtest_makereport(item, call)` 是 pytest 框架中的一个钩子函数,用于生成测试报告的每个测试用例的报告。
二)、钩子函数的使用方法
步骤:
- 创建 conftest.py 文件。该文件可以放在测试代码的根目录下或者测试目录的任意层级中。
- 在 conftest.py 文件中,定义一个函数并将其注册为 pytest_runtest_makereport 的钩子函数。函数的命名需要遵循 pytest 的命名规则,一般以 pytest_runtest_makereport 开头,后面可以再加上自定义的后缀以区分不同的用途。
- 在钩子函数内部,可以获取测试报告的相关信息,并进行逻辑处理。一般可以通过 result 参数来获取测试结果,通过 report 参数来获取测试报告。
示例1:
    # conftest.py
    def pytest_runtest_makereport(item, call)
    	# 获取测试结果
        result= call.excinfo

    	# 获取测试报告
    	report = item.session.config.hook.pytest_runtest_makereport(
        	item=item, call=call
    	)

    	# 处理测试结果和测试报告
    	if result.failed or result.skipped:
        	# 测试失败或被跳过的情况处理逻辑
        	pass
    	else:
        	# 测试通过的情况处理逻辑
        	pass
在以上示例中,pytest_runtest_makereport 函数接受两个参数:item 和 call。
item表示测试项,
call 表示测试的调用。
通过这两个参数,可以获取测试结果并生成测试报告。
需要注意的是,pytest_runtest_makereport 钩子函数在每个测试项运行结束后都会被调用一次,因此可以在该函数内部编写测试结果和测试报告的逻辑处理代码。
result = call.excinfo 是在 pytest_runtest_makereport 钩子函数中直接获取测试结果。call.excinfo 是一个 ExceptionInfo 对象,包含了测试中发生的异常信息,如果没有异常则为 None。使用此方法可以直接访问测试结果,但不能直接利用 yield 来处理结果。
三)、 钩子函数实现失败截图添加到allure
    #conftest.py
    """
    失败截图保存到allure测试报告中
    """

    @pytest.hookimpl(tryfirst=True, hookwrapper=True)
    def pytest_runtest_makereport(item, call):
        # 后置,获取测试结果
        outcome = yield
        reps = outcome.get_result()

        if reps.when == 'call' and reps.failed:
            # 在测试失败时进行截图, 添加到allure报告中
            img = web_driver.get_screenshot_as_png()
            name = '_'.join([reps.nodeid.replace('testcases/', '').replace('::', '_'), dt_strftime('%Y%m%d %H%M%S')])   # 为截图文件命名

            allure.attach(img, name=name, attachment_type=allure.attachment_type.PNG)
在钩子函数中:
通过 yield 和 outcome.get_result() 获取测试用例的结果。
使用 result.when 来检查测试结果是否为 ‘call’(执行测试用例的阶段)并且是否失败。
如果测试用例失败,我们创建了一个对应测试用例的截图,并将其附加到 Allure 报告中。
    #conftest.py
    """
    失败截图保存为文件,同时将文件保存到allure测试报告中
    """
    @pytest.hookimpl(tryfirst=True, hookwrapper=True)
    def pytest_runtest_makereport(item, call):
        # 后置,获取测试结果
        outcome = yield
        reps = outcome.get_result()

        if reps.when == 'call' and reps.failed:
            # 在测试失败时进行截图, 添加到allure报告中
            file_name = "{}.png".format('_'.join([reps.nodeid.replace('testcases/', '').replace('::', '_'), dt_strftime('%Y%m%d %H%M%S')]))
            file_path = os.path.join(cm.dir_img, file_name)
            web_driver.get_screenshot_as_file(file_path)
            allure.attach.file(file_path, name=file_name, attachment_type=allure.attachment_type.PNG)
文件名的生成是通过替换 result.nodeid 中的双冒号(‘::’)为下划线(‘_’)来实现的。 例如,如果当前测试用例的 result.nodeid 为 test_module::test_case,那么截图文件名将为 test_module_test_case.png。
十、result.nodeid
result.nodeid 是在 pytest 测试框架中表示测试项目的唯一标识符,通常用于标识测试用例或测试集。它是一个字符串类型的属性。
每个测试项(测试函数、测试类、测试模块、测试目录)都有一个唯一的 nodeid,用于标识该项在整个测试集中的位置。nodeid 由测试项的名称和其在测试集中的路径组成。路径由 :: 分隔符连接,表示从根目录到当前测试项的层级关系。
例如,对于以下测试项结构:
tests/
└── test_sample.py
├── test_func1
├── TestClass1
│ ├── test_method1
│ └── test_method2
└── test_func2
- result.nodeid 可能会是 test_sample.py::test_func1,表示 test_func1 函数在 test_sample.py 模块中的位置。
- result.nodeid 可能会是 test_sample.py::TestClass1::test_method1,表示 test_method1 方法在 TestClass1 类中的位置。
- result.nodeid 可能会是 test_sample.py::test_func2,表示 test_func2 函数在 test_sample.py 模块中的位置。 在测试执行过程中,可以使用 result.nodeid 来唯一标识测试项,并进行进一步的操作和处理,例如生成自定义的测试报告、筛选特定的测试项进行执行等。
- class:在类之前和之后执行


