Nodejs实现微信小程序支付功能前后端实践 全新的微信支付 APIv3
theme: orange
前言
自己实现一个带支付功能的小程序,前端使用uniapp,后端使用Node.js,将实现微信小程序支付功能的全流程详细记录下来。使用的是全新的微信支付 APIv3,优点是 - 使用JSON作为数据交互的格式,不再使用XML
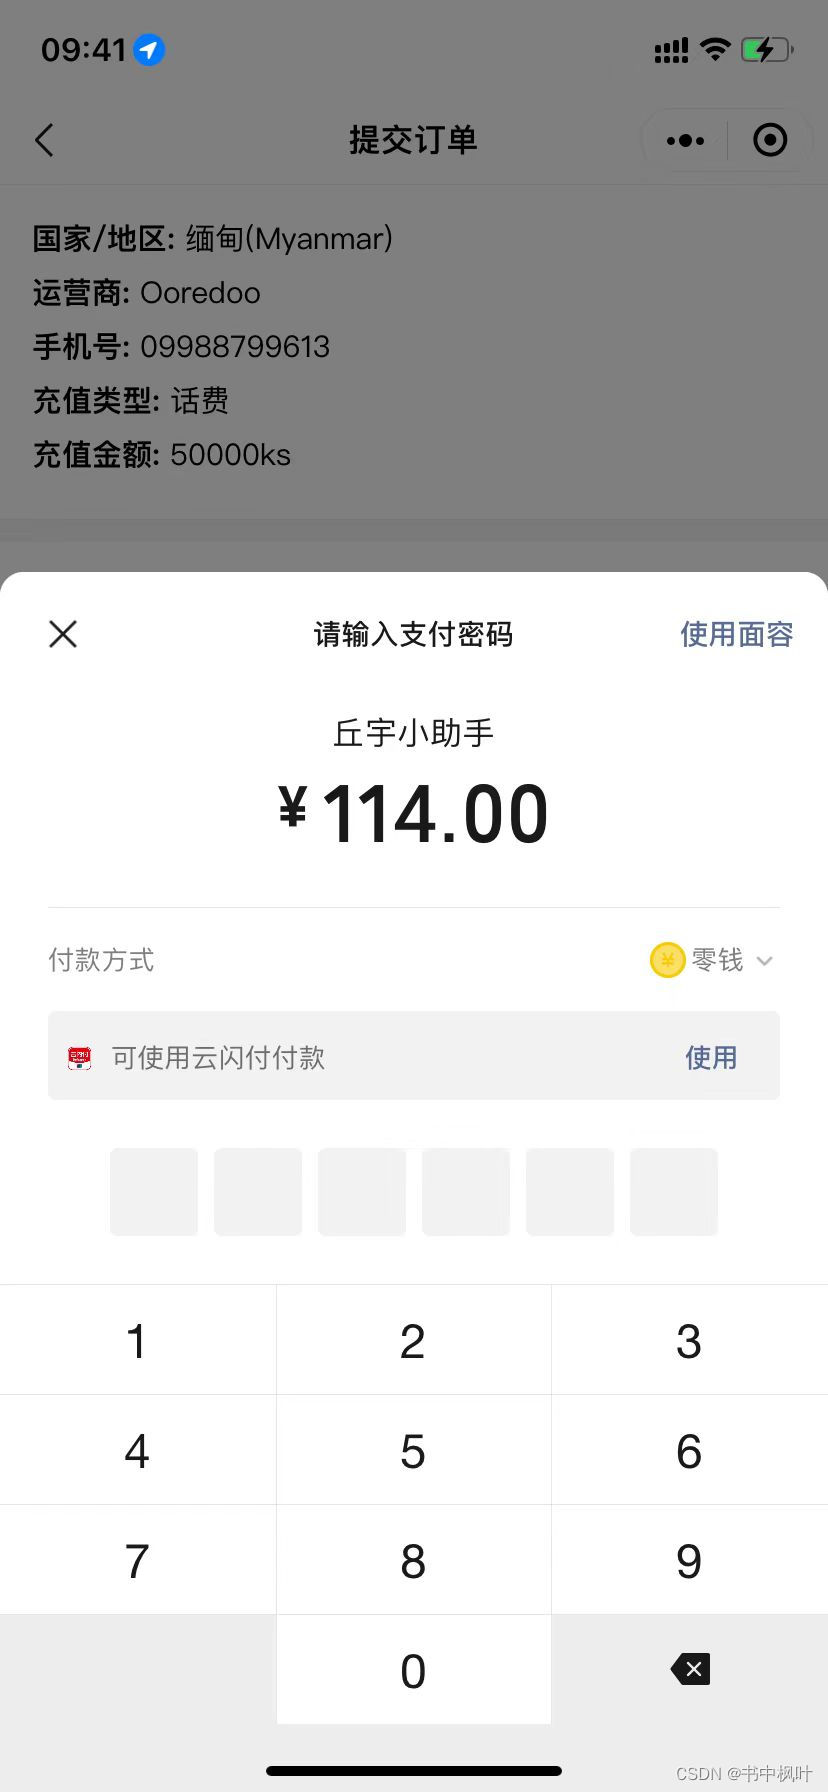
效果图:
准备工作
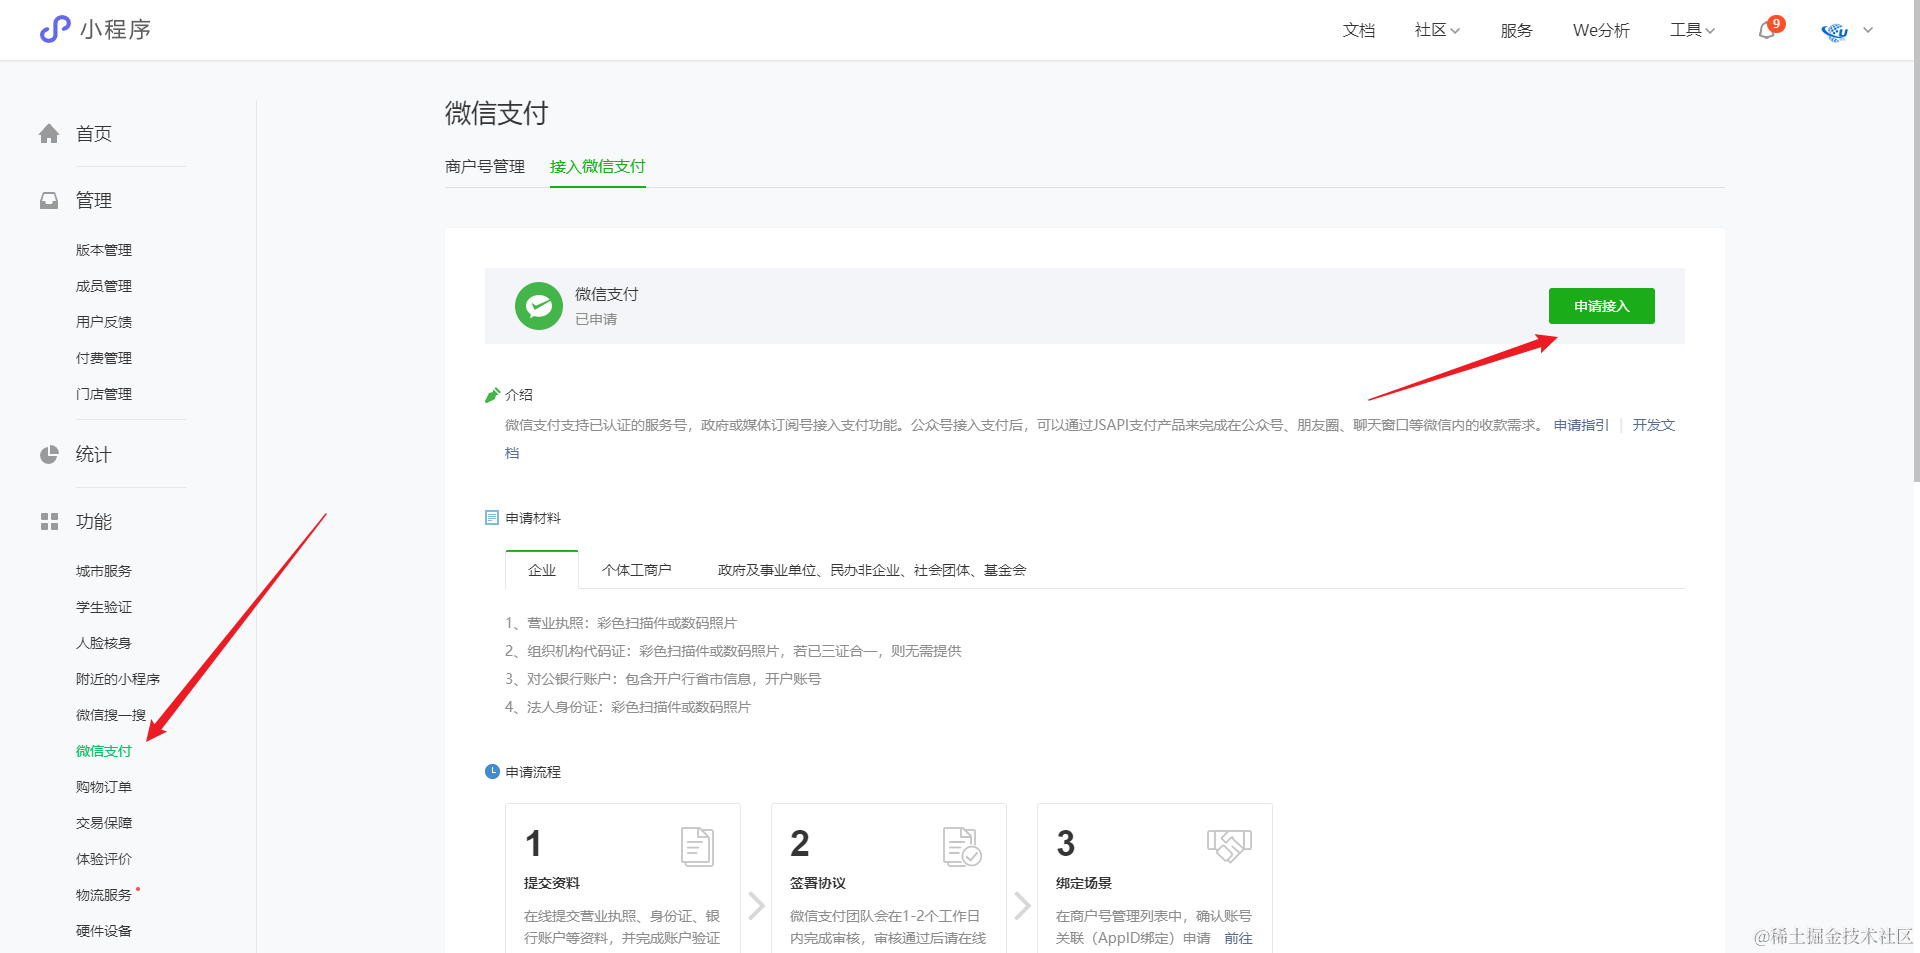
- 将小程序开通支付
- 微信支付接入指引
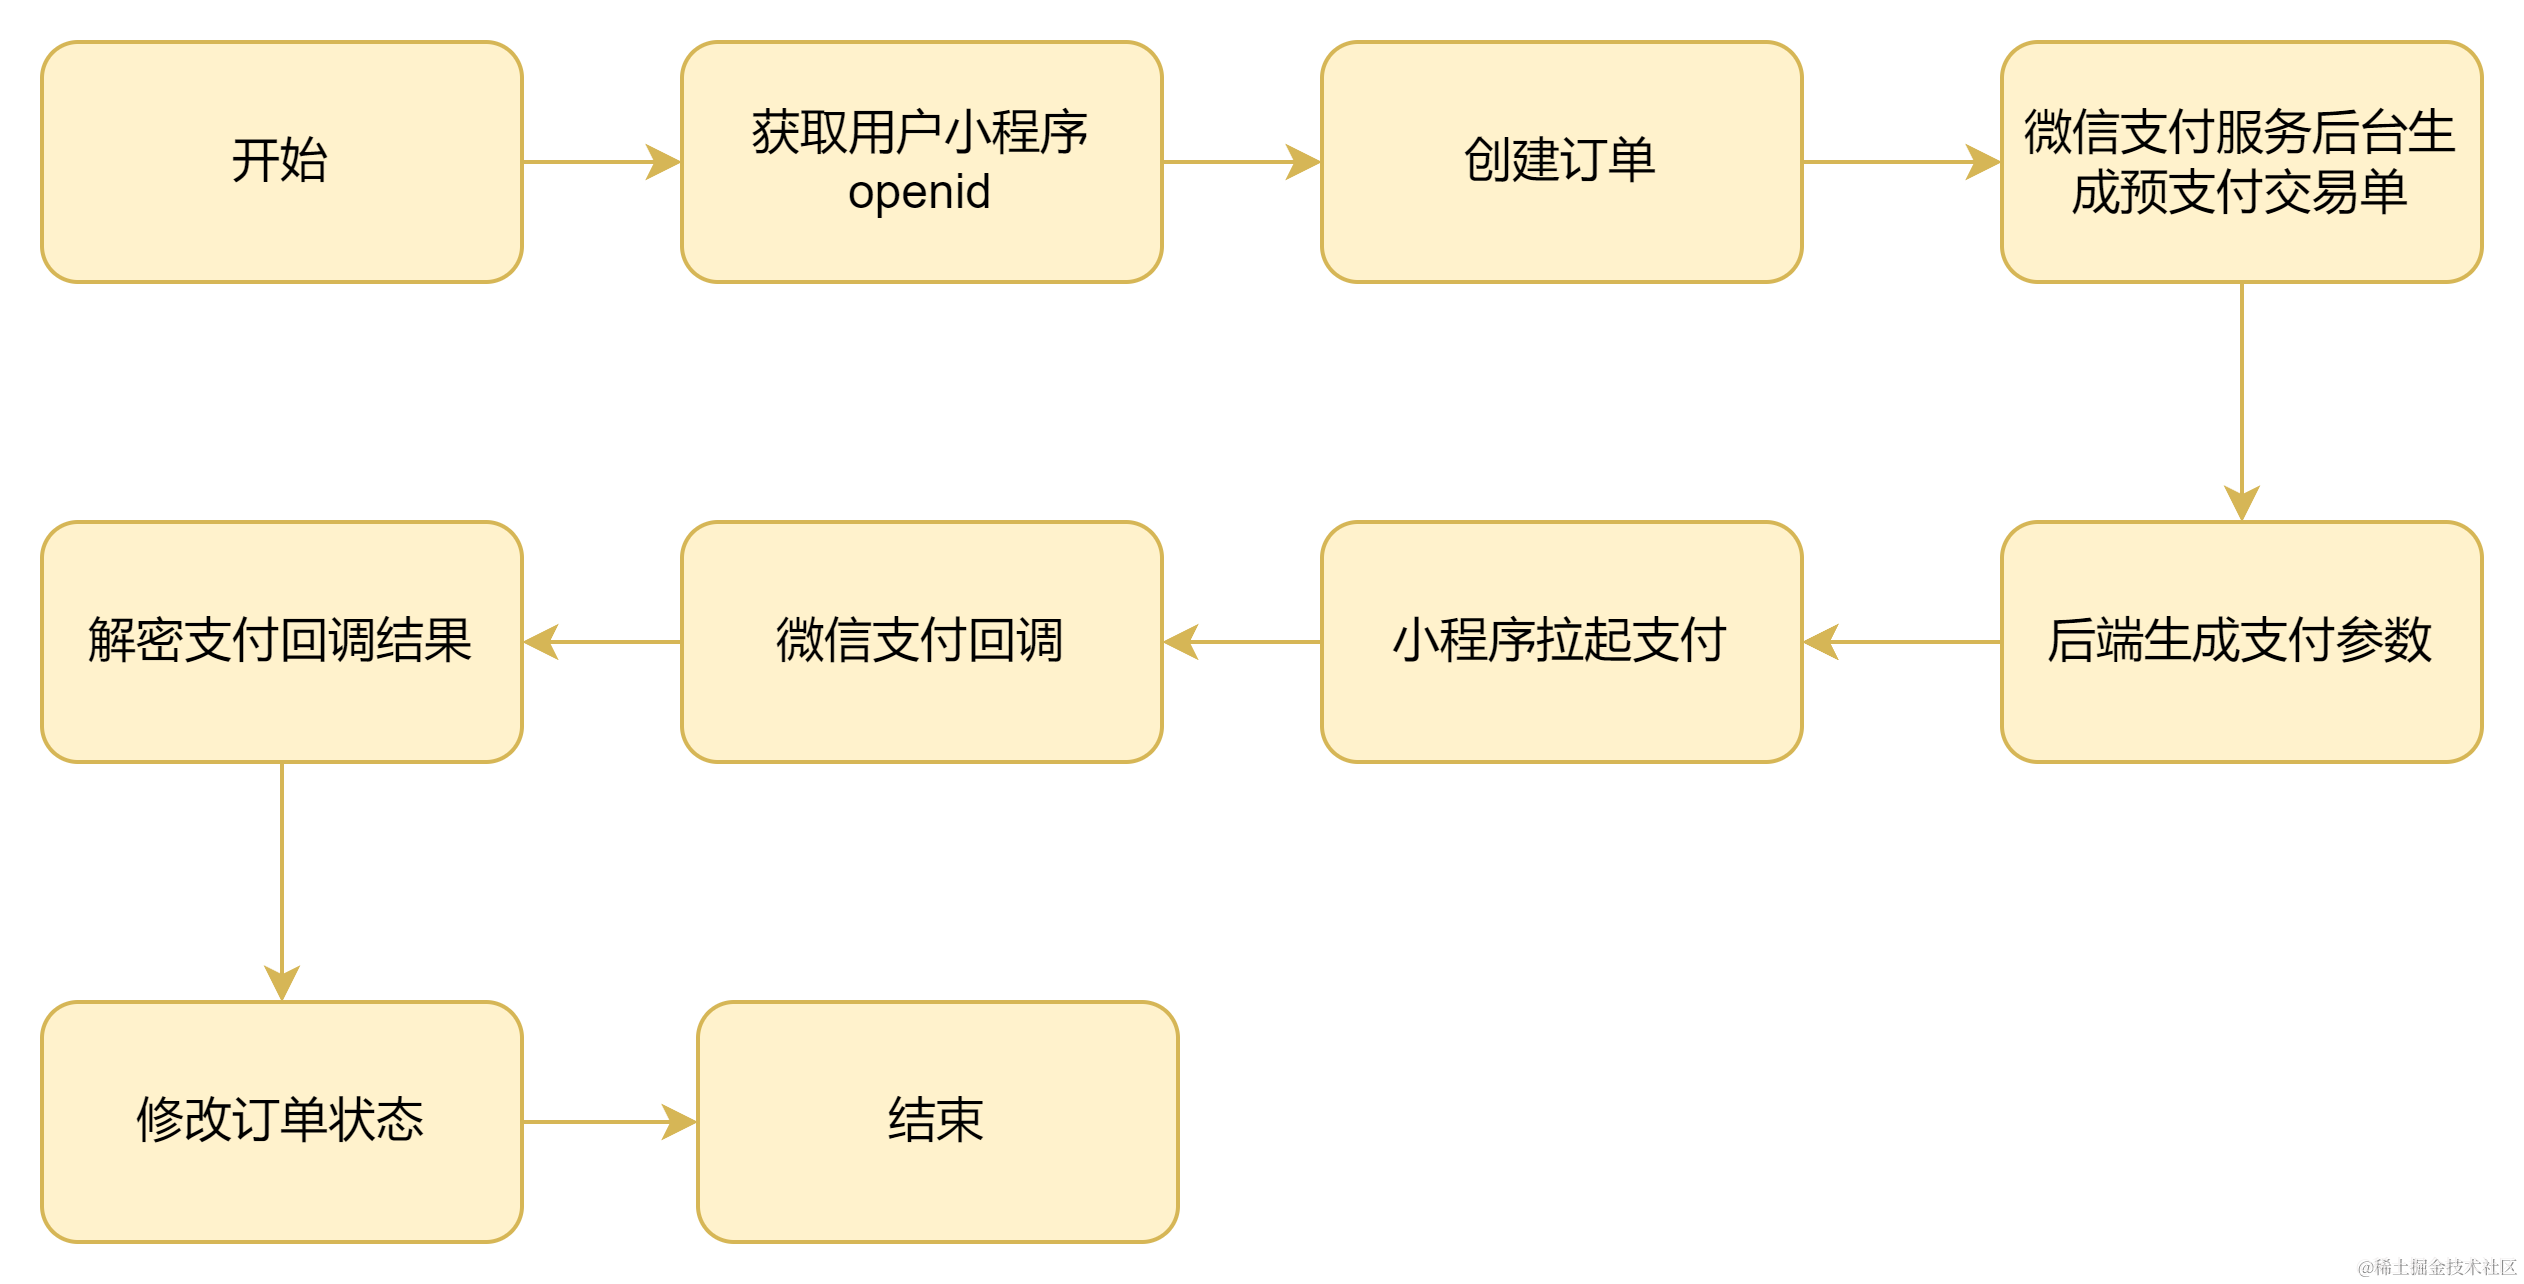
小程序支付逻辑全流程图解
获取用户小程序openid
一般获取用户小程序openid场景是放在首页默认登录或者登录页面进行,提前获取openid方便后面使用
获取用户openid需要两个步骤
- 用户登录 uni.login
uni.login({ success: res => { console.info(res); // 发送 res.code 到后端接口换取 openId, sessionKey } })- 后端获取openid,响应给前端 (需要使用前端的请求码code、小程序appid和密钥进行换取用户openid)
exports.getOpenId = [
    [body("code").notEmpty().withMessage('请求码不能为空.')],
    async (req, res, next) => {
        try {
            const errors = validationResult(req)
            if (!errors.isEmpty()) {
                return apiResponse.validationErrorWithData(res, "参数错误.", errors.array()[0].msg);
            }
            const {code} = req.body
            const tokenResponse = await axios.get(`https://api.weixin.qq.com/sns/jscode2session?appid=小程序的appid&secret=小程序的密钥&js_code=${code}&grant_type=authorization_code`);
            //openid类似: ocikq40Fkx8E96zSoDYOB74v5pK6
            return apiResponse.successResponseWithData(res, "获取openid成功.", tokenResponse.data);
        } catch (err) {
            next(err);
        }
    }
];
创建订单
这一步骤是创建我们自己的订单得到自定义的订单号,这方便我们系统的订单和微信后台的支付订单相关联查询,是必不可少的步骤
-
微信小程序进行下单生成订单信息
略 就简单的提交信息给后端生成订单存入数据库
-
后端实现小程序创建订单接口
/**
 * 小程序创建订单接口
 * @security JWT - 需要提供有效的访问令牌
 */
exports.ordersCreate = [
    tokenAuthentication,
    [
        body("phone").notEmpty().withMessage('手机号不能为空.'),
        body("packageType").notEmpty().withMessage('套餐类型不能为空.'),
        body("packageId").notEmpty().withMessage('套餐ID不能为空.'),
        body("rechargeAmount").notEmpty().withMessage('充值金额不能为空.'),
        body("openid").notEmpty().withMessage('openid不能为空.'),
        ...其他参数校验
    ],
    async (req, res, next) => {
        try {
            const errors = validationResult(req);
            if (!errors.isEmpty()) {
                return apiResponse.validationErrorWithData(res, "参数错误.", errors.array()[0].msg);
            }
            // 创建订单
            const orderInfo = await PhoneBillOrdersModel.create({
            ...req.body,
            orderNo: generateUniqueOrderNumber(), // 生成自定义的订单号 1708570774203JDX
            });
            return apiResponse.successResponseWithData(res, "创建订单成功.", orderInfo);
        } catch (err) {
            next(err);
        }
    }
];
开始正式支付前准备
- 参数申请
- 配置API key
- 下载并配置商户证书
微信支付v3开发准备
生成预支付交易单(开始正式支付获取到预支付标识:prepay_id)
生成预支付交易单文档:https://pay.weixin.qq.com/docs/merchant/apis/jsapi-payment/direct-jsons/jsapi-prepay.html
预支付请求地址:https://api.mch.weixin.qq.com/v3/pay/transactions/jsapi
这部分很重要步骤比较繁琐也容易出错
在请求 预支付地址 需要准备几个东西
- 微信支付商户号、获取商户API证书 (商户API证书的压缩包中包含了签名必需的私钥和商户证书)
- 构造签名串 (https://pay.weixin.qq.com/docs/merchant/development/interface-rules/signature-generation.html)
- 计算签名值 (对API证书进行SHA256 with RSA签名,并对签名结果进行Base64编码得到签名值)
- 设置HTTP头 (微信支付商户API v3要求请求通过HTTP Authorization头来传递签名)
因为官方文档并没有给出Nodejs的相关示例
下面我以 Nodejs来实现调用预支付接口
- 微信支付商户号、获取商户API证书
- 商户号在微信支付平台获取 例如:1900009191
- 获取商户API证书 在微信支付平台获取压缩包解压出来 例如:apiclient_key.pem
- 构造签名串
构造签名串:签名串一共有五行,每一行为一个参数。结尾以\n(换行符,ASCII编码值为0x0A)结束,包括最后一行。如果参数本身以\n结束,也需要附加一个\n
HTTP请求方法\n
URL\n
请求时间戳\n
请求随机串\n
请求报文主体\n
// 构造签名串 let signStr = `${method}\n${url}\n${timestamp}\n${nonce_str}\n${JSON.stringify(order)}\n`;- 计算签名值
计算签名值:对API证书(商户私钥)对 待签名串(上面构造的签名串) 进行SHA256 with RSA签名,并对签名结果进行Base64编码得到签名值
/** * 微信支付v3 下单签名值生成 * @param {string} pem pem证书名称 * @param {string} method 请求方法 * @param {string} url 微信小程序下单官方api * @param {number} timestamp 时间戳 秒级 * @param {string} nonce_str 随机字符串 * @param {Object} order 主体(订单)信息 */ function createOrderSign(pem,method, url, timestamp, nonce_str, order) { // 签名串 let signStr = `${method}\n${url}\n${timestamp}\n${nonce_str}\n${JSON.stringify( order )}\n`; // 读取API证书文件内容 apiclient_key.pem的内容 let cert = fs.readFileSync(`./pems/files/${pem}`, "utf-8"); // 创建使用 RSA 算法和 SHA-256 散列算法的签名对象 let sign = crypto.createSign("RSA-SHA256"); // 对签名串进行加密处理 sign.update(signStr); return sign.sign(cert, "base64"); }- 设置HTTP头
微信支付商户API v3要求请求通过HTTP Authorization头来传递签名。Authorization由认证类型和签名信息两个部分组成。
Authorization: 认证类型 签名信息
具体组成为:
-
认证类型,目前为 WECHATPAY2-SHA256-RSA2048
-
签名信息
- 发起请求的商户(包括直连商户、服务商或渠道商)的商户号mchid
- 商户API证书序列号serial_no,用于声明所使用的证书 (apiclient_key.pem 里面的序列号(获取方法有很多 https://www.yesdotnet.com/archive/post/1621531570.html))
- 请求随机串nonce_str
- 时间戳timestamp
- 签名值signature
// 生成随机字符串 function generateNonceStr(len) { let data = "ABCDEFGHJKMNPQRSTWXYZabcdefhijkmnprstwxyz2345678"; let str = ""; for (let i = 0; i正式请求 预支付接口
/** * 微信支付v3 支付信息获取交易会话标识 prepay_id * @param {Object} order 主体信息 * @param notifyUrl 回调地址 https://qy.xxx.com/v1/payment/wx/success 下面有具体实现方式 */ exports.getPrepayInfo = async function (order,notifyUrl) { let timestamp = Math.floor(new Date().getTime() / 1000); let nonce_str = generateNonceStr(32); const ac = await getThirdKeys() let wxOrderInfo = { mchid:商户号, appid:小程序appid, notify_url:notifyUrl, // 回调地址 这里需要我们自行实现用来接收支付结果信息 out_trade_no: order.orderNo, // 上面创建的订单的订单号 我们自己自定义的 description: order.description,// 商品描述 amount: { total: order.amount, // 单位为分 currency: "CNY" }, payer: { openid: order.openid // 用户的openid } } let signature = createOrderSign( ac.pem, "POST", "/v3/pay/transactions/jsapi", timestamp, nonce_str, wxOrderInfo ); let Authorization = `WECHATPAY2-SHA256-RSA2048 mchid="${ac.mchid}",nonce_str="${nonce_str}",timestamp="${timestamp}",signature="${signature}",serial_no="${ac.serial_no}"`; // 拿到 "prepay_id": "wx26112221580621e9b071c00d9e993b00666" return await axios.post("https://api.mch.weixin.qq.com/v3/pay/transactions/jsapi", wxOrderInfo, { headers: {Authorization: Authorization}, }) }后端生成支付参数
后端生成支付参数响应给前端小程序进行拉起支付
/** * 微信支付v3 付款签名生成支付参数 * @param {string} prepay_id 预支付交易会话标识 */ exports.createPaySign =async function (prepay_id) { let timeStamp = (Math.floor(new Date().getTime() / 1000)).toString(); let nonceStr = generateNonceStr(32); const ac = await getThirdKeys() let signStr = `${ac.appid}\n${timeStamp}\n${nonceStr}\nprepay_id=${prepay_id}\n`; let cert = fs.readFileSync(`./pems/files/${ac.pem}`, "utf-8"); let sign = crypto.createSign("RSA-SHA256"); sign.update(signStr); return { paySign: sign.sign(cert, "base64"), timestamp: timeStamp, nonce_str: nonceStr, signType: 'RSA', package: 'prepay_id=' + prepay_id }; }小程序拉起支付
// 从后端获取到支付参数(上面 createPaySign 生成的数据) phoneWxRequest(that.form).then(res => { wx.requestPayment({ provider: 'wxpay', timeStamp: res.timestamp, nonceStr: res.nonce_str, package: res.package, signType: res.signType, paySign: res.paySign, success(res) { uni.showModal({ title: '提示', content: '支付成功!', showCancel: false, success: function(res) { if (res.confirm) { uni.switchTab({ url: '/pages/index/index' }) } } }); }, fail(err) { uni.switchTab({ url: '/pages/index/index' }) console.log('fail:' + JSON.stringify(err)); } }); })微信支付回调 (会多次调用)
微信支付通过支付通知接口将用户支付成功消息通知给商户。
https://pay.weixin.qq.com/docs/merchant/apis/jsapi-payment/payment-notice.html
回调URL: 该链接是通过基础下单接口中的请求参数“notify_url”来设置的,要求必须为HTTPS地址。请确保回调URL是外部可正常访问的,且不能携带后缀参数,否则可能导致商户无法接收到微信的回调通知信息。回调URL示例:“https://qy.xxx.com/v1/payment/wx/success”
具体接口实现
- 验证签名
微信支付会对发送给商户的通知进行签名,并将签名值放在通知的HTTP头Wechatpay-Signature。商户应当验证签名,以确认请求来自微信,而不是其他的第三方。签名验证的算法请参考 《微信支付API v3签名验证》。
- 参数解密
/** * 微信支付v3 支付通知回调参数解密 * resource 为 回调回来的参数 */ exports.decodePayNotify =async function (resource) { try { const AUTH_KEY_LENGTH = 16; // ciphertext = 密文,associated_data = 填充内容, nonce = 位移 const { ciphertext, associated_data, nonce } = resource; // 密钥 const ac = await getThirdKeys() const key_bytes = Buffer.from(ac.key, 'utf8'); // 位移 const nonce_bytes = Buffer.from(nonce, 'utf8'); // 填充内容 const associated_data_bytes = Buffer.from(associated_data, 'utf8'); // 密文Buffer const ciphertext_bytes = Buffer.from(ciphertext, 'base64'); // 计算减去16位长度 const cipherdata_length = ciphertext_bytes.length - AUTH_KEY_LENGTH; // upodata const cipherdata_bytes = ciphertext_bytes.slice(0, cipherdata_length); // tag const auth_tag_bytes = ciphertext_bytes.slice(cipherdata_length, ciphertext_bytes.length); const decipher = crypto.createDecipheriv( 'aes-256-gcm', key_bytes, nonce_bytes ); decipher.setAuthTag(auth_tag_bytes); decipher.setAAD(Buffer.from(associated_data_bytes)); const output = Buffer.concat([ decipher.update(cipherdata_bytes), decipher.final(), ]); // 解密后 转成 JSON 格式输出 return JSON.parse(output.toString('utf8')); } catch (error){ console.error('解密错误:', error); return null; } }回调接口具体实现
/** * 微信支付回调 * @param {Object} req - 请求对象,包含查询参数 * url https://qy.xxx.com/v1/payment/wx/success */ exports.paymentSuccess = [ async (req, res, next) => { try { let result = req.body // 解密微信支付成功后的订单信息 const deInfo = await decodePayNotify(result.resource) if (!deInfo) { console.log('支付回调解析失败',deInfo) logger.error(`支付回调解析失败: ${JSON.stringify(deInfo)}`); return res.status(200).json({code: 'SUCCESS', message: '成功'}); } //***** 对订单修改或者其他业务逻辑即可 //***** return res.status(200).json({code: 'SUCCESS', message: '成功'}); } catch (err) { res.status(500).json({code: 'FAIL', message: '失败'}); } } ];结束
微信小程序支付全流程大概就这些,有不对不清楚的地方欢迎指正哦
- 我的主页:https://www.zhouyi.run
- 码云:https://gitee.com/Z568_568
-
- 后端获取openid,响应给前端 (需要使用前端的请求码code、小程序appid和密钥进行换取用户openid)


