
c# 开发串口调试助手 Visual Studio 2019
一、串口调试工具作用
串口调试助手是用于在开发、测试和调试串口通信应用程序时进行串口数据的监视和交互的工具。它通常具有以下功能:
1. 串口参数设置:允许用户设置串口的波特率、数据位、校验位、停止位等参数。
2. 串口连接管理:允许用户打开、关闭串口连接。
3. 数据发送:允许用户手动输入或从文件中加载数据,并通过串口发送到目标设备。
4. 数据接收:显示从串口接收到的数据,并支持数据的解析和显示。
5. 数据记录:允许用户将接收到的数据保存到文件中以供后续分析和查看。
6. 数据分析:提供数据格式化、解析和显示的功能,便于用户理解和分析串口通信数据。
7. 数据监视:实时监视串口通信数据,包括发送和接收的数据量、速率等信息。
8. 自定义操作:支持用户自定义脚本或命令,以便执行特定的串口操作或测试。
总的来说,串口调试助手是串口通信开发过程中的一个重要辅助工具,能够帮助开发人员进行串口通信的测试、调试和分析。
二、开发工具
语言:C# 开发环境:Visual Studio 2019
三、开发步骤
1. 界面设计
- 使用 Windows Forms 或 WPF 进行界面设计。
- 设计包含串口参数设置、数据发送、数据接收、数据显示等功能的用户界面。
2. 串口通信
- 使用 `System.IO.Ports` 命名空间中的 `SerialPort` 类进行串口通信。
- 实现串口的打开、关闭、参数设置等功能。
- 监听串口数据的接收事件,并进行相应的处理。
3. 数据发送
- 提供文本框或其他输入控件,允许用户手动输入待发送的数据。
- 实现发送按钮点击事件,将数据通过串口发送。
4. 数据接收与显示
- 使用串口的 DataReceived 事件来监听串口数据的接收。
- 将接收到的数据显示在界面上的文本框或数据显示控件中。
- 可以对接收到的数据进行解析、格式化,方便用户阅读。
5. 数据记录与保存
- 提供数据记录功能,允许用户将接收到的数据保存到文件中。
- 实现保存按钮点击事件,将接收到的数据写入到指定的文件中。
6. 其他功能
- 支持设置串口的波特率、数据位、校验位、停止位等参数。
- 提供数据的清除、停止接收、清空接收缓存等功能。
- 支持用户自定义脚本或命令,执行特定的串口操作。
四、开发流程
1.创建工程
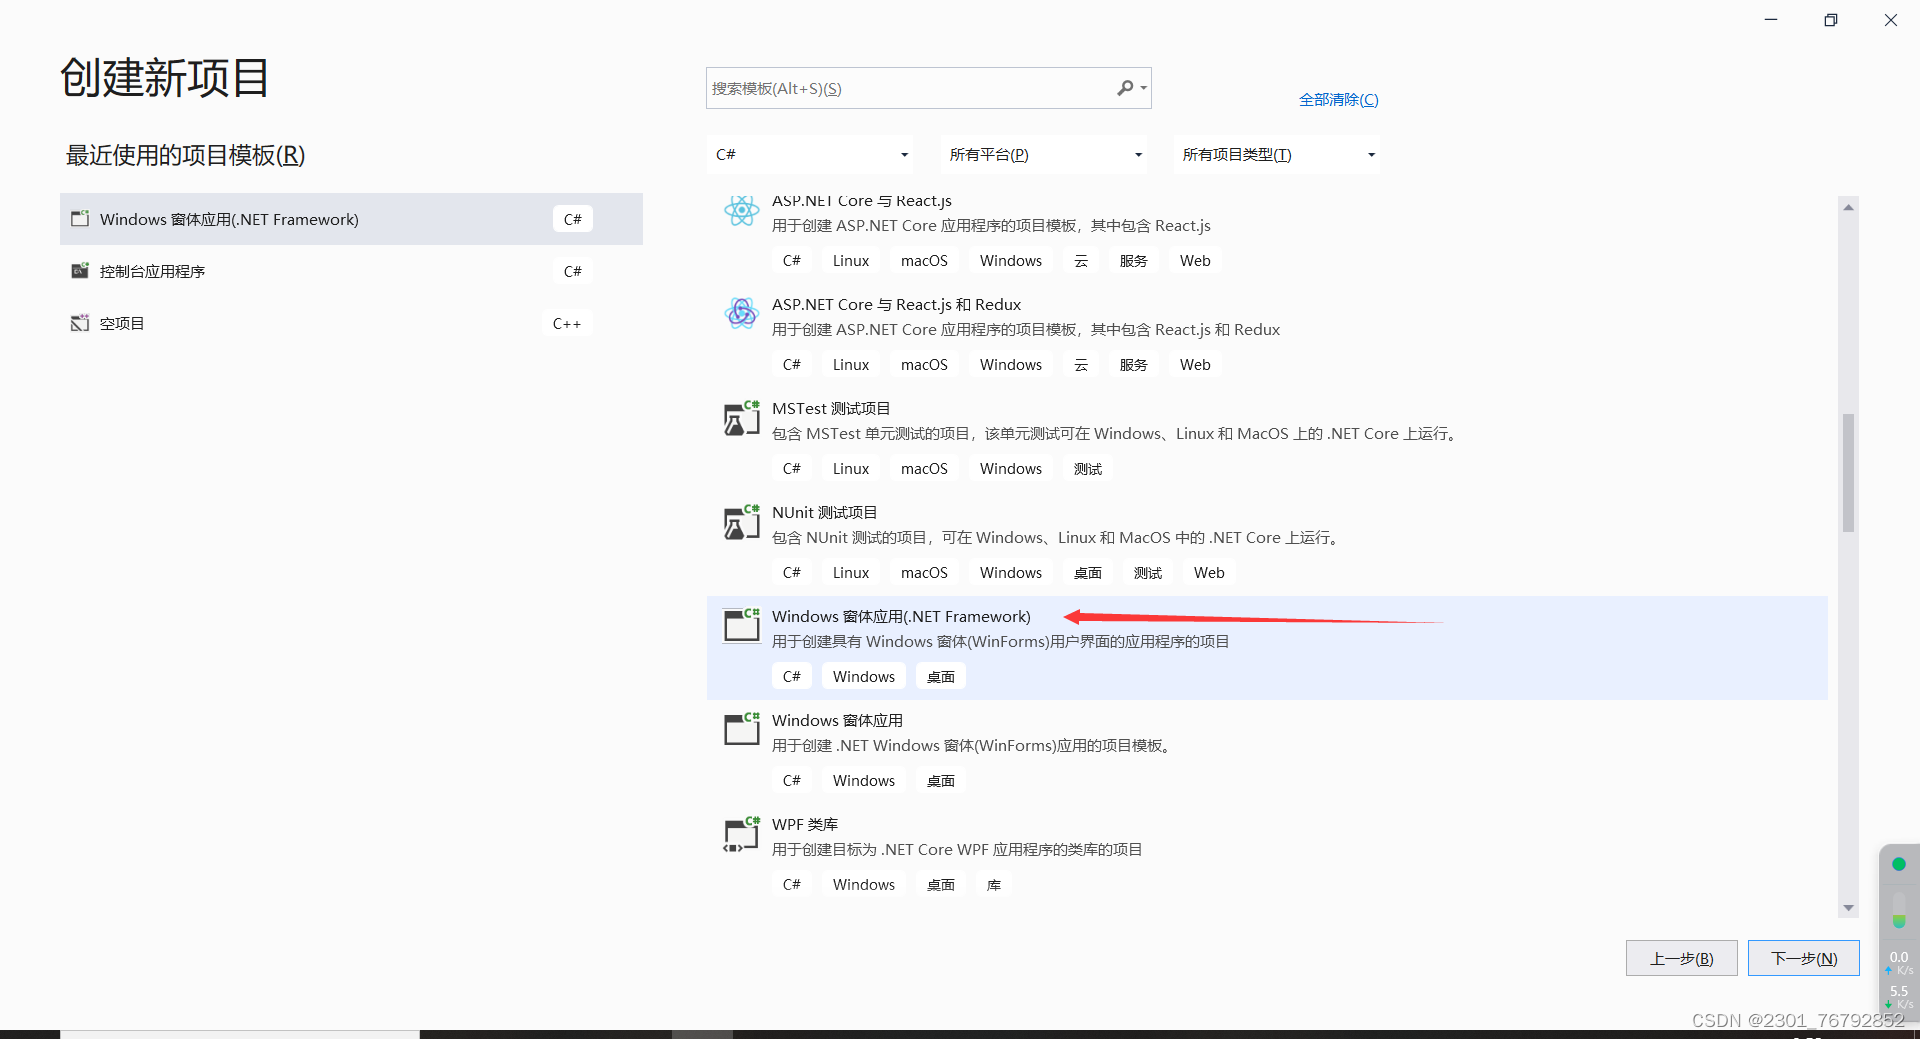
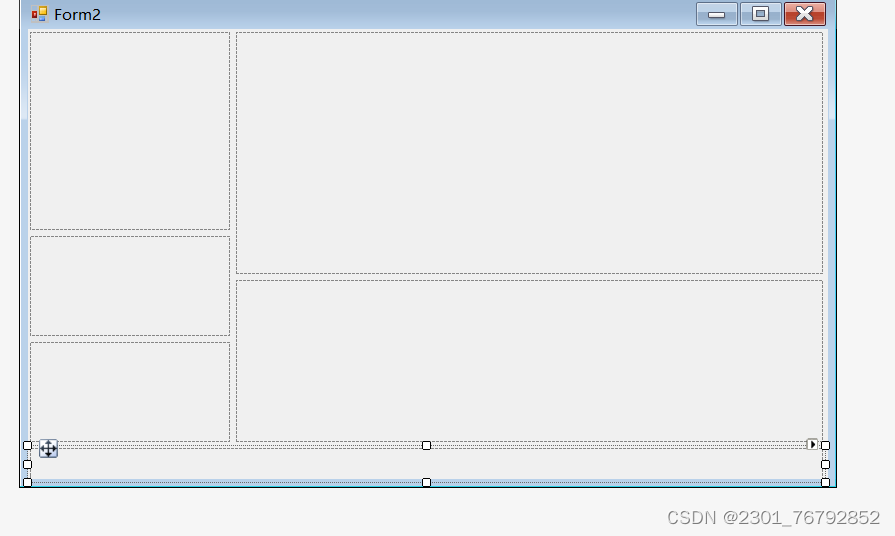
2.添加Panel控件
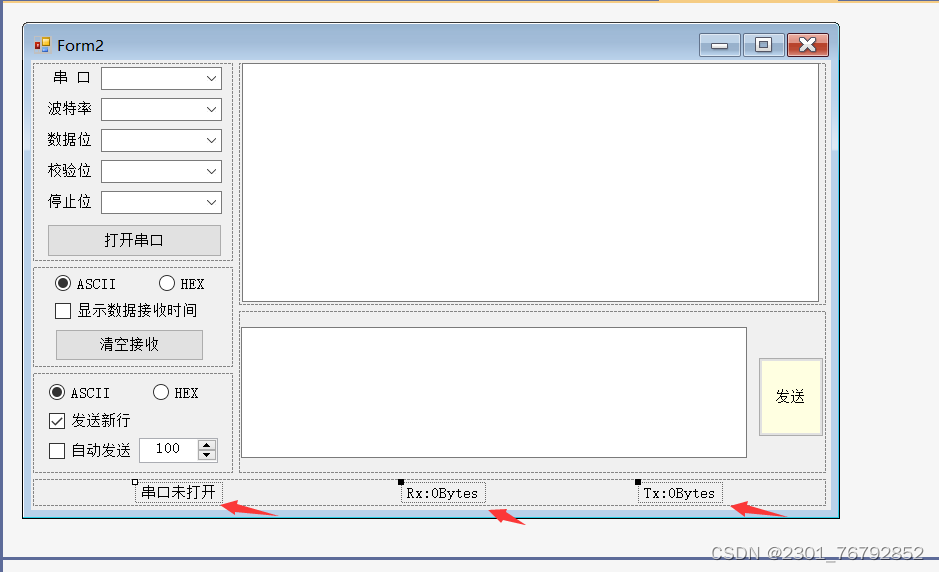
①.添加容器Panel,将页面分为6个页面,分别为串口配置窗口、接收区配置窗口、发送区配置窗口、接收数据显示窗口、发送数据编辑窗口、数据接收发送字节大小窗口。
②.实际运行效果,你会发现并没有边界线,这样后续视觉效果就会很差。
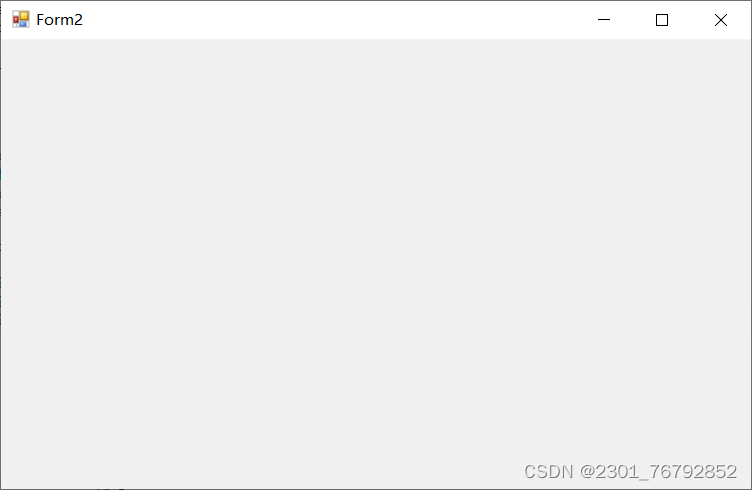
将添加边界线程序加在对应容器函数里面即可,记得修改panelx,x对应的是容器编号。
ControlPaint.DrawBorder(e.Graphics, panel1.ClientRectangle,
            Color.Black, 1, ButtonBorderStyle.Solid, //左边
            Color.Black, 1, ButtonBorderStyle.Solid, //上边
            Color.Black, 1, ButtonBorderStyle.Solid, //右边
            Color.Black, 1, ButtonBorderStyle.Solid);//底边
加上边界线程序效果如下:

3.添加控件label和comboBox
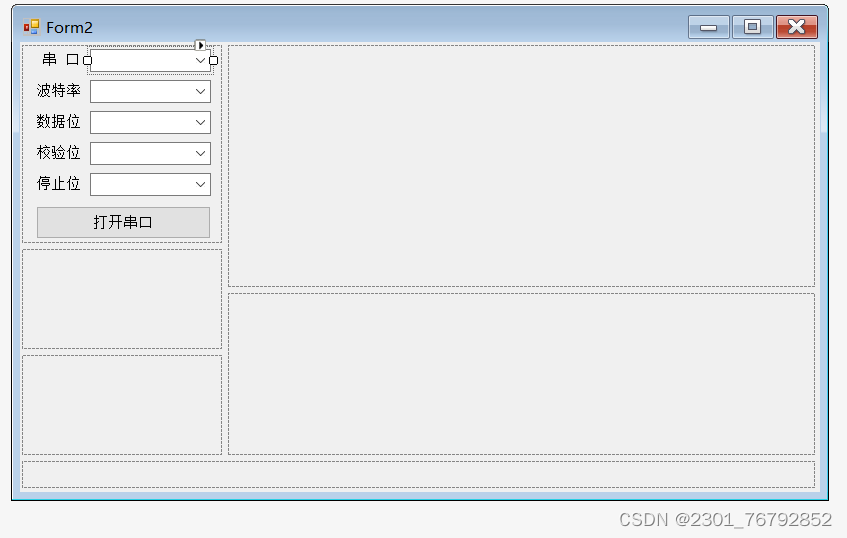
添加下拉数据:
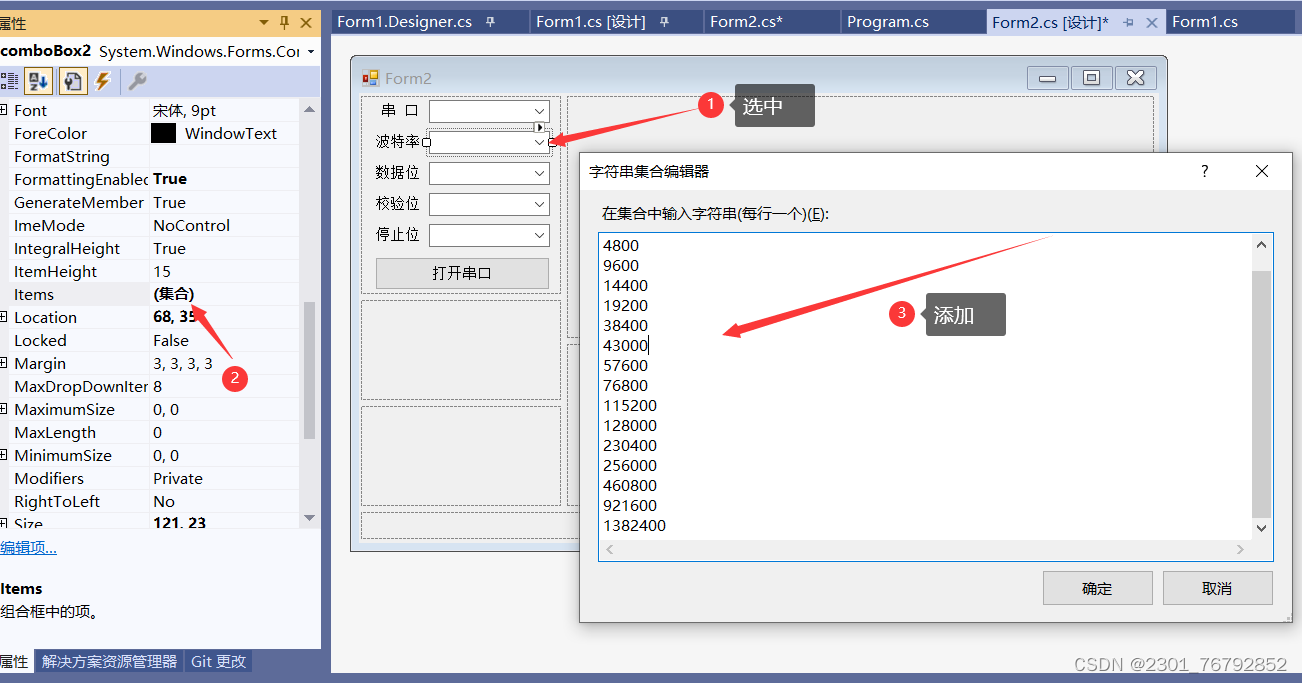
同理在数据位下拉列表里面添加5、6、7、8;在校验位下拉列表里面添加无、奇校验、偶校验;在停止位下拉列表里面添加1、1.5、2;
4.添加初始化程序
双击窗口,在Form2_Load函数里面添加初始化程序
private void Form2_Load(object sender, EventArgs e)
        {
            string[] ports = System.IO.Ports.SerialPort.GetPortNames();//获取电脑上可用串口号
            comboBox1.Items.AddRange(ports);//给comboBox1添加数据
            comboBox1.SelectedIndex = comboBox1.Items.Count > 0 ? 0 : -1;//如果里面有数据,显示第0个
            comboBox2.Text = "115200";/*默认波特率:115200*/
            comboBox3.Text = "1";/*默认停止位:1*/
            comboBox4.Text = "8";/*默认数据位:8*/
            comboBox5.Text = "无";/*默认奇偶校验位:无*/
        }
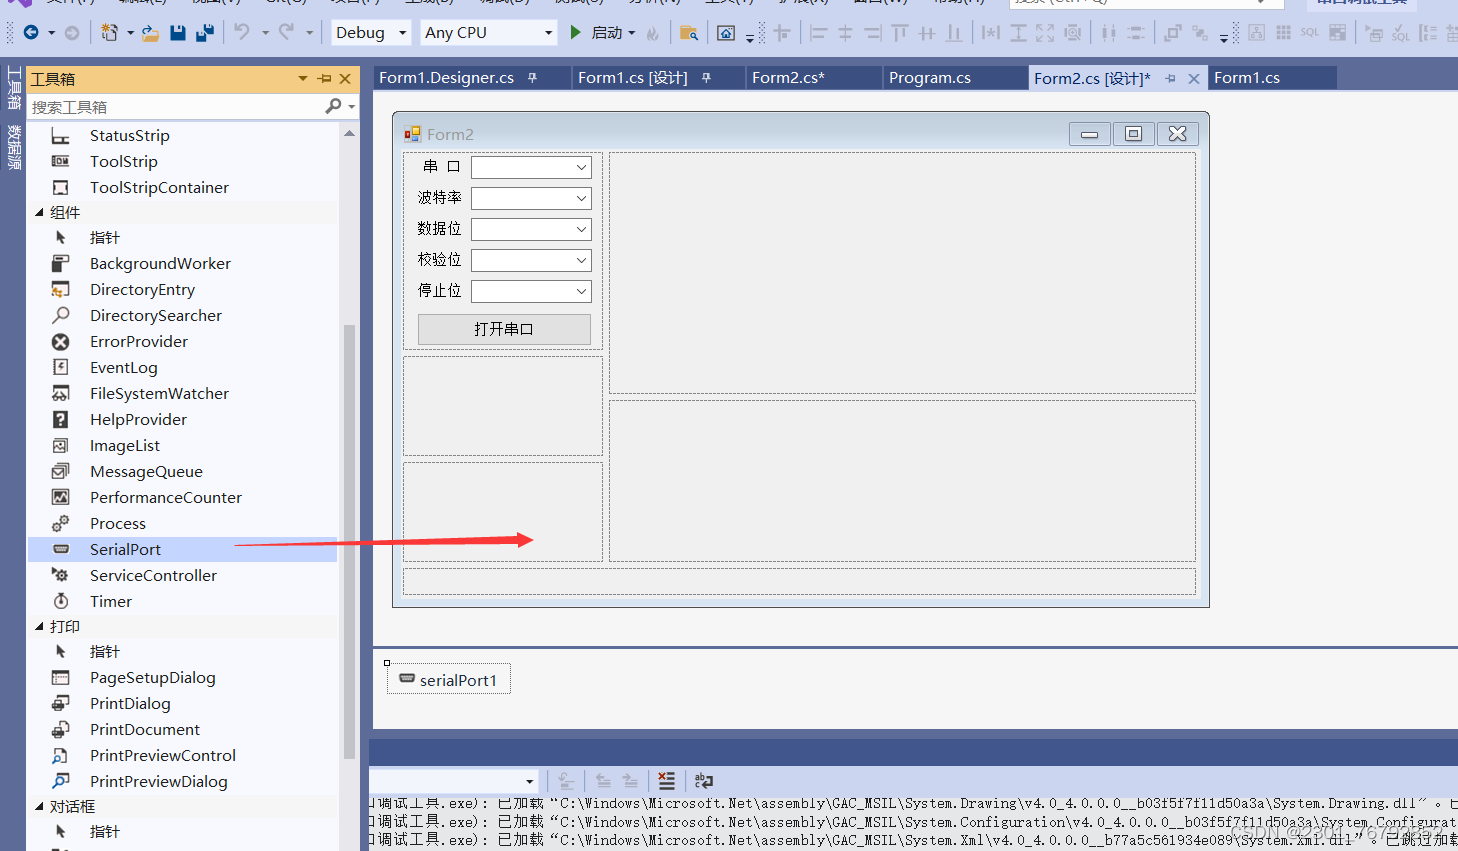
5.添加串口控件
6.添加打开串口控件程序
双击打开串口按键,添加程序
private void button1_Click(object sender, EventArgs e)
        {
            if (button1.Text == "打开串口")
            {//如果按钮显示的是打开串口
                try
                {//防止意外错误
                    serialPort1.PortName = comboBox1.Text;//获取comboBox1要打开的串口号
                    serialPort1.BaudRate = int.Parse(comboBox2.Text);//获取comboBox2选择的波特率
                    serialPort1.DataBits = int.Parse(comboBox4.Text);//设置数据位
                    /*设置停止位*/
                    if (comboBox3.Text == "1") { serialPort1.StopBits = StopBits.One; }
                    else if (comboBox3.Text == "1.5") { serialPort1.StopBits = StopBits.OnePointFive; }
                    else if (comboBox3.Text == "2") { serialPort1.StopBits = StopBits.Two; }
                    /*设置奇偶校验*/
                    if (comboBox5.Text == "无") { serialPort1.Parity = Parity.None; }
                    else if (comboBox5.Text == "奇校验") { serialPort1.Parity = Parity.Odd; }
                    else if (comboBox5.Text == "偶校验") { serialPort1.Parity = Parity.Even; }
                    serialPort1.Open();//打开串口
                    button1.BackColor = Color.FromArgb(194, 178, 128);
                    button1.Text = "关闭串口";//按钮显示关闭串口
                }
                catch (Exception err)
                {
                    MessageBox.Show("打开失败" + err.ToString(), "提示!");//对话框显示打开失败
                }
            }
            else
            {//要关闭串口
                try
                {//防止意外错误
                    serialPort1.Close();//关闭串口
                }
                catch (Exception) { }
                button1.Text = "打开串口";//按钮显示打开
                button1.BackColor = Color.Transparent;
            }
        }
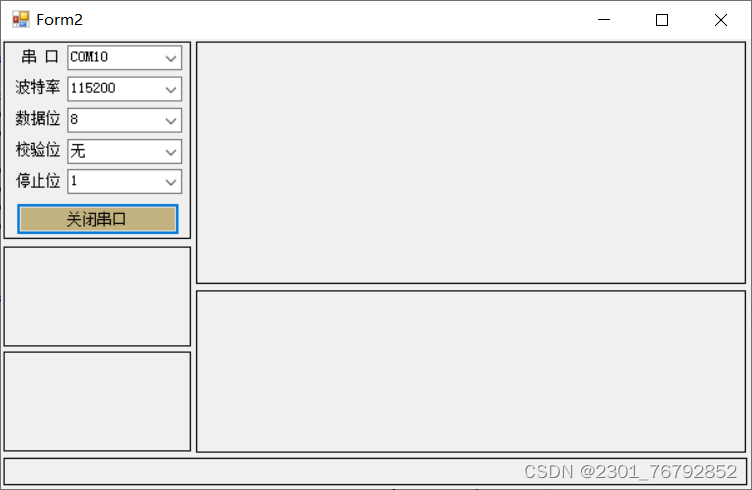
运行效果如下图
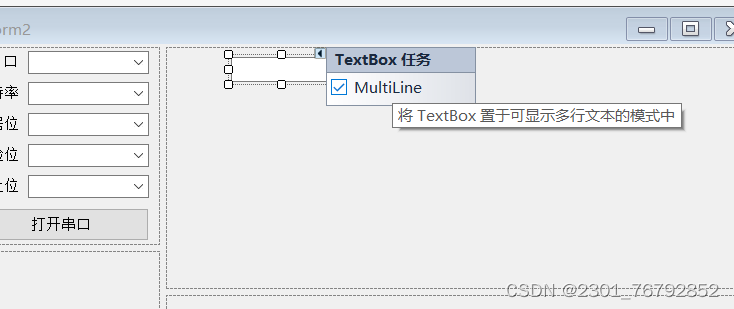
6.添加接收区控件textBox,勾选MultiLine,勾选后,拖拽为合适的大小
7.选择serialPort1 -> 选择事件 -> 双击DataReceived
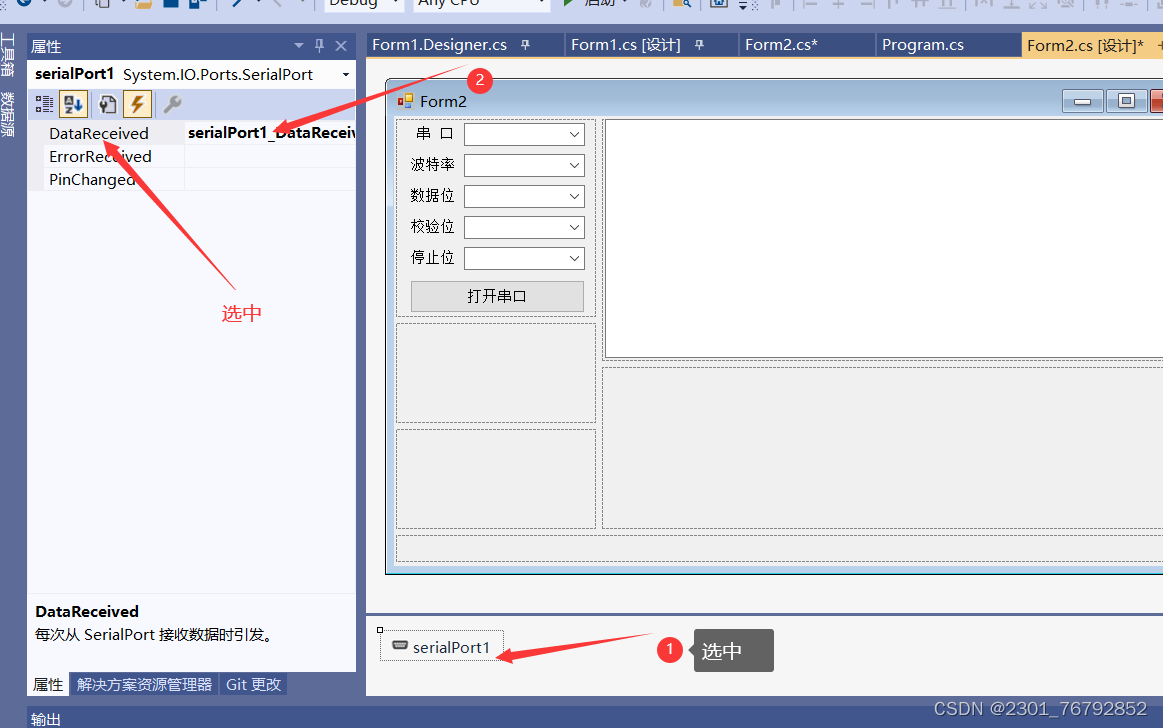
在函数serialPort1_DataReceived添加接收数据程序
private void serialPort1_DataReceived(object sender, SerialDataReceivedEventArgs e)
        {
            int len = serialPort1.BytesToRead;//获取可以读取的字节数
            byte[] buff = new byte[len];//创建缓存数据数组
            serialPort1.Read(buff, 0, len);//把数据读取到buff数组
            string str = Encoding.Default.GetString(buff);//Byte值根据ASCII码表转为 String
            Invoke((new Action(() => //C# 3.0以后代替委托的新方法
            {
                textBox1.AppendText(str);//对话框追加显示数据
            })));
        }
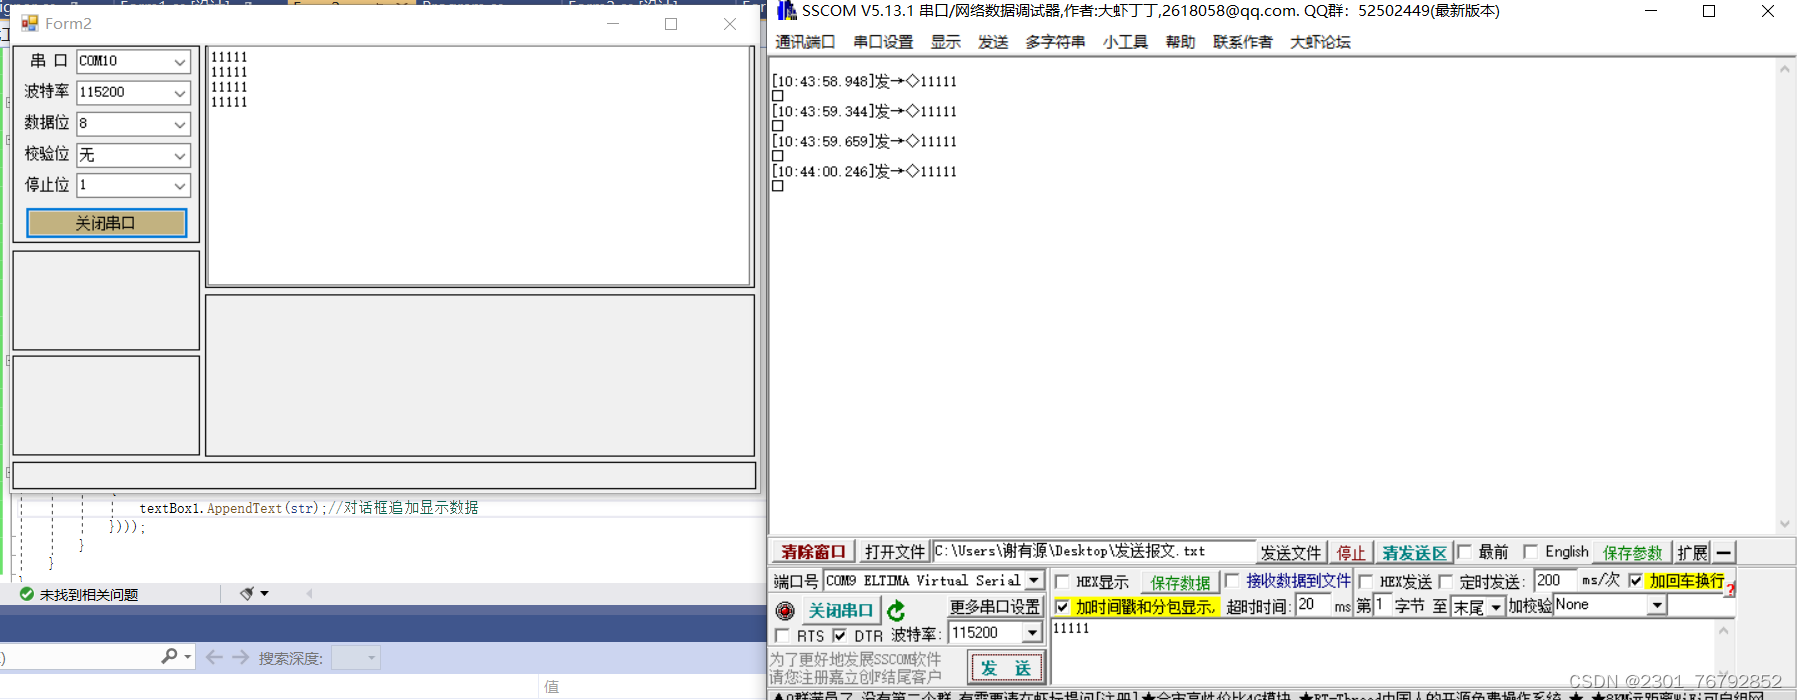
接下来就可以测试一下,我这里是通过虚拟串口工具(Virtual Serial Port Driver)添加了两个虚拟串口,我这里是添加的COM9和COM10;测试效果如下
但是会发现发送HEX数据会出现乱码的现象
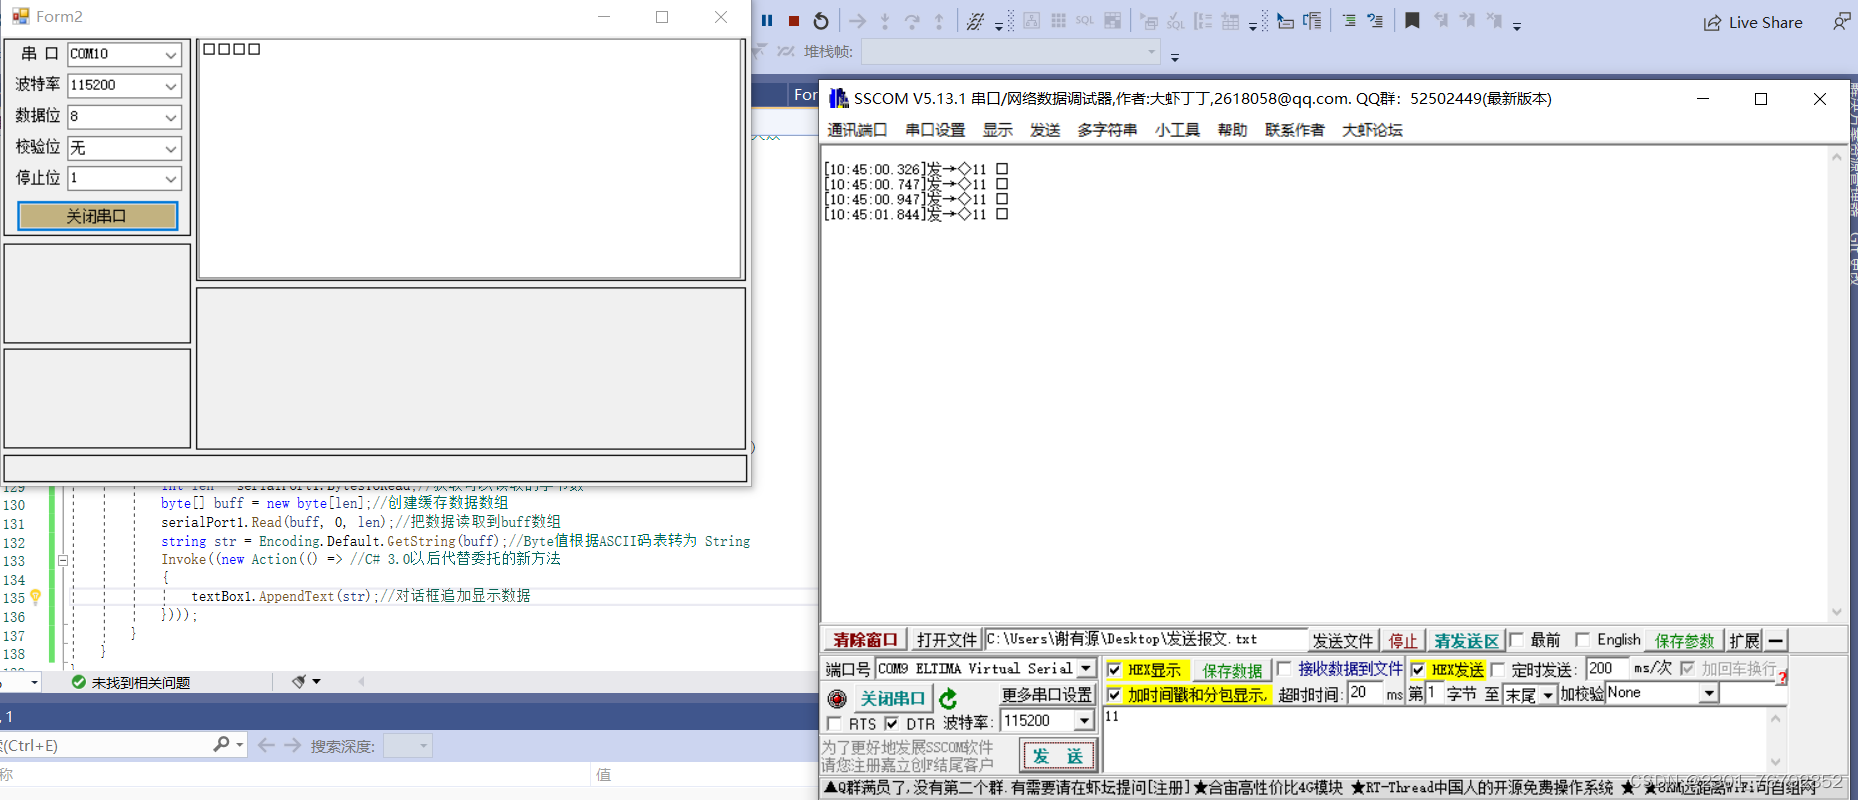
出现乱码是因为这里接收的是ASCII,ASCII码表中显示的字符是乱码 ,所以这里需要加一个将字节转换为HEX函数
public static string byteToHexStr(byte[] bytes)
{
string returnStr = "";
try
{
if (bytes != null)
{
for (int i = 0; i
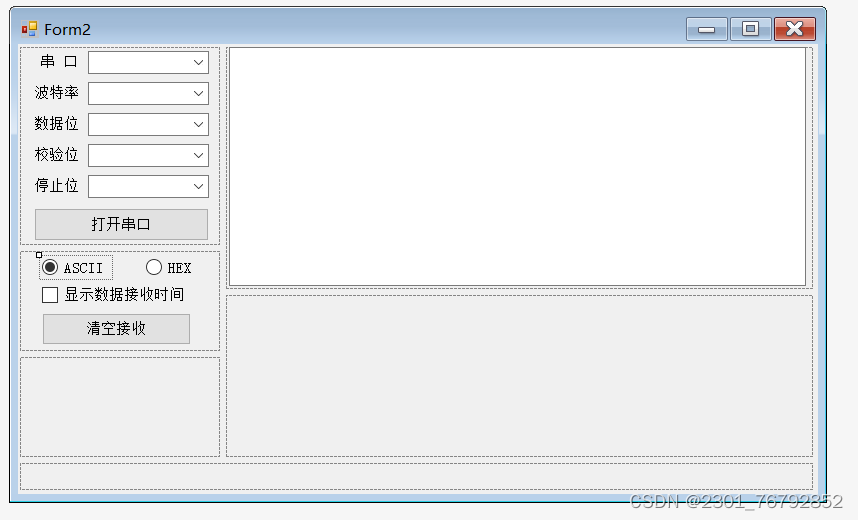
8.添加ASCII和HEX接收选择控件radioButton
将ASCII控件默认勾选Checked->true
添加获取时间程序
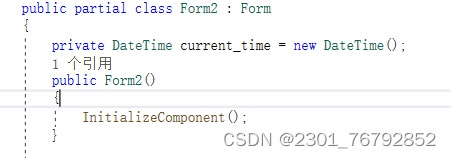
private DateTime current_time = new DateTime();
在serialPort1_DataReceived函数中添加选择ASCII和HEX控件和显示数据接收时间程序
private void serialPort1_DataReceived(object sender, SerialDataReceivedEventArgs e)
{
int len = serialPort1.BytesToRead;//获取可以读取的字节数
byte[] buff = new byte[len];//创建缓存数据数组
serialPort1.Read(buff, 0, len);//把数据读取到buff数组
string str = Encoding.Default.GetString(buff);//Byte值根据ASCII码表转为 String
Invoke((new Action(() => //C# 3.0以后代替委托的新方法
{
current_time = System.DateTime.Now;
if (radioButton2.Checked)
{
if (checkBox1.Checked)
{
textBox1.AppendText("[" + current_time.ToString("yyyy-MM-dd HH:mm:ss") + "]收→" + byteToHexStr(buff) + "\r\n");//对话框追加显示数据
}
else
{
textBox1.AppendText(byteToHexStr(buff) + "\r\n");
}
}
else if (radioButton1.Checked)
{
if (checkBox1.Checked)
{
textBox1.AppendText("[" + current_time.ToString("yyyy-MM-dd HH:mm:ss") + "]收→" + Encoding.Default.GetString(buff));
}
else
{
textBox1.AppendText(Encoding.Default.GetString(buff));
}
}
})));
}
测试效果如下图

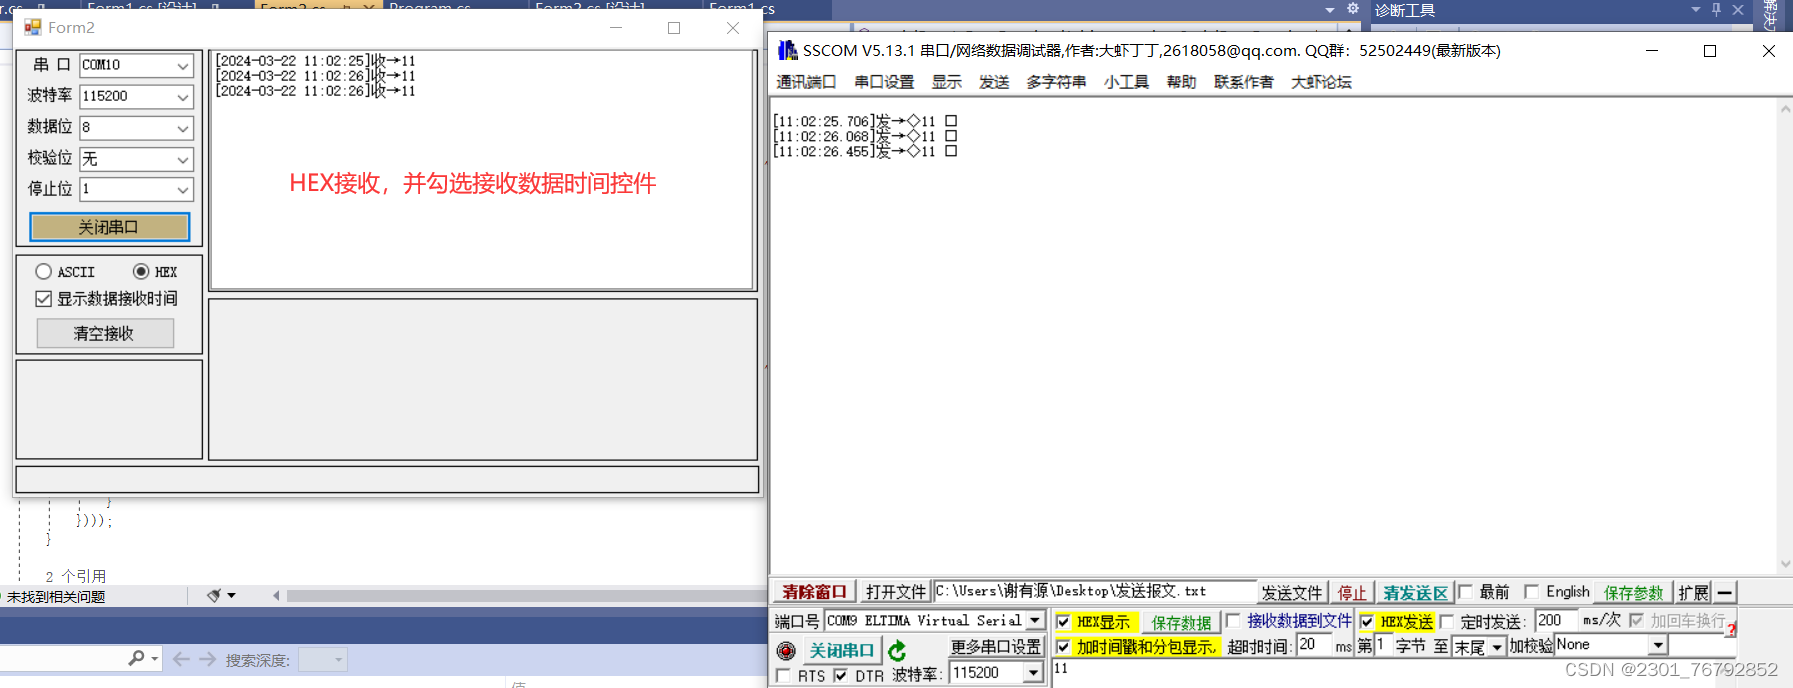
9.添加清除接收程序
双击清除接收控件
private void button3_Click(object sender, EventArgs e)
{
textBox1.Clear();
}
10.添加发送控件

双击发送控件,添加发送函数
private void button2_Click(object sender, EventArgs e)
{
String Str = textBox2.Text.ToString();//获取发送文本框里面的数据
try
{
if (Str.Length > 0)
{
serialPort1.Write(Str);//串口发送数据
}
}
catch (Exception) { }
}
测试效果如下图
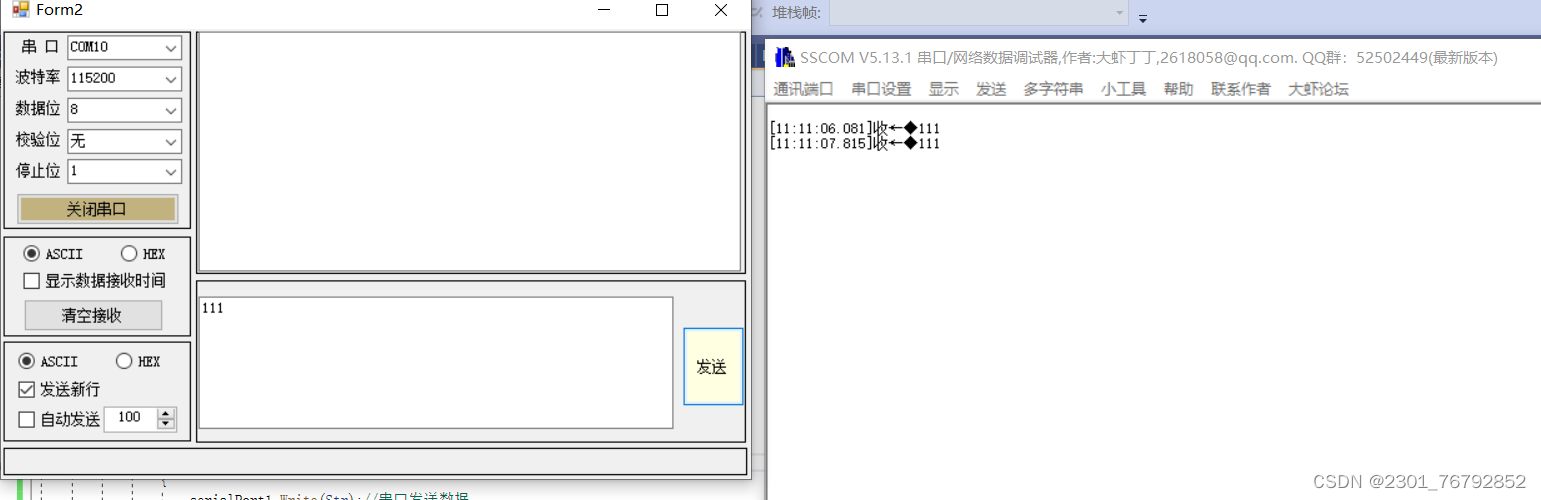
但是发送HEX还是会出现乱码的现象,现在添加一个将字符串转为HEX程序
private static byte[] strToToHexByte(String hexString)
{
int i;
hexString = hexString.Replace(" ", "");//清除空格
if ((hexString.Length % 2) != 0)//奇数个
{
byte[] returnBytes = new byte[(hexString.Length + 1) / 2];
try
{
for (i = 0; i
添加选择发送ASCII、HEX、发送新行控件程序
private void button2_Click(object sender, EventArgs e)
{
String Str = textBox2.Text.ToString();//获取发送文本框里面的数据
try
{
if (Str.Length > 0)
{
if (radioButton3.Checked)
{
serialPort1.Write(Str);//串口发送数据
textBox1.AppendText("发→" + Str + "\r\n");
}
else if (radioButton4.Checked)
{
byte[] byt = strToToHexByte(Str);
serialPort1.Write(byt, 0, byt.Length);
string hexString = BitConverter.ToString(byt).Replace("-", " ");
textBox1.AppendText("发→" + hexString + Environment.NewLine);
}
}
}
catch (Exception) { }
}
测试效果如下图

9.添加串口状态栏显示、接收字节个数和发送字节个数,添加控件label,并修改文本默认内容
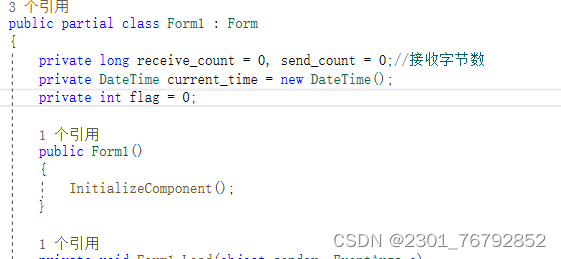
定义接收和发送字节个数变量
private long receive_count = 0, send_count = 0;//接收字节数
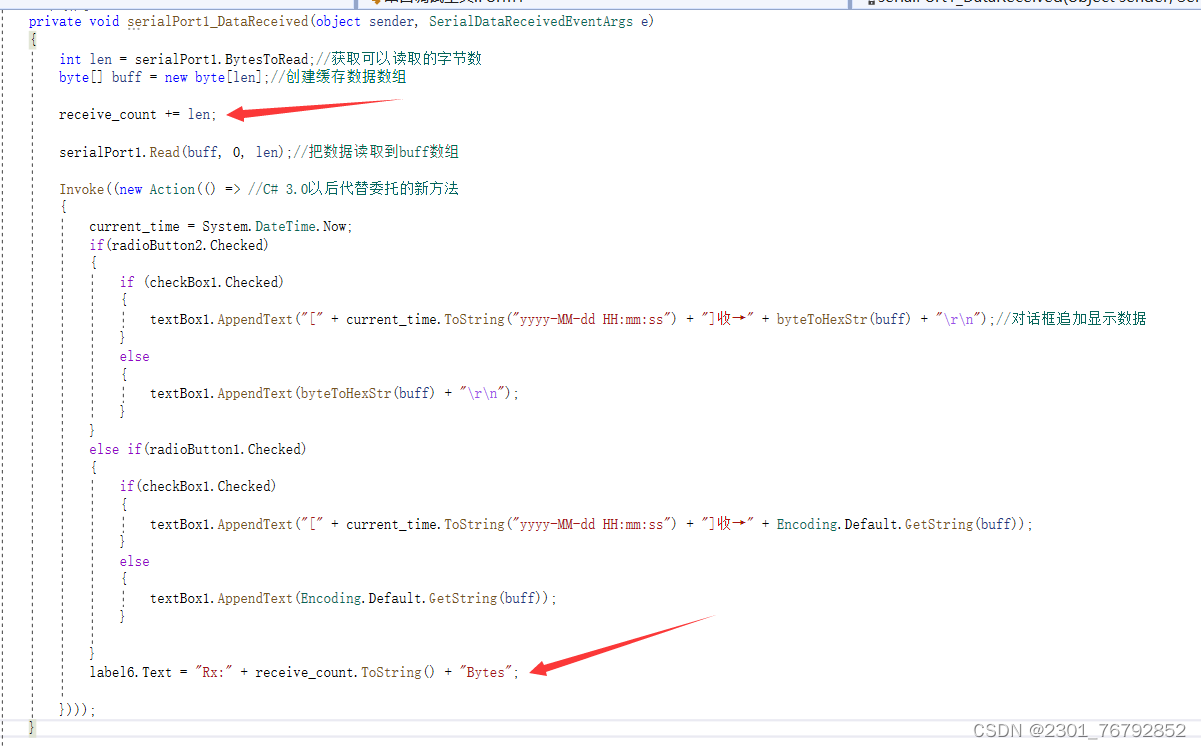
在接收数据函数加水接收字节个数程序
private void serialPort1_DataReceived(object sender, SerialDataReceivedEventArgs e)
{
int len = serialPort1.BytesToRead;//获取可以读取的字节数
byte[] buff = new byte[len];//创建缓存数据数组
receive_count += len;
serialPort1.Read(buff, 0, len);//把数据读取到buff数组
Invoke((new Action(() => //C# 3.0以后代替委托的新方法
{
current_time = System.DateTime.Now;
if(radioButton2.Checked)
{
if (checkBox1.Checked)
{
textBox1.AppendText("[" + current_time.ToString("yyyy-MM-dd HH:mm:ss") + "]收→" + byteToHexStr(buff) + "\r\n");//对话框追加显示数据
}
else
{
textBox1.AppendText(byteToHexStr(buff) + "\r\n");
}
}
else if(radioButton1.Checked)
{
if(checkBox1.Checked)
{
textBox1.AppendText("[" + current_time.ToString("yyyy-MM-dd HH:mm:ss") + "]收→" + Encoding.Default.GetString(buff));
}
else
{
textBox1.AppendText(Encoding.Default.GetString(buff));
}
}
label6.Text = "Rx:" + receive_count.ToString() + "Bytes";
})));
}
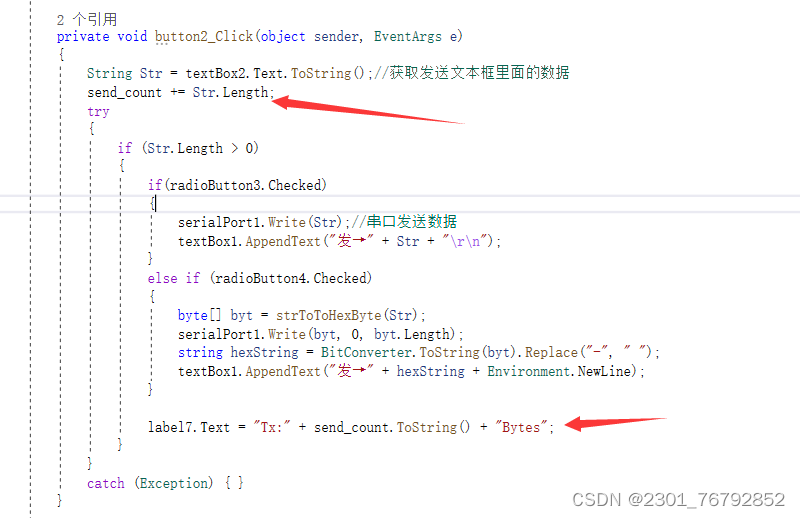
在发送函数添加发送字节个数显示程序
private void button2_Click(object sender, EventArgs e)
{
String Str = textBox2.Text.ToString();//获取发送文本框里面的数据
send_count += Str.Length;
try
{
if (Str.Length > 0)
{
if(radioButton3.Checked)
{
serialPort1.Write(Str);//串口发送数据
textBox1.AppendText("发→" + Str + "\r\n");
}
else if (radioButton4.Checked)
{
byte[] byt = strToToHexByte(Str);
serialPort1.Write(byt, 0, byt.Length);
string hexString = BitConverter.ToString(byt).Replace("-", " ");
textBox1.AppendText("发→" + hexString + Environment.NewLine);
}
label7.Text = "Tx:" + send_count.ToString() + "Bytes";
}
}
catch (Exception) { }
}
测试效果如下图
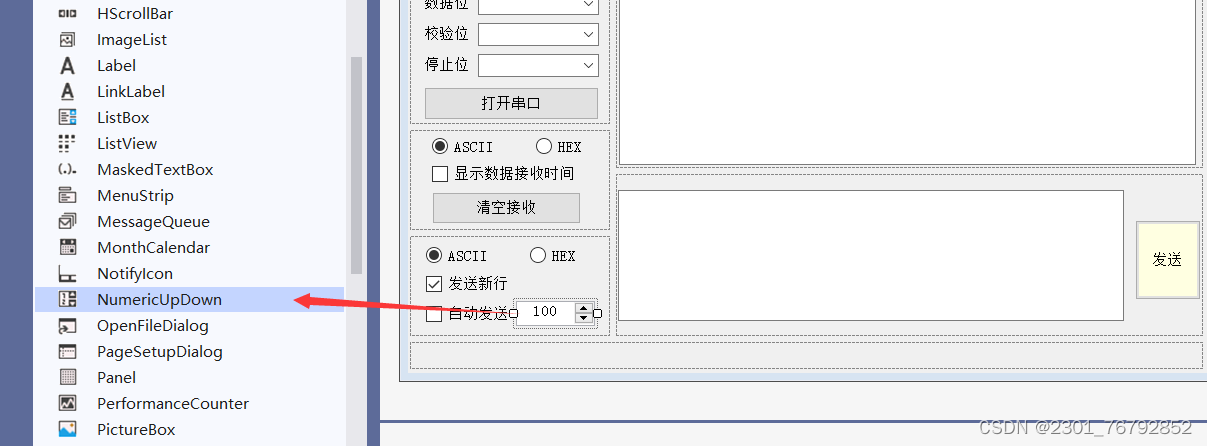
 10.添加定时发送功能(定时控件)
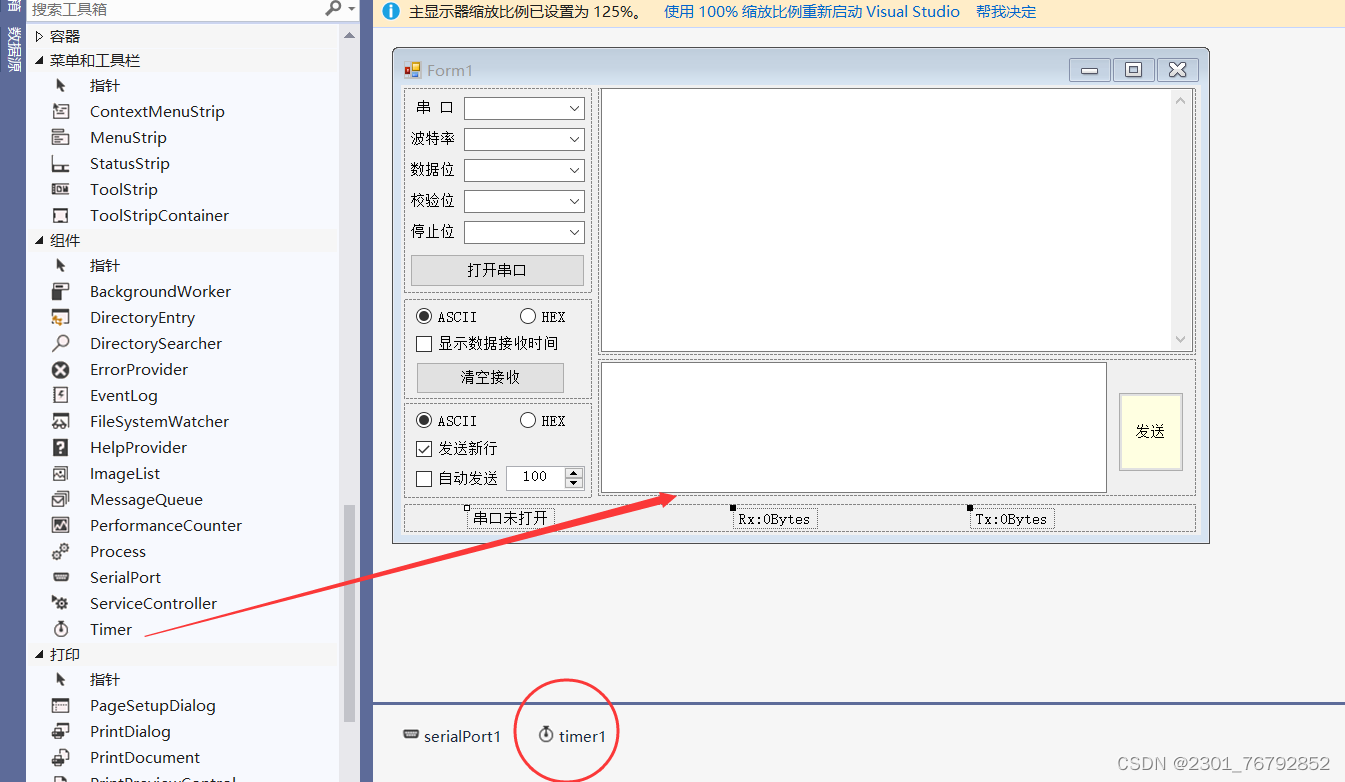
双击自动发送控件checkBox3,添加定时函数,首先获取控件numericUpDown1设置的时间数据(单位ms)
private void checkBox3_CheckedChanged(object sender, EventArgs e)
{
if (checkBox3.Checked)
{
if(flag == 1)
{
//自动发送功能选中,开始自动发送
numericUpDown1.Enabled = false; //失能时间选择
timer1.Interval = (int)numericUpDown1.Value; //定时器赋初值
timer1.Start(); //启动定时器
label8.Text = "串口已打开" + " 自动发送中...";
label8.ForeColor = Color.Red; // 设置文本颜色为红色
}
else
{
checkBox3.Checked = false;
MessageBox.Show("未打开串口!");
}
}
else
{
//自动发送功能未选中,停止自动发送
numericUpDown1.Enabled = true; //使能时间选择
timer1.Stop(); //停止定时器
if(flag == 0)
{
label8.Text = "串口未打开";
}
else
{
label8.Text = "串口已打开";
}
label8.ForeColor = SystemColors.ControlText;
}
}
双击定时器控件,调用发送数据函数
private void timer1_Tick(object sender, EventArgs e)
{
//定时时间到
button2_Click(button2, new EventArgs()); //调用发送按钮回调函数
}
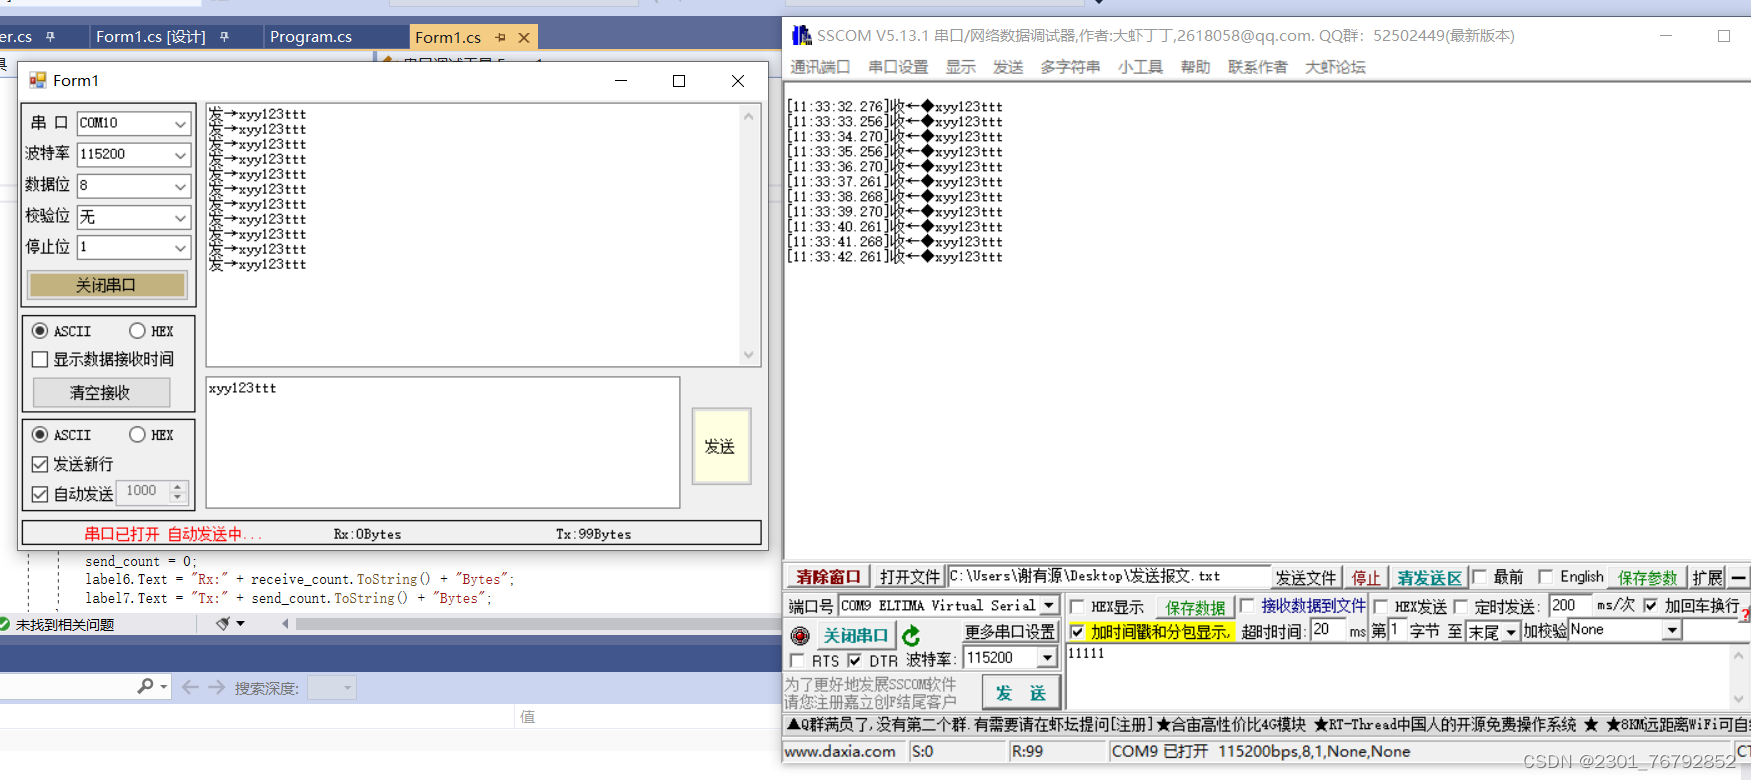
测试效果如下图
11.清空按键添加清空接收和发送字节个数
private void button3_Click(object sender, EventArgs e)
{
textBox1.Clear();
receive_count = 0;
send_count = 0;
label6.Text = "Rx:" + receive_count.ToString() + "Bytes";
label7.Text = "Tx:" + send_count.ToString() + "Bytes";
}
五、开发总结
首先是开发这个工具,会帮助我们对C#上位机开发流程进一步熟悉,其次就是让我们可以深入了解串口通信的原理、常见问题和解决方案,实践数据解析与处理和锻炼问题排查与调试能力等等。


