python 学习之 request 库的基本使用
目录
1、基本请求
2、代理设置
3、设置请求参数
4、设置请求头
5、文件的写入与读取
6、遍历请求 txt 内的所有 url
7、其他补充
1、基本请求
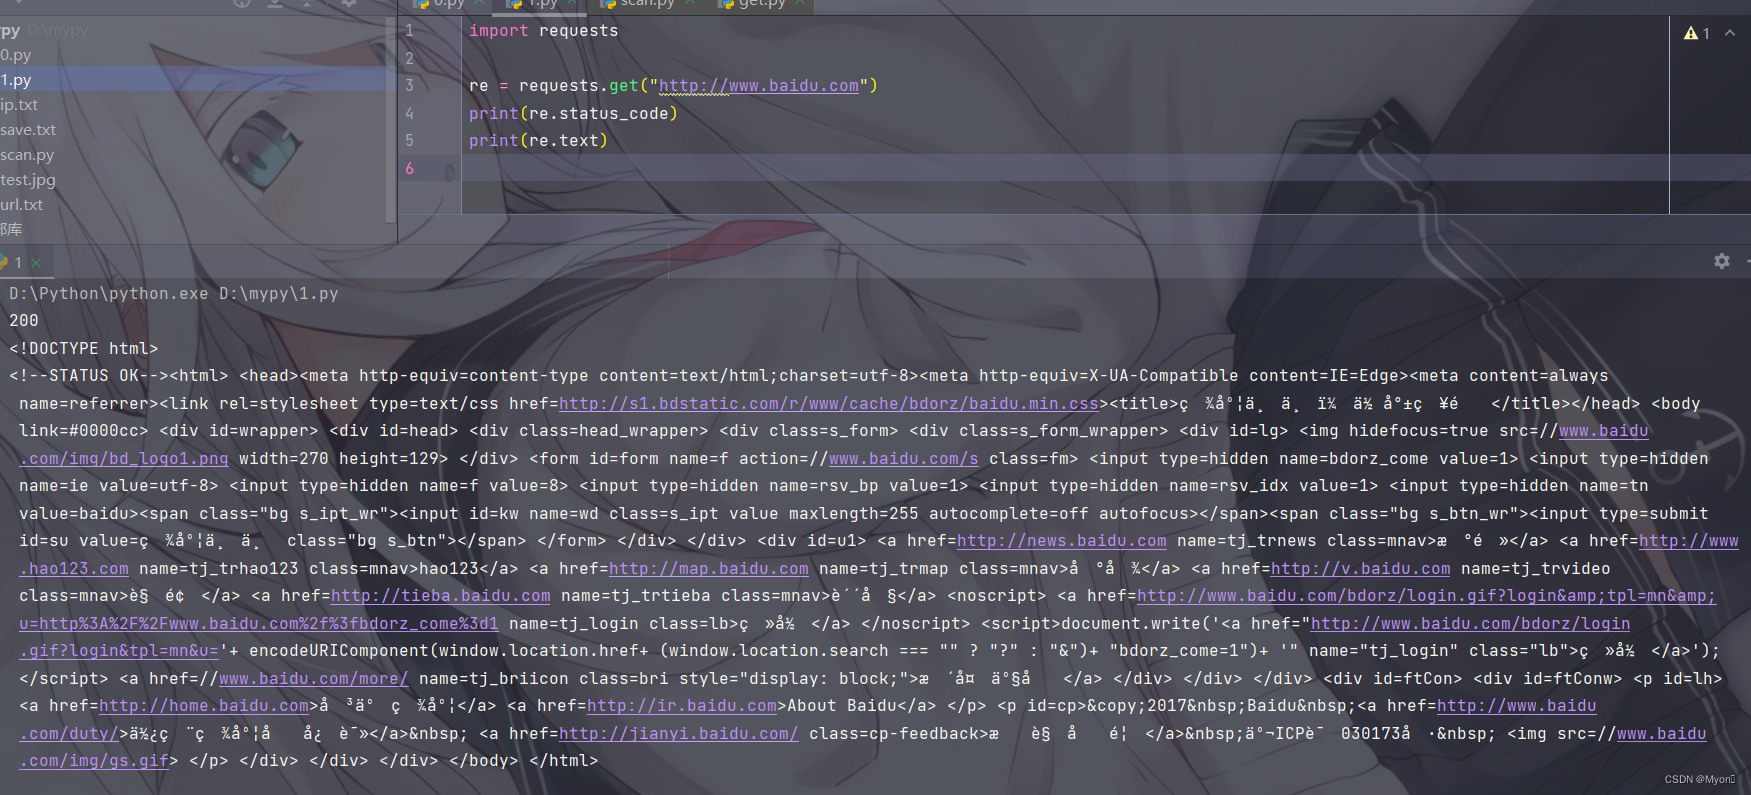
测试代码:
import requests
re = requests.get("http://www.baidu.com")
print(re.status_code)
print(re.text)
个人理解:
使用 requests 库我们肯定需要先导入它,使用 import 导入;
re 为我们自定义的一个参数,用来接收请求返回的信息,在 python 中点表示调用的意思,我们这里就调用了 requests 库中的 get() 方法,括号内为请求的URL,使用单引号或者双引号包裹;
最后使用 print 函数输出响应结果,也是通过点进行调用;
status_code 为响应状态码,text 返回的是网页源码(str类型)。
运行结果:
常用的调用方法:
re. text # 返回的是unicode 型的数据,一般是在网页的header中定义的编码形式
re.content # 返回的是bytes,二级制型的数据
如果想要提取文本就用 text ,如果想要提取图片、文件,就用 content
re.url # 获取请求的 url
re.status_code # 获取响应的状态码
re.headers # 获取响应头
re.request.headers # 获取请求头
re.cookies # 获取 cookie
re.history # 获取请求历史
2、代理设置
测试代码:
import requests
proxies = {
    'http': "http://127.0.0.1:8080",
    'https': "http://127.0.0.1:8080"
}
re = requests.get("http://www.baidu.com", proxies=proxies)
print(re.url)
print(re.status_code)
print(re.text)
个人理解:
就是加入一个 proxies ,字典的数据类型,内容为键值对的形式,分别为 http 和https 协议设置代理,我这里是转发到本地的 8080 端口,再使用 burpsuite 进行抓包拦截。
注意在请求中加上 proxies=proxies 即可。
运行结果:
burpsuite 成功抓包
放包之后观察 pycharm 结果回显
代理转发请求成功
3、设置请求参数
最常用的有两种情况:get 和 post 请求
测试代码(以 get 请求为例):
import requests
proxies = {
    'http': "http://127.0.0.1:8080",
    'https': "http://127.0.0.1:8080"
}
payload = {
    'myon': "hello!",
    'test': 123456
}
re = requests.get("http://www.baidu.com", proxies=proxies, params=payload)
print(re.url)
print(re.status_code)
print(re.text)
个人理解:
同代理设置一样,新增一个请求的 payload ,也是字典键值对的形式;
注意不同键值对之间使用逗号隔开,否则会报错;
请求中加上 params=payload 即可。
特别说明:
对于 get 请求,我们使用 params;
对于 post 请求,我们使用 data,即:
payload = {
    'myon': "hello!",
    'test': 123456
}
re = requests.post("http://www.baidu.com", proxies=proxies, data=payload)
抓包结果:
get 请求
post 请求
4、设置请求头
测试代码(以 post 请求为例):
import requests
proxies = {
    'http': "http://127.0.0.1:8080",
    'https': "http://127.0.0.1:8080"
}
payload = {
    'myon': "hello!",
    'test': 123456
}
headers = {
    'User-Agent': 'Mozilla/5.0 (Windows NT 10.0; Win64; x64) AppleWebKit/537.36 (KHTML, like Gecko) Chrome/120.0.0.0 Safari/537.36 Edg/120.0.0.0',
    'Accept-Language': 'zh-CN,zh;q=0.9,en;q=0.8,en-GB;q=0.7,en-US;q=0.6',
    'test': 'hello Myon!'
}
re = requests.post("http://www.baidu.com", proxies=proxies, data=payload, headers=headers)
print(re.url)
print(re.status_code)
print(re.text)
个人理解:
新增请求的 headers ,也是字典键值对的形式,这里设置了三个请求头;
同理需要在请求中加上 headers=headers 。
使用 burpsuite 抓包看看:
这里如果直接运行会报错:
这个错误是由于 SSL 证书验证失败引起的
我们需要在请求中增加 verify=False
即:
re = requests.post("http://www.baidu.com", proxies=proxies, data=payload, headers=headers, verify=False)
运行结果:
因为这里 payload 我们是随便添加的所以找不到
5、文件的写入与读取
写入文件:
比如我们想将百度的图标下载下来
我们前面说过,这种图片类是二进制文件,因此使用 content
测试代码:
import requests
re = requests.get("https://www.baidu.com/favicon.ico")
with open('save.ico', 'wb') as f:
    f.write(re.content)
个人理解:
'wb' 表示二进制写入,save.ico 为保存的文件名,如果当前目录下没这个文件名则会新建;
将这个文件作为 f (可自定义名字),调用 write() 方法写入请求返回的数据。
运行结果:
在同一目录下找到 save.ico 即我们下载的文件
如果我们想写入的是文本,则使用 text 和文本写入模式('w')
即:
with open('save.txt', 'w') as f:
    f.write(re.text)
补充说明:
如果返回的内容不是 str 类型,可以使用 str() 方法进行类型转换,比如
f.write(str(re.status_code))
读取文件:
测试代码:
import requests
with open('ip.txt', 'r') as file:
    for i in file:
        print(i.strip())
个人理解:
其中 ip.txt 是一个本地存在的文件,'r' 表示以只读方式打开,并赋给 file(可自定义名字);
使用 for 循环,遍历 file ;
使用 print() 函数输出结果,strip() 用于去除行尾的换行符和空白字符。
运行结果:
这里其实还不用引入 requests 库,但是后面就会需要了
6、遍历请求 txt 内的所有 url
测试代码:
import requests
with open('url.txt', 'r') as urls:
    for i in urls:
        url = i.strip()
        try:
            re = requests.get(url)
            print(f"请求URL为:{url}, 响应状态码为:{re.status_code}")
        except Exception as e:
            print(f"请求出错:{url},{e}")
在本地准备一个 url.txt
前三个为可正常访问的网站,最后一个为错误的地址
说明:
f 是 f-string 的语法,是一种用于字符串格式化的快捷方式;
在 f-string 中,可以直接嵌入变量和表达式,而不需要使用传统的字符串格式化方法;
{} 内放的是表达式,可以是变量、常量、表达式等;
这部分被称为花括号或占位符,用于在字符串中表示将在运行时被替换的值。
基本的 try 和 except 结构:
try:
    # 你的代码块
    # 可能会引发异常的代码
except SomeExceptionType as e:
    # 处理异常的代码
    # e 是异常对象,包含有关异常的信息
这里使用 requests.RequestException 更好,即:
except requests.RequestException as e:
运行结果:
7、其他补充
在请求中我们还可以设置超时时间,使用 timeout 指定
即:
向百度发出请求,如果 3 秒内没有得到响应,则抛出错误
re = requests.post("http://www.baidu.com", timeout=3)
请求分为两个阶段:连接(connect)和读取(read)
# 如果给 timeout 参数指定一个数值,则超时时间是这两个阶段的总和
# 可以传入一个元组,分别指定连接超时时间和读取超时时间
即:
re = requests.post("http://www.baidu.com", timeout=(2,10))


