Android Studio + sqllite 数据库连接的步骤以及常见问题
Android Studio + sqllite 数据库连接的步骤以及常见问题
- 一、连接步骤
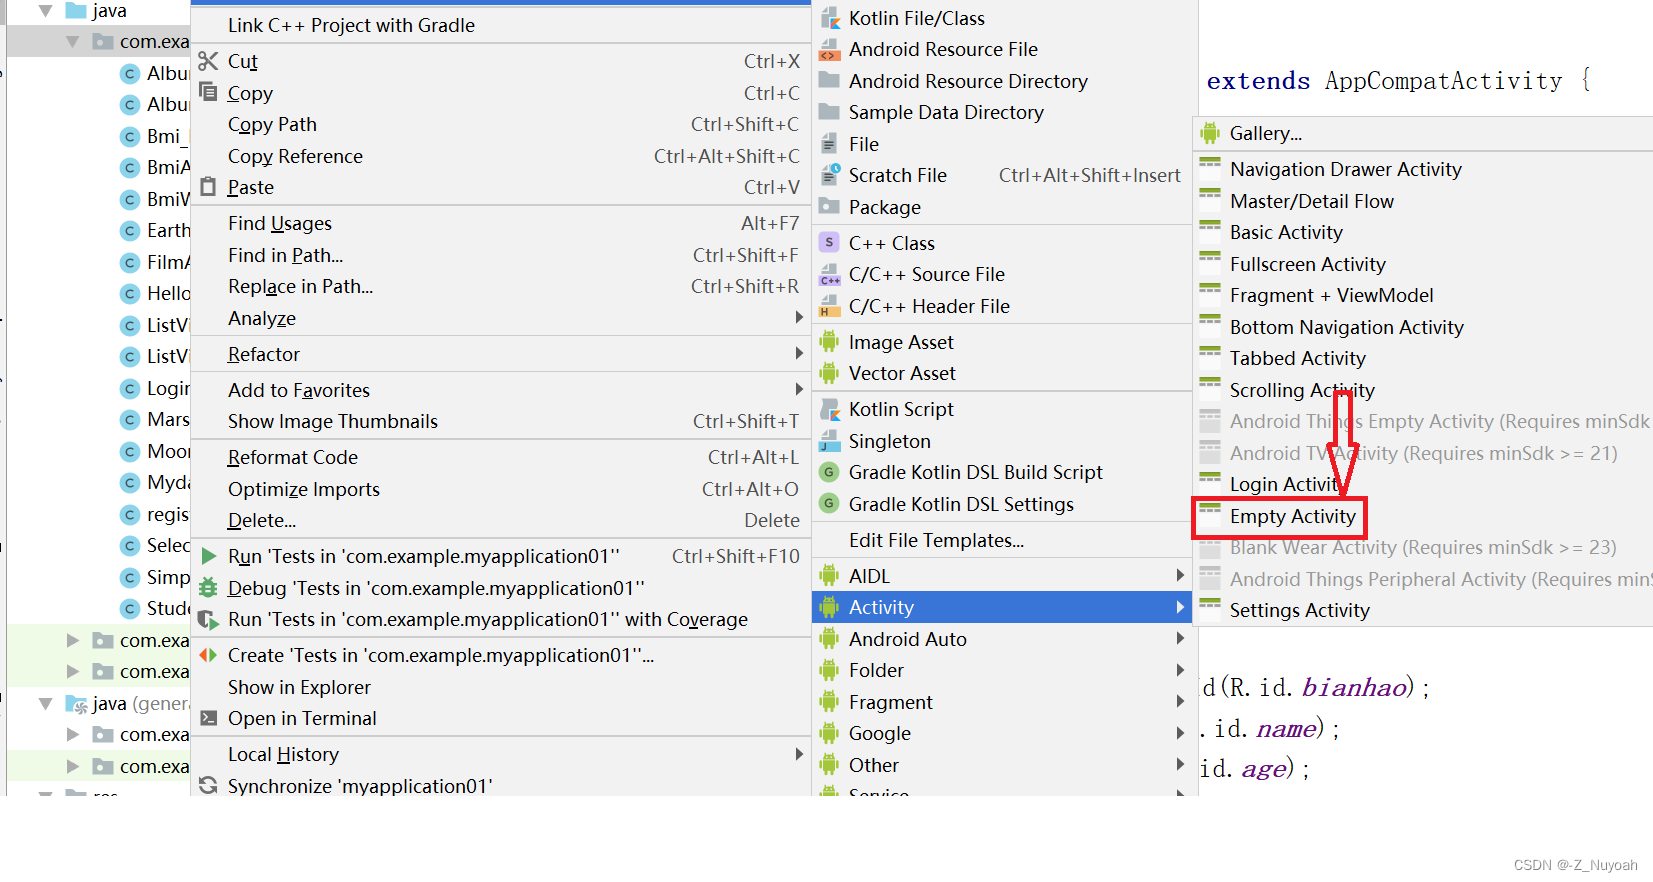
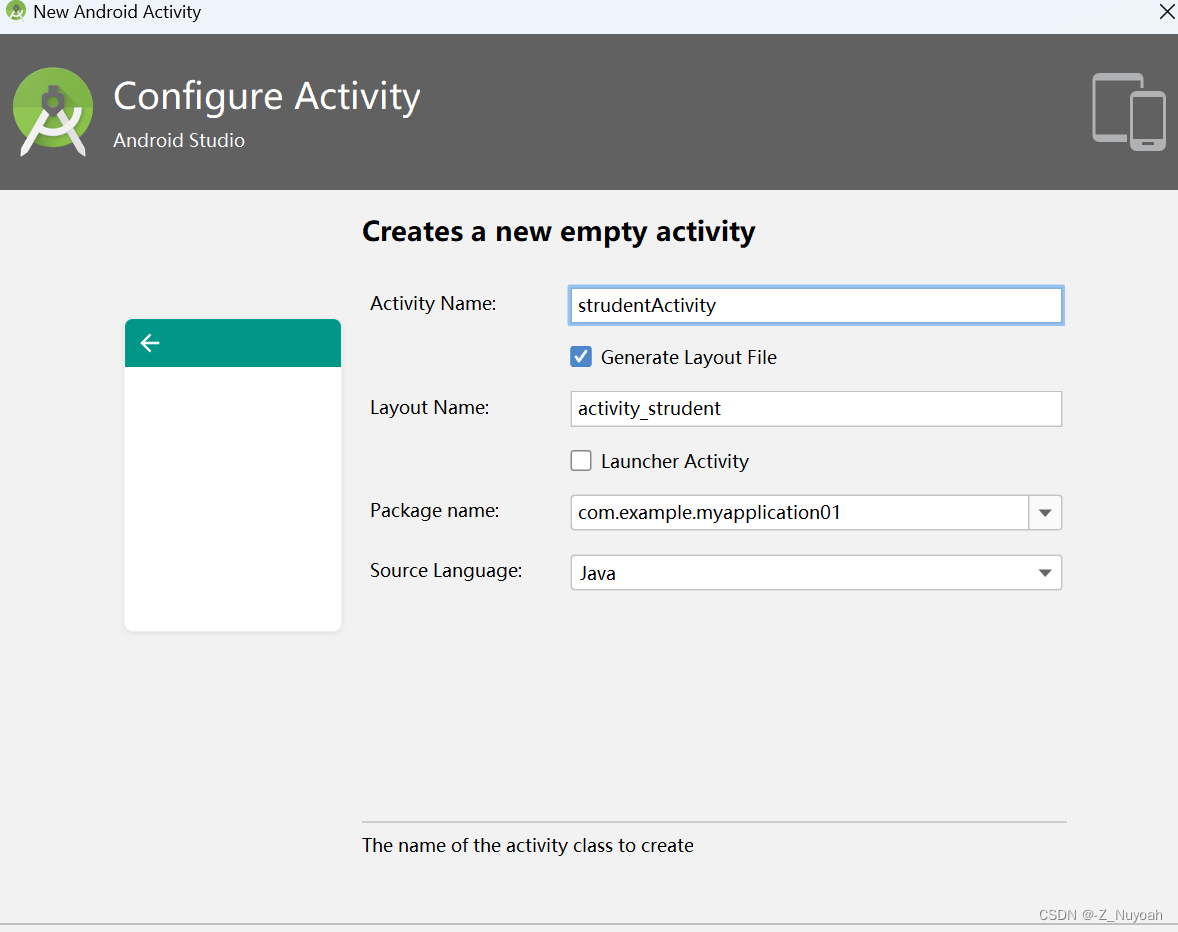
- 1、打开Android studio 创建一对Activity,
- 2、书写相关代码
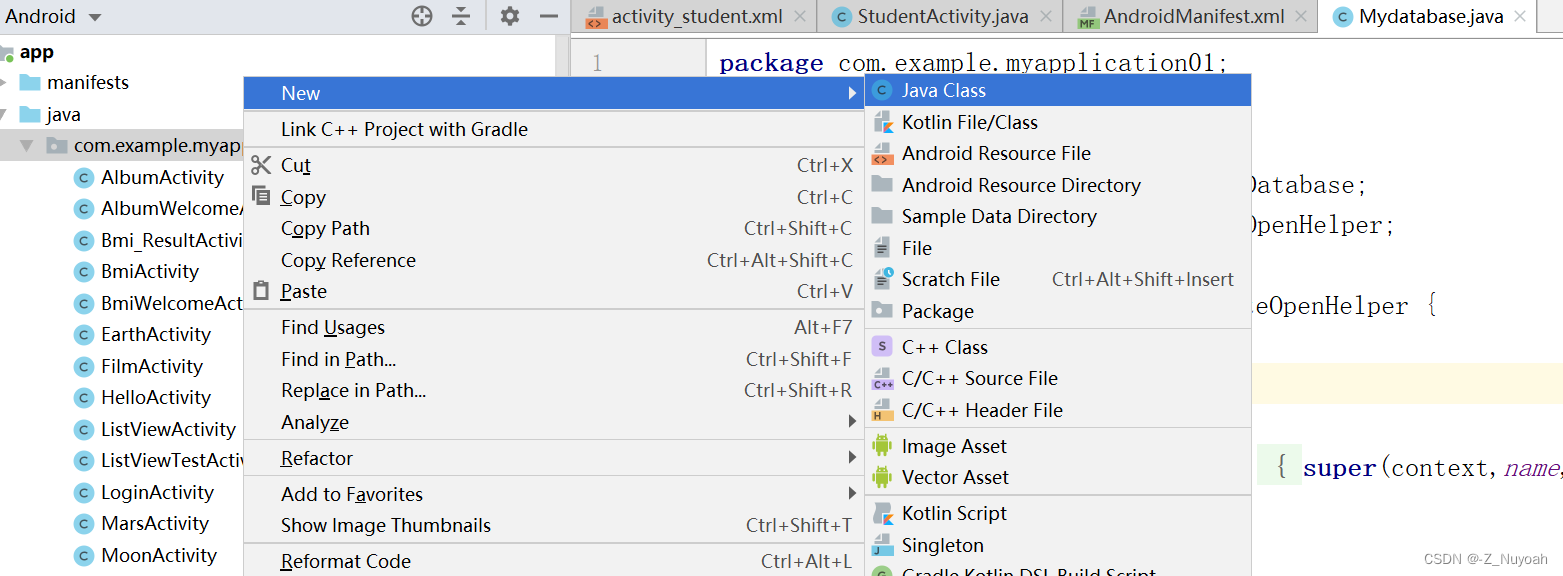
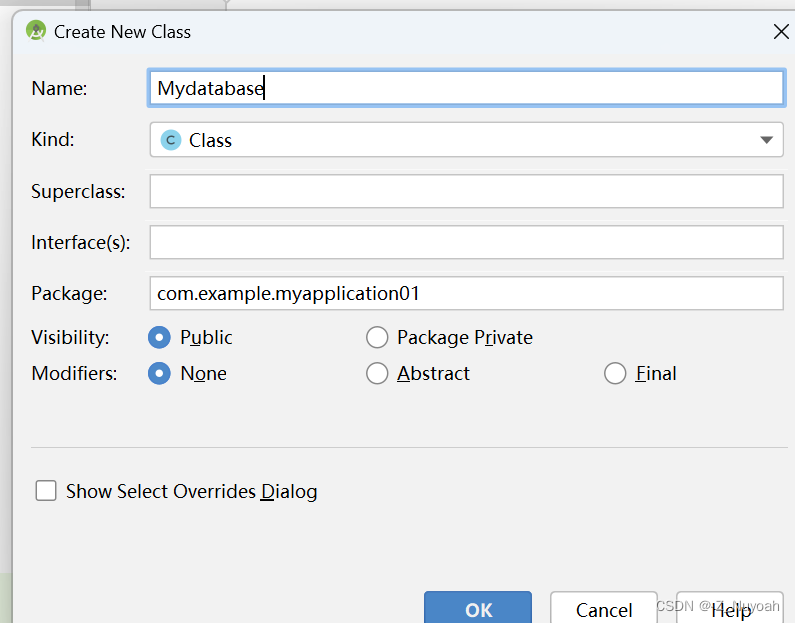
- 3、创建一个Mydatabase的一个Java类。
- 4、运行
- 5、启动monitor连接数据库
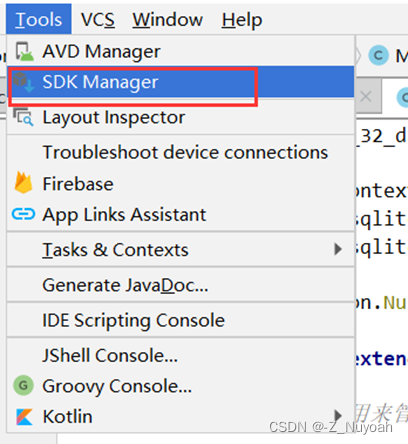
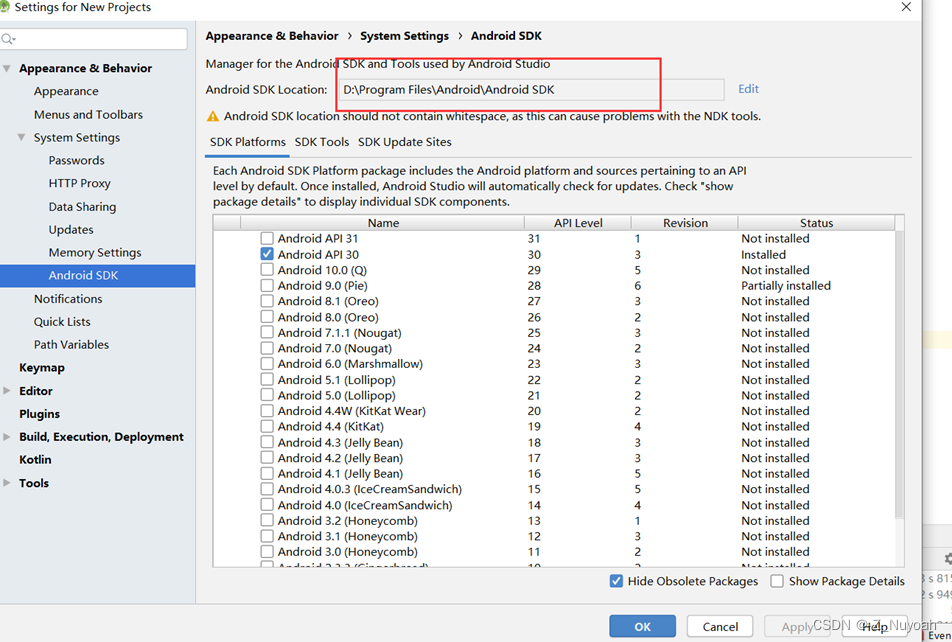
- 1、打开SDK后,查看SDK路径
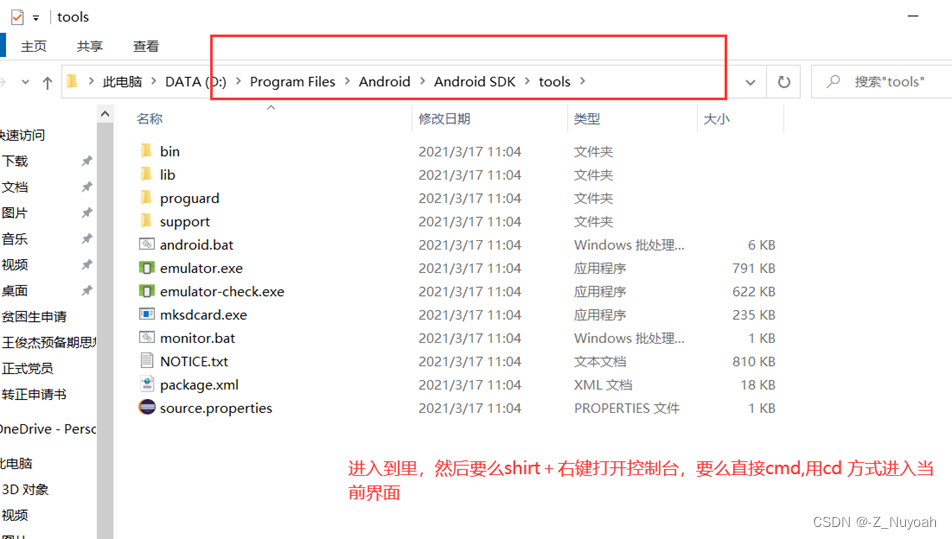
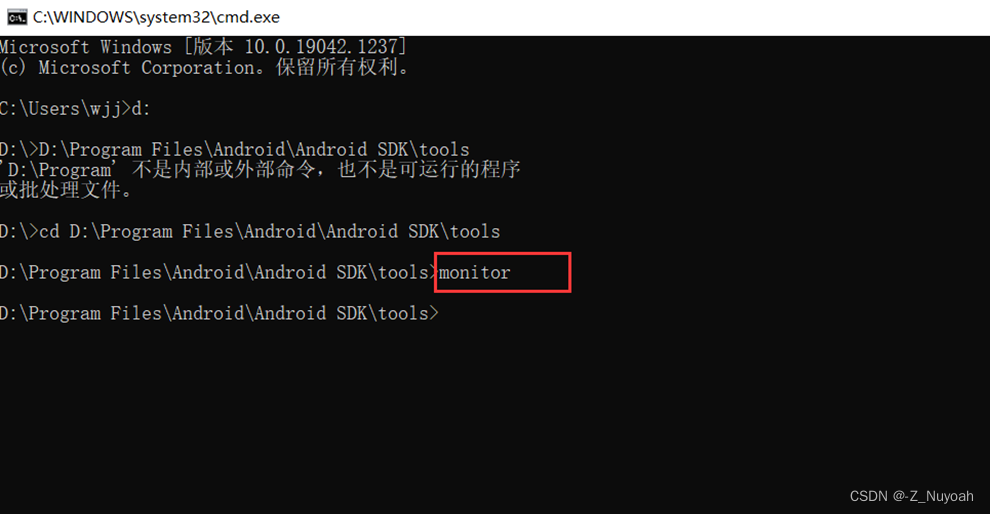
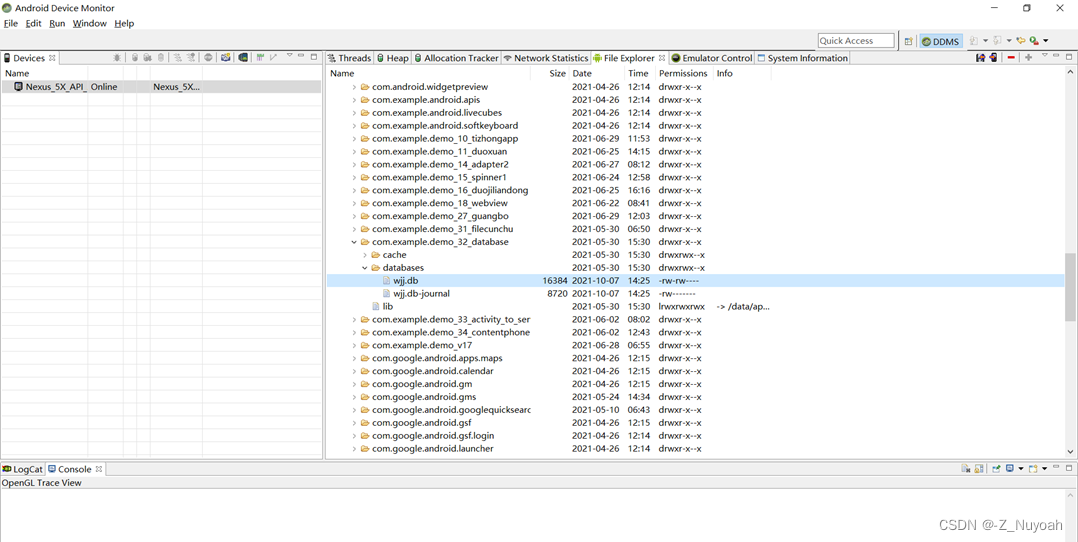
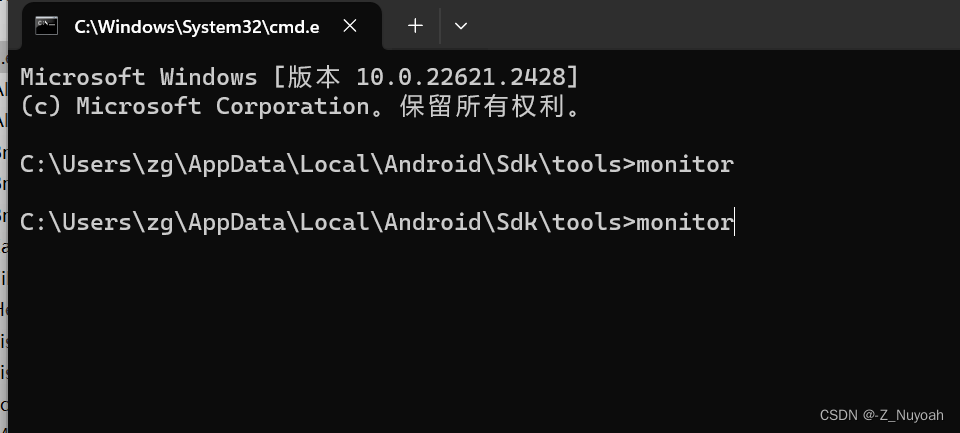
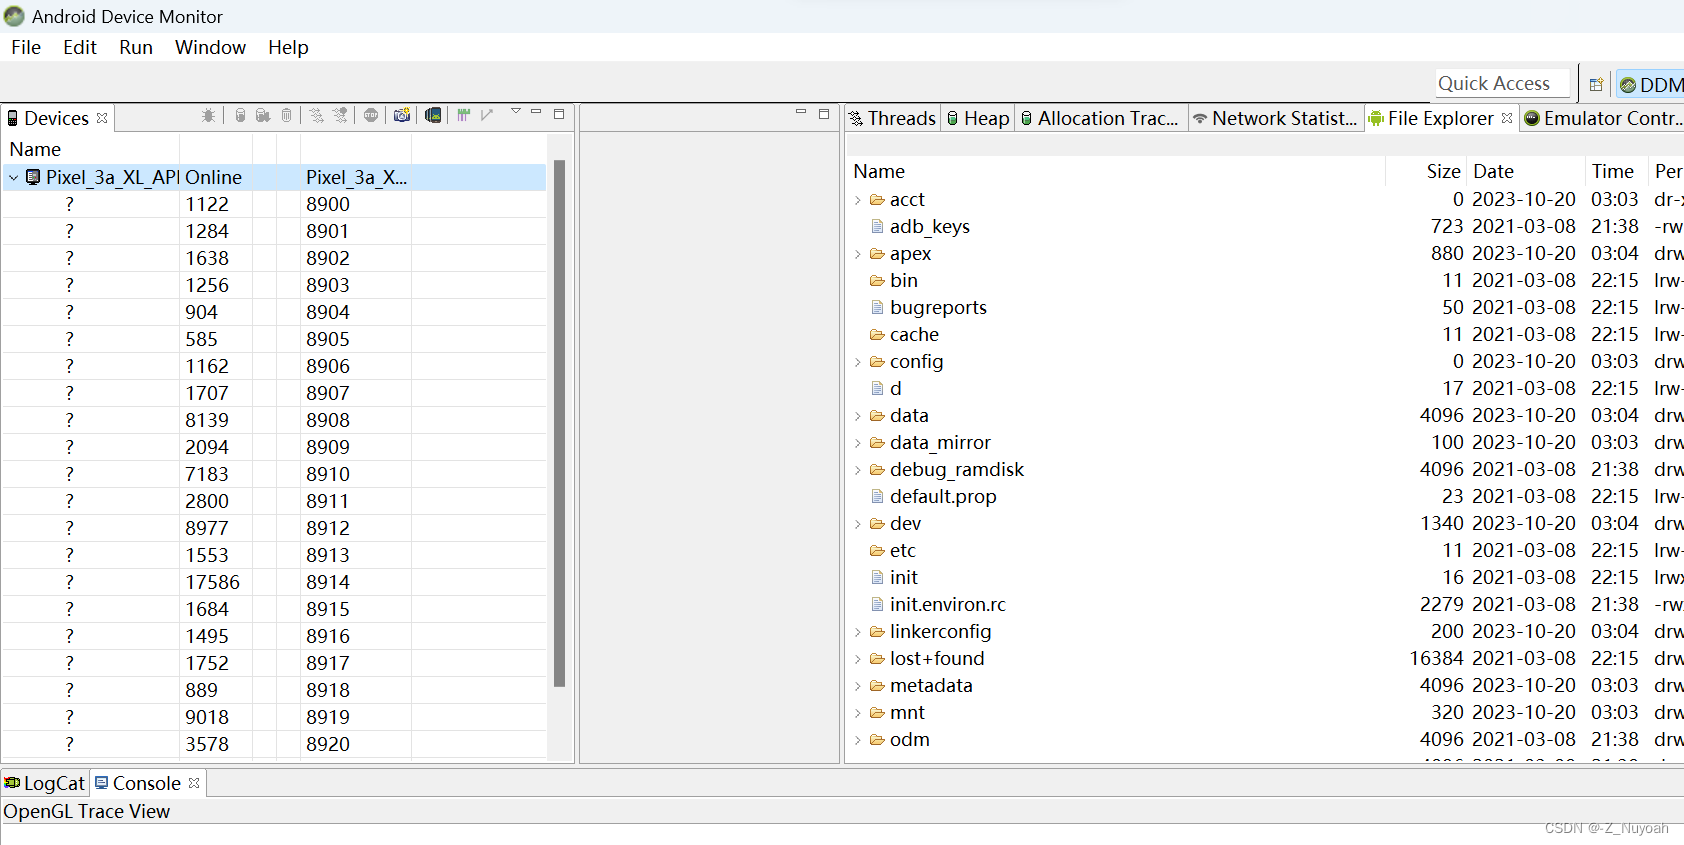
- 2、在SDK路径下右键鼠标运行命令行,输入命令monitor,即可启动Android monitor Device如下图所示:
- 6、使用模拟器运行的界面进行操作可能出现的问题
- 1、执行后前台显示成功,数据库里面的refresh没反应的问题
- 二、常见错误
- 0、在运行monitor时跳转页面时有可能会弹出
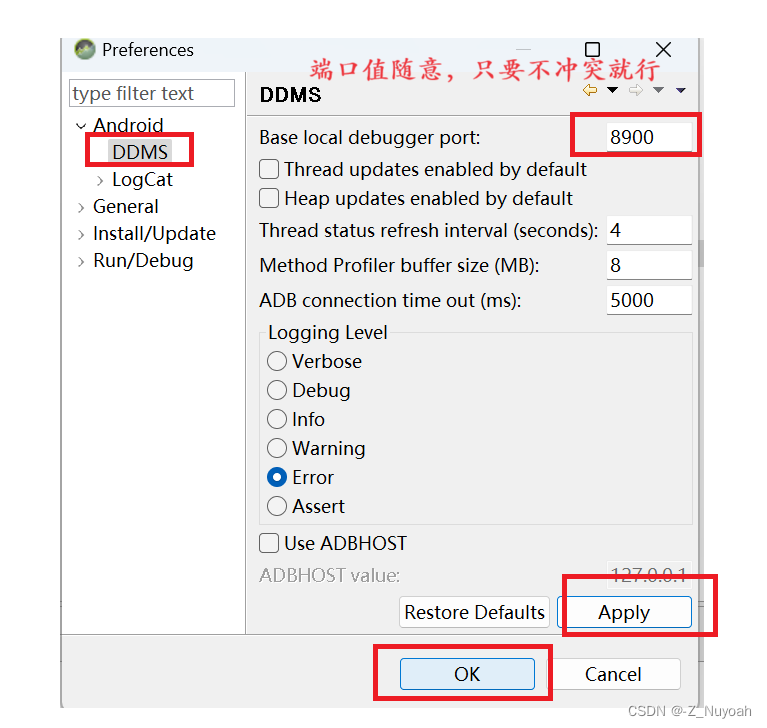
- 1、以上这是由于有端口号冲突问题,**如果点击ok以后*不是*这个界面并且右边的data能点开,那就问题不大,可以忽略以下操作**
- 2、 ***如果是这个界面,并且data也点不开要进行的操作***
- 将端口号修改一下:
- data打不开是由于权限不够需要进行以下操作:
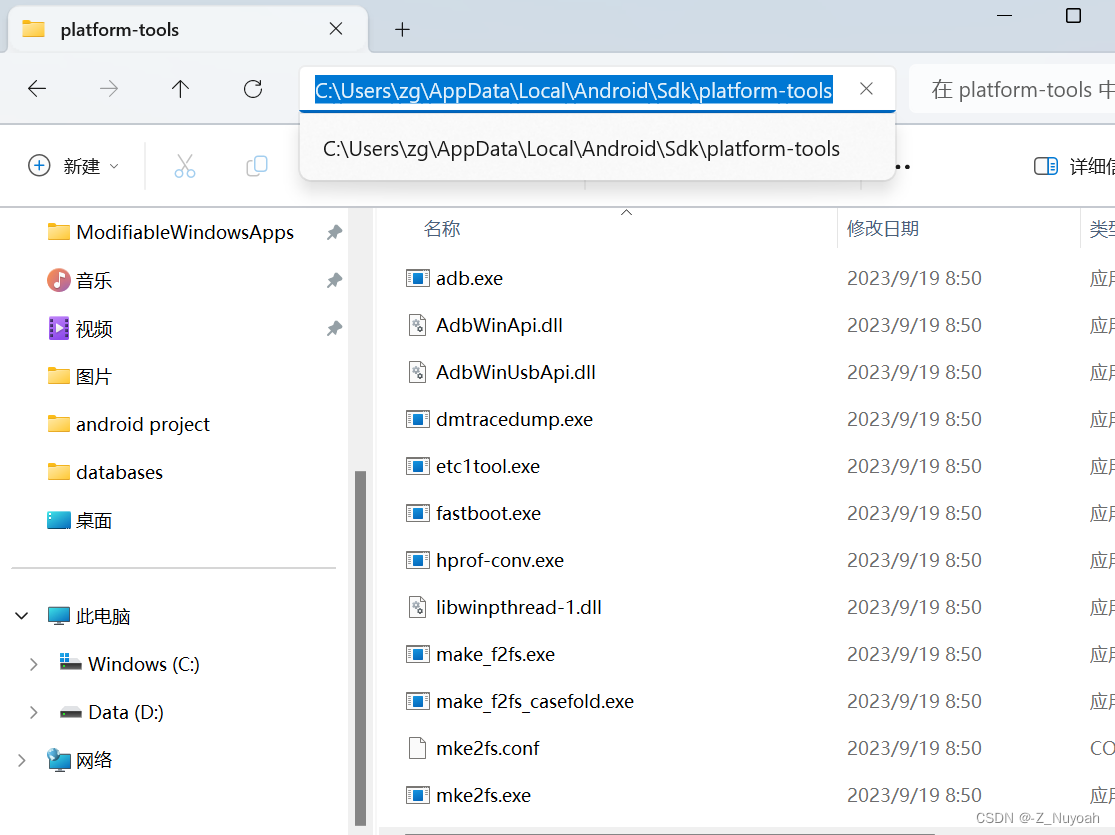
- 1、找到这个目录
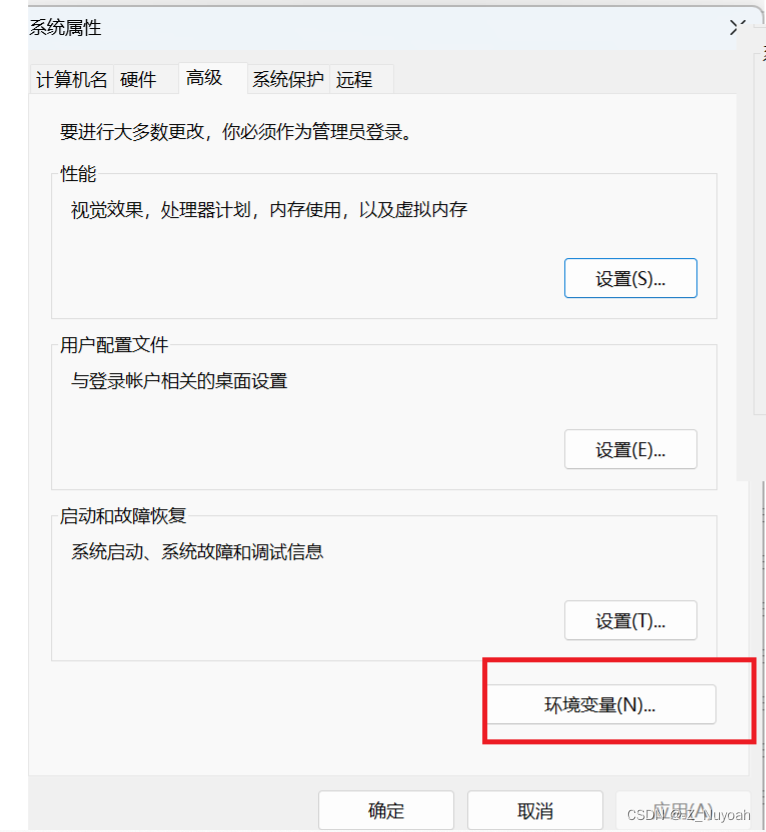
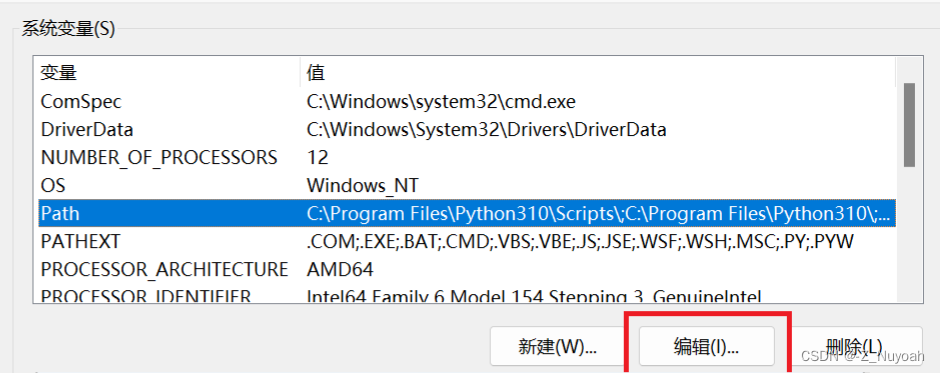
- 2、打开高级设置
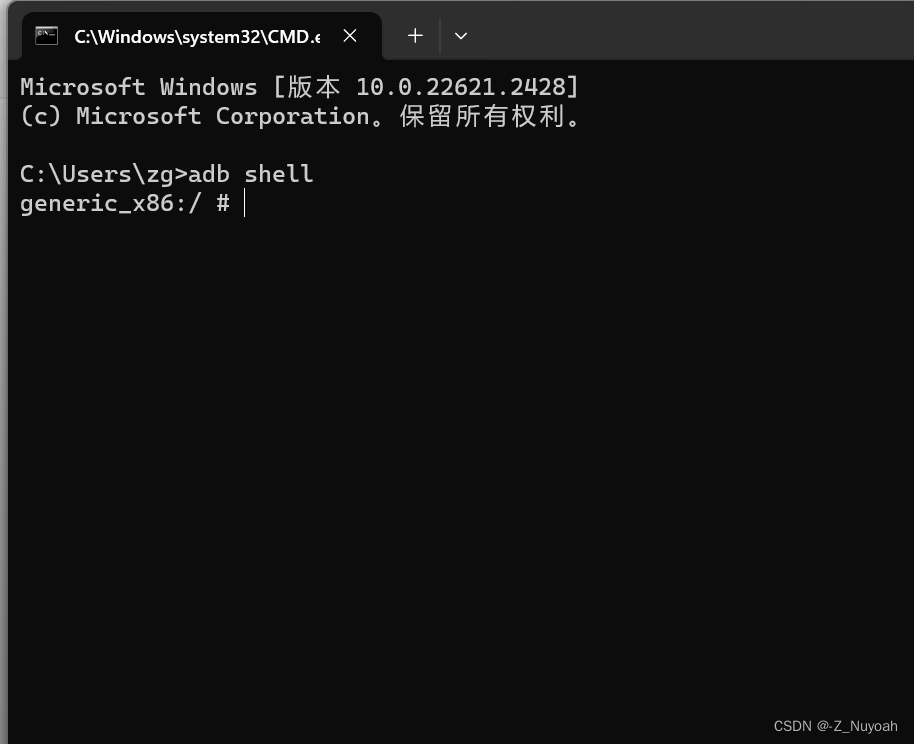
- 3、打开cmd输入adb shell,显示以下转态就是可以了。
- 3、关于/system/bin/sh: su: not found的解决办法
- 4、解决无法打开data文件夹,原因是权限不够,需要设置权限
- 左边依旧是问号,这时执行以下操作即可
- 1、首先先获取root权限
- 2、在返回Android device monitor中执行以下操作
- 相关资料
软件见文末
一、连接步骤
前提是先安装好sqllite---->无脑式next安装
1、打开Android studio 创建一对Activity,
2、书写相关代码
//   在 StudentActivity.java
package com.example.myapplication01;
import androidx.appcompat.app.AppCompatActivity;
import android.database.Cursor;
import android.database.sqlite.SQLiteDatabase;
import android.os.Bundle;
import android.view.View;
import android.widget.EditText;
import android.widget.TextView;
import android.widget.Toast;
public class StudentActivity extends AppCompatActivity {
    private EditText bianhao;
    private EditText name;
    private EditText age;
    private EditText czbianhao;
    private EditText czname;
    private TextView czresult;
    private SQLiteDatabase database;
    @Override
    protected void onCreate(Bundle savedInstanceState) {
        super.onCreate(savedInstanceState);
        setContentView(R.layout.activity_student);
        bianhao = findViewById(R.id.bianhao);
        name = findViewById(R.id.name);
        age = findViewById(R.id.age);
        czbianhao = findViewById(R.id.czbianhao);
        czname = findViewById(R.id.czxingming);
        czresult = findViewById(R.id.result);
        Mydatabase mydatabase = new Mydatabase(StudentActivity.this);
        database = mydatabase.getWritableDatabase();
    }
    public void  insert(View view) {
        String sql1 = "select * from user where 编号=?";
        Cursor cursor = database.rawQuery(sql1, new String[]{bianhao.getText().toString()});
        if (cursor.getCount() == 0) {
            String sql = "insert into user(编号,姓名,年龄)values(?,?,?)";
            database.execSQL(sql, new Object[]{Integer.parseInt(bianhao.getText().toString()), name.getText().toString(),
                    Integer.parseInt(age.getText().toString())});
            Toast.makeText(getApplicationContext(), "已成功添加!!!", Toast.LENGTH_SHORT).show();
        } else {
            Toast.makeText(getApplicationContext(), "数据已存在!!!", Toast.LENGTH_SHORT).show();
            bianhao.setText("");
            bianhao.requestFocus();
        }
    }
    //方法二
        /*String sql1="select * from user where 编号=?";
        Cursor cursor = database.rawQuery(sql1,new String[]{bianhao.getText().toString()});
        if(cursor.getCount()==0){
            ContentValues contentValues = new ContentValues();
            contentValues.put("编号",Integer.parseInt(bianhao.getText().toString()));
            contentValues.put("姓名",name.getText().toString());
            contentValues.put("年龄",Integer.parseInt(age.getText().toString()));
            Toast.makeText(getApplicationContext(),"已成功添加!!!",Toast.LENGTH_SHORT).show();
        }else {
            Toast.makeText(getApplicationContext(),"数据已存在!!!",Toast.LENGTH_SHORT).show();
            bianhao.setText("");
            bianhao.requestFocus();
        }*/
    public void  delete(View view){
        String sql = "delete from user where 编号=?";
        database.execSQL(sql,new Object[]{Integer.parseInt(bianhao.getText().toString())});
        Toast.makeText(getApplicationContext(),"数据已删除!!!",Toast.LENGTH_SHORT).show();
    }
    public void update(View view){
        String sql = "update user set 姓名=?,年龄=? where 编号=?";
        database.execSQL(sql,new Object[]{name.getText().toString(),Integer.parseInt(age.getText().toString()),
                Integer.parseInt(bianhao.getText().toString())});
        Toast.makeText(getApplicationContext(),"数据已更新!!!",Toast.LENGTH_SHORT).show();
    }
    public void findbianhao(View view){
        String sql="select * from user where 编号=?";
        Cursor cursor = database.rawQuery(sql,new String[]{czbianhao.getText().toString()});
        if(cursor.moveToNext()){
            int bianhao1 = cursor.getInt(cursor.getColumnIndex("编号"));
            String name1 = cursor.getString(cursor.getColumnIndex("姓名"));
            int age1 = cursor.getInt(cursor.getColumnIndex("年龄"));
            czresult.setText("查找结果->编号: "+bianhao1+"\t姓名:"+name1+"\t年龄:"+age1);
        }else {
            Toast.makeText(getApplicationContext(),"无记录!!!",Toast.LENGTH_SHORT).show();
            czresult.setText("");
        }
    }
    public void findname(View view){
        String sql="select * from user where 姓名=?";
        Cursor cursor = database.rawQuery(sql,new String[]{czname.getText().toString()});
        if(cursor.moveToNext()){
            int bianhao2 = cursor.getInt(cursor.getColumnIndex("编号"));
            String name2 = cursor.getString(cursor.getColumnIndex("姓名"));
            int age2 = cursor.getInt(cursor.getColumnIndex("年龄"));
            czresult.setText("查找结果->编号: "+bianhao2+"\t姓名:"+name2+"\t年龄:"+age2);
        }else {
            Toast.makeText(getApplicationContext(),"无记录!!!",Toast.LENGTH_SHORT).show();
            czresult.setText("");
        }
    }
}
提示:.xml有些资源需要用自己有的,否者有可能会报错!!!!
3、创建一个Mydatabase的一个Java类。
//在Mydatanase.java中书写
package com.example.myapplication01;
import android.content.Context;
import android.database.sqlite.SQLiteDatabase;
import android.database.sqlite.SQLiteOpenHelper;
public class Mydatabase extends SQLiteOpenHelper {
    static String name = "www.db";
    static int version = 1;
    public Mydatabase(Context context){
        super(context,name,null,version);
    }
    @Override
    public void onCreate(SQLiteDatabase db) {
        String sql = "create table user(编号 Integer,姓名 varchar(10),年龄 Integer)";
        //逗号是英文的
        db.execSQL(sql);
    }
    @Override
    public void onUpgrade(SQLiteDatabase db, int oldVersion, int newVersion) {
    }
}
4、运行
5、启动monitor连接数据库
1、打开SDK后,查看SDK路径
2、在SDK路径下右键鼠标运行命令行,输入命令monitor,即可启动Android monitor Device如下图所示:
执行完monitor,正常情况下会直接跳转出以下界面
以上是正常不出错的连接步骤
6、使用模拟器运行的界面进行操作可能出现的问题
1、执行后前台显示成功,数据库里面的refresh没反应的问题
解决方案:
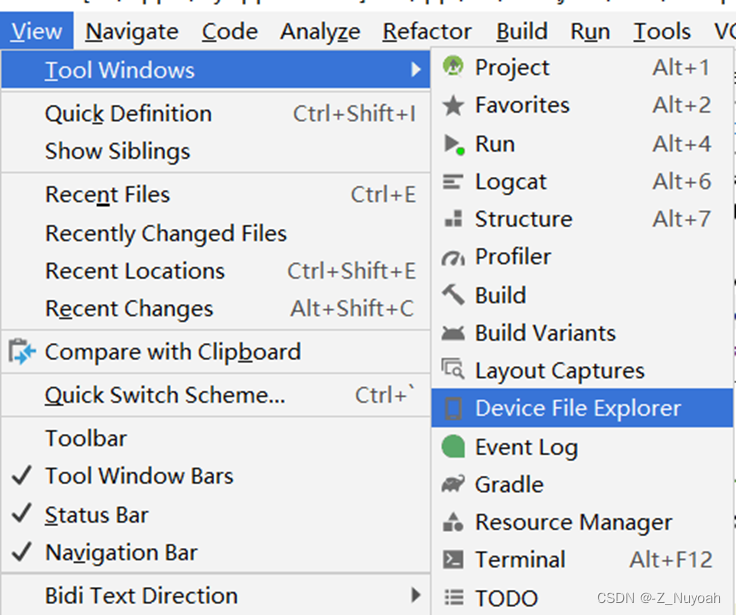
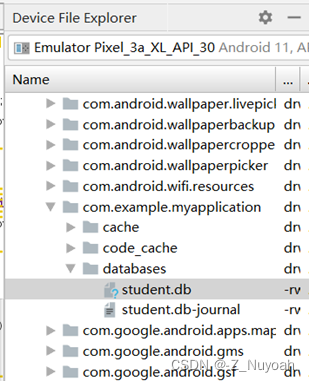
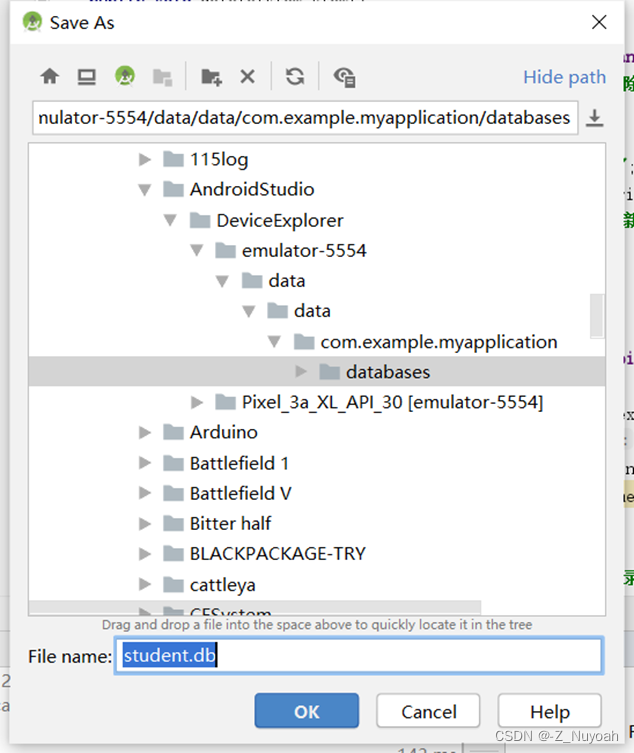
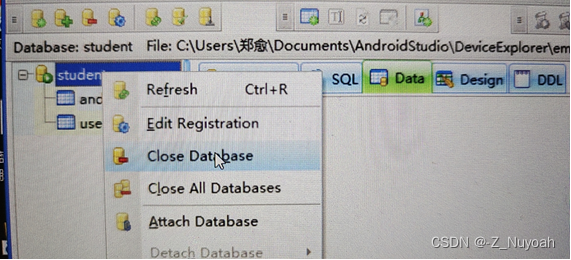
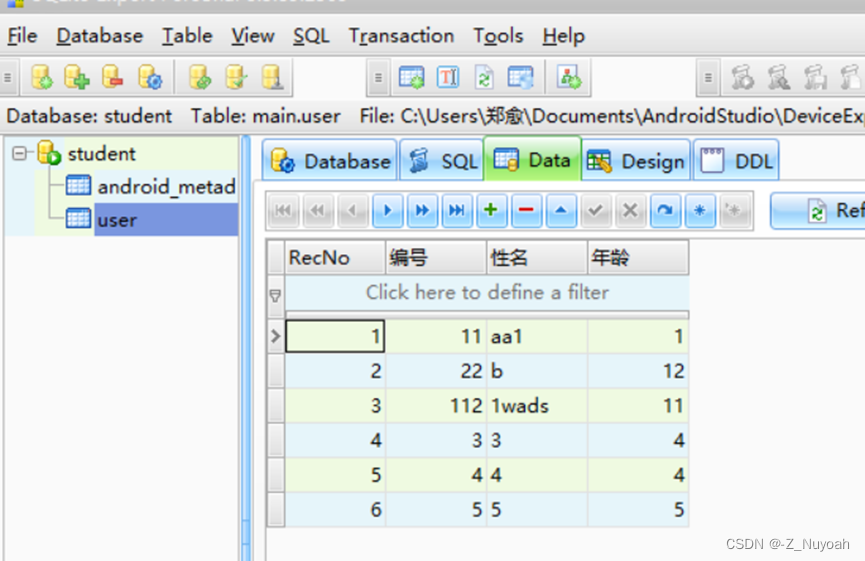
打开Android studio,在如下图所示的地方可以打开data文件夹
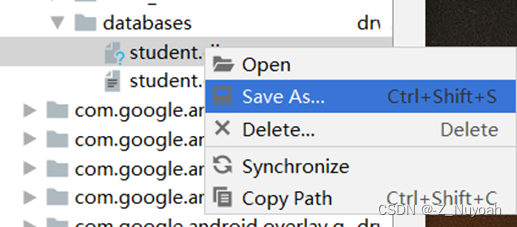
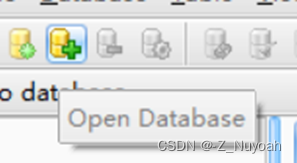
打开sqllite
二、常见错误
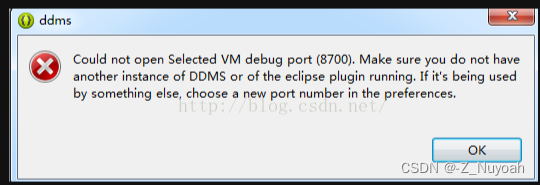
0、在运行monitor时跳转页面时有可能会弹出
1、以上这是由于有端口号冲突问题,如果点击ok以后不是这个界面并且右边的data能点开,那就问题不大,可以忽略以下操作
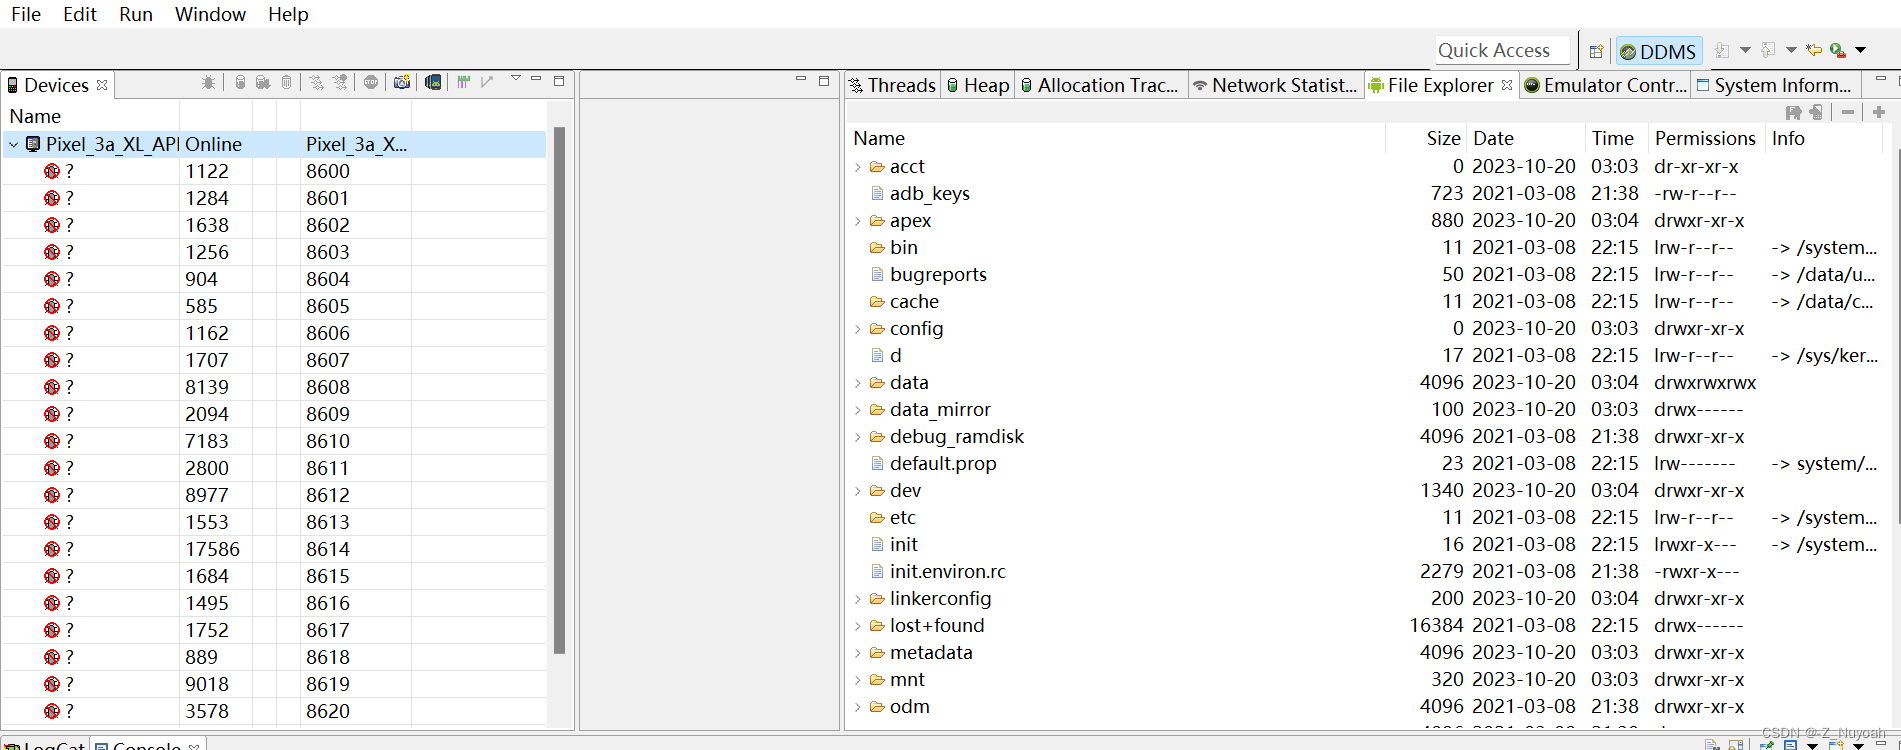
2、 如果是这个界面,并且data也点不开要进行的操作
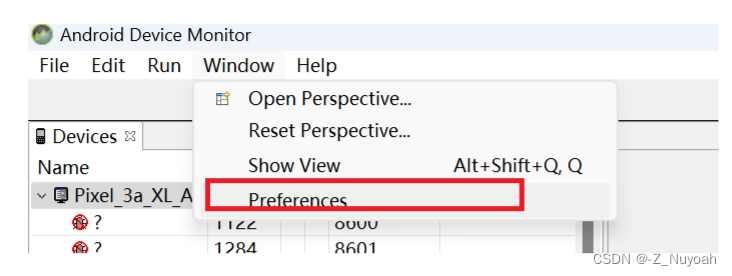
将端口号修改一下:
data打不开是由于权限不够需要进行以下操作:
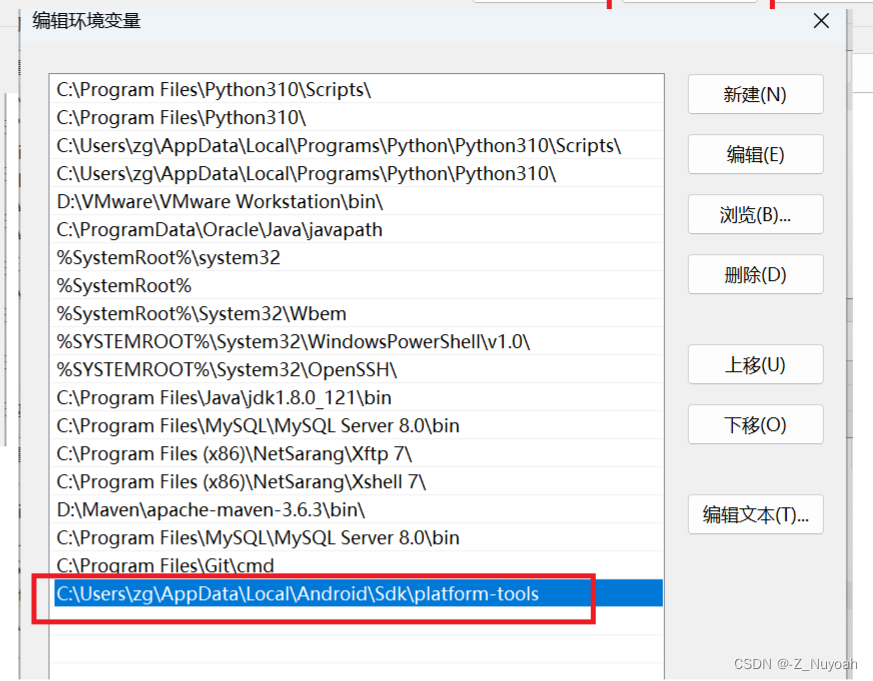
执行以下操作之前需要配置platform-tools环境变量
1、找到这个目录
2、打开高级设置
配好直接点三次确定退出
3、打开cmd输入adb shell,显示以下转态就是可以了。
3、关于/system/bin/sh: su: not found的解决办法
c:\user\zg>adb shell
generic_x86:/ $ su
/system/bin/sh: su: not found
原因是
Android Studio带(Google Play)的模拟器无法获得root权限安装
该换成为带(Google APIs)的模拟器即可,如下
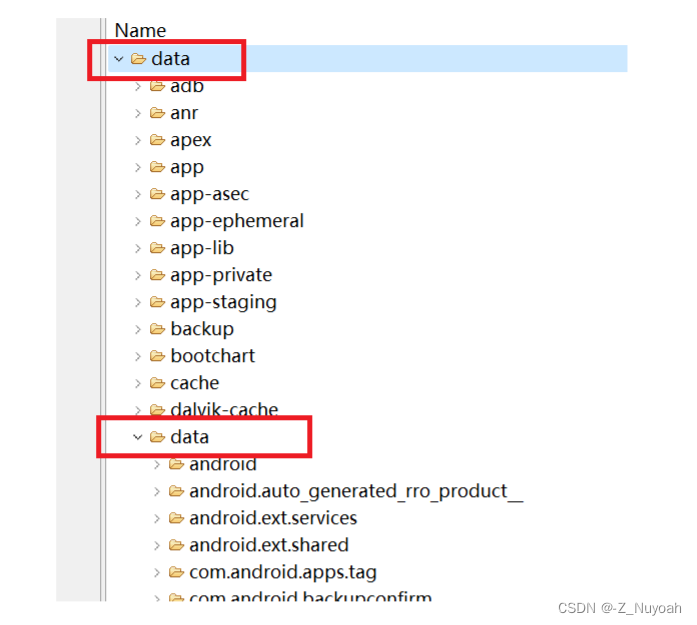
4、解决无法打开data文件夹,原因是权限不够,需要设置权限
可以一层一层的给权限
C:\Users\zg>adb shell
generic_x86_64:/ $ su
generic_x86_64:/ # chmod 777 /data
generic_x86_64:/ # exit
generic_x86_64:/ $ su
generic_x86_64:/ # chmod 777 /data/data
generic_x86_64:/ # exit
generic_x86_64:/ $ exit
结束以上操作,退出Android device monitor,重新执行以下命令
弹出这个界面(之前的爆红就消失了)
左边依旧是问号,这时执行以下操作即可
1、首先先获取root权限
打开cmd执行
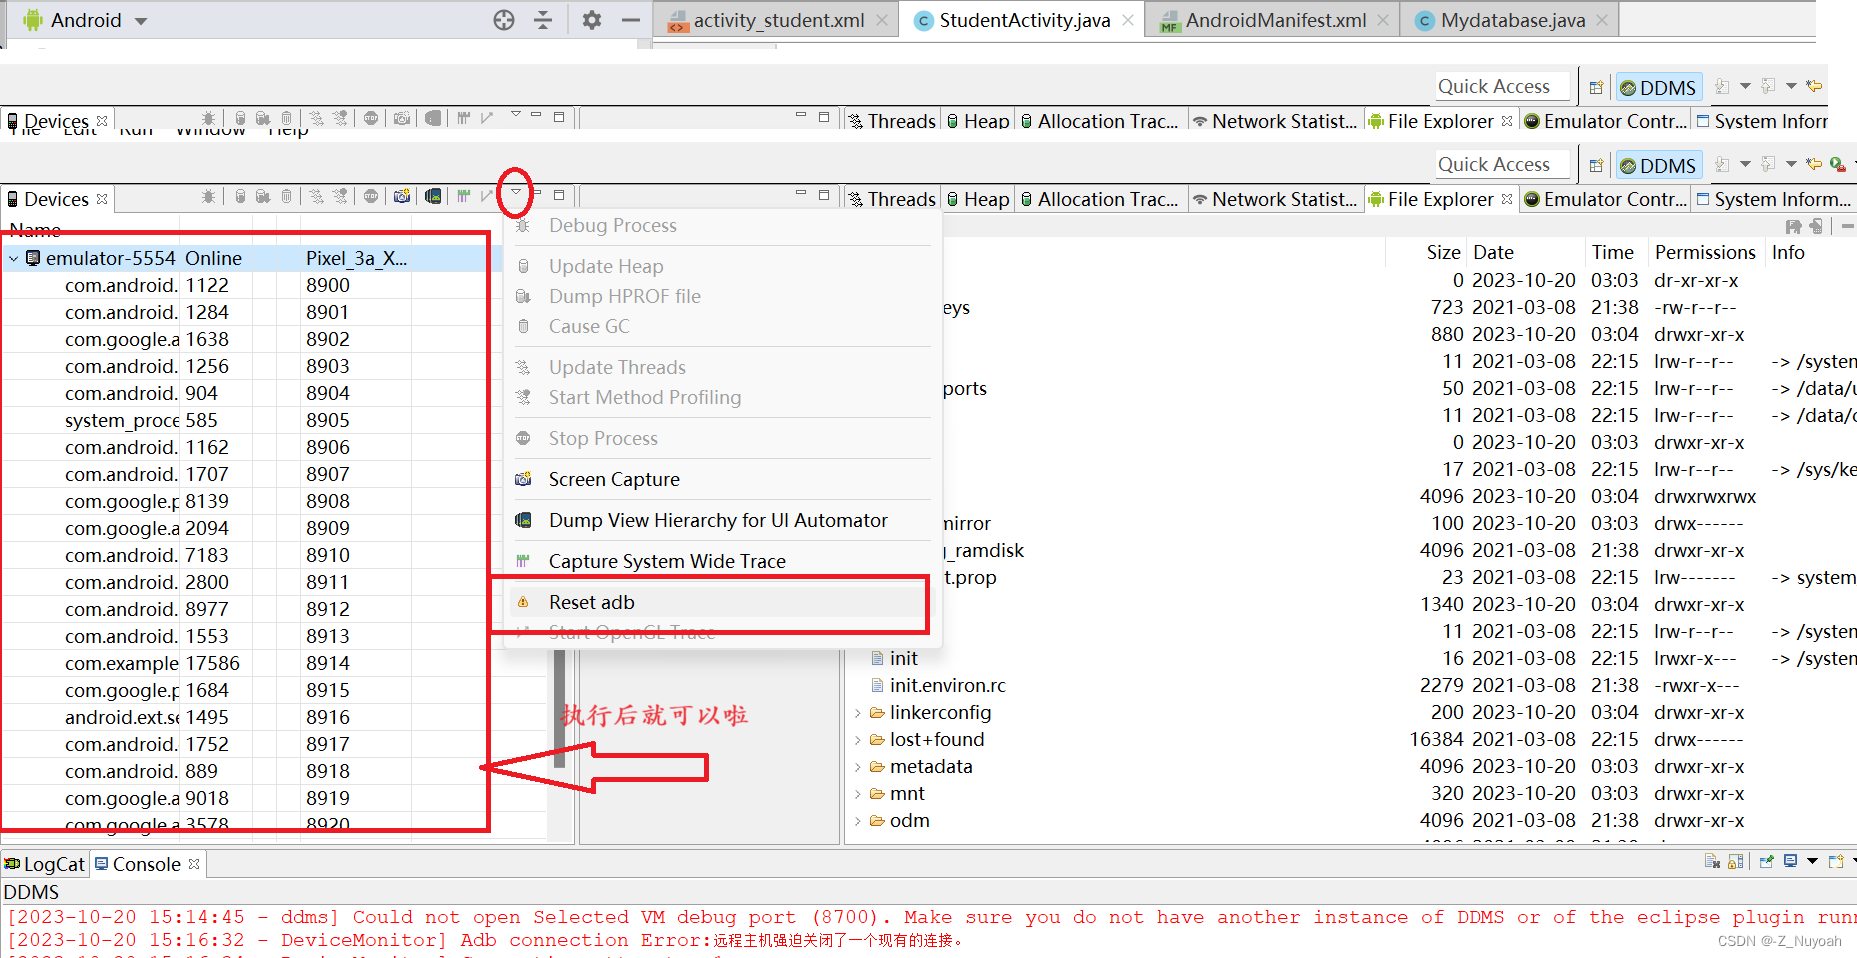
2、在返回Android device monitor中执行以下操作
相关资料
链接:https://pan.baidu.com/s/14TrrJlCP7b5gxQPC3PpQlg?pwd=nduf
提取码:nduf
文章版权声明:除非注明,否则均为主机测评原创文章,转载或复制请以超链接形式并注明出处。


